If you’ve ever dreamed of sipping an old-fashioned soda that’s bursting with real, earthy flavors, you’re about to fall for homemade root beer. Made with roots, spices, and just a touch of sweetness, this fizzy treat is steeped in American tradition and full of nostalgia. With every sip of homemade root beer, you’ll get a refreshingly complex blend of herbal notes, gentle spice, and creamy vanilla — all lovingly crafted in your own kitchen.
Ingredients You’ll Need
-
Root Beer Base:
- 8 cups filtered water
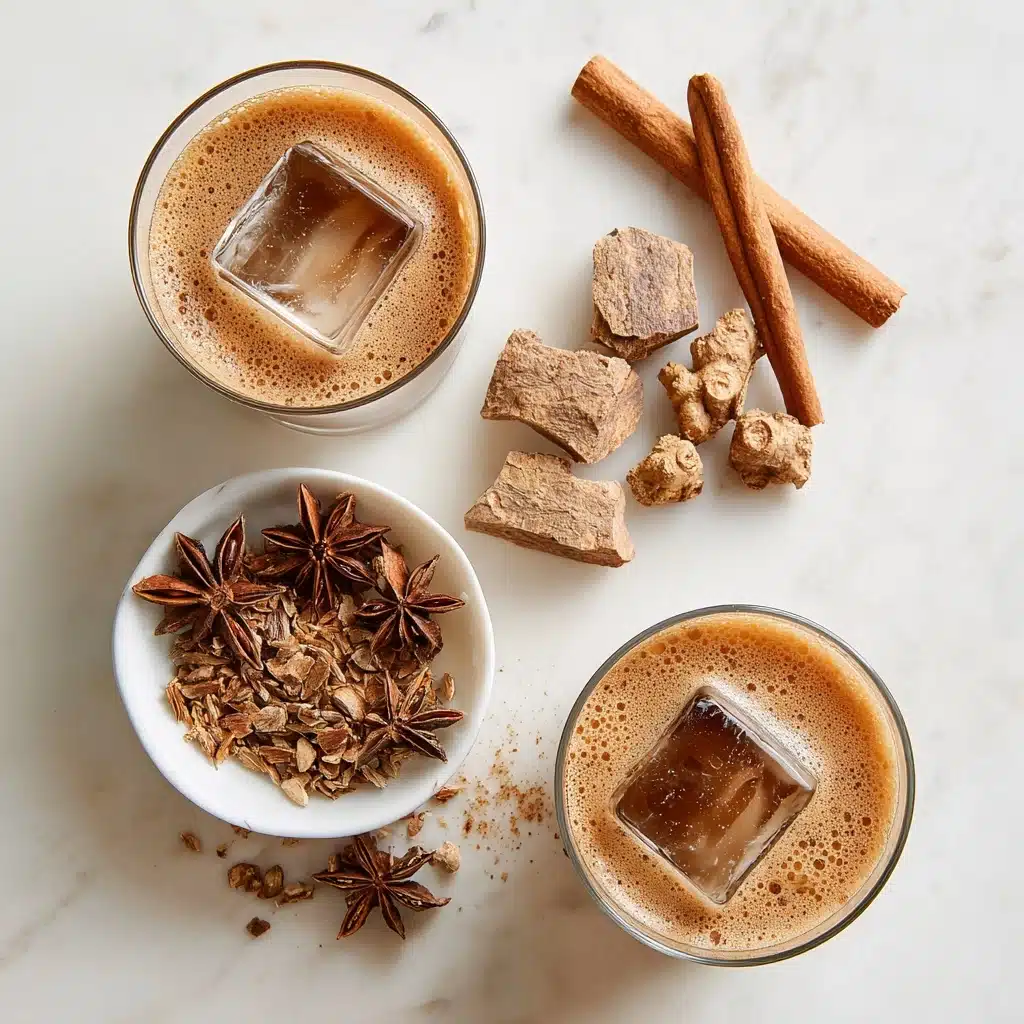
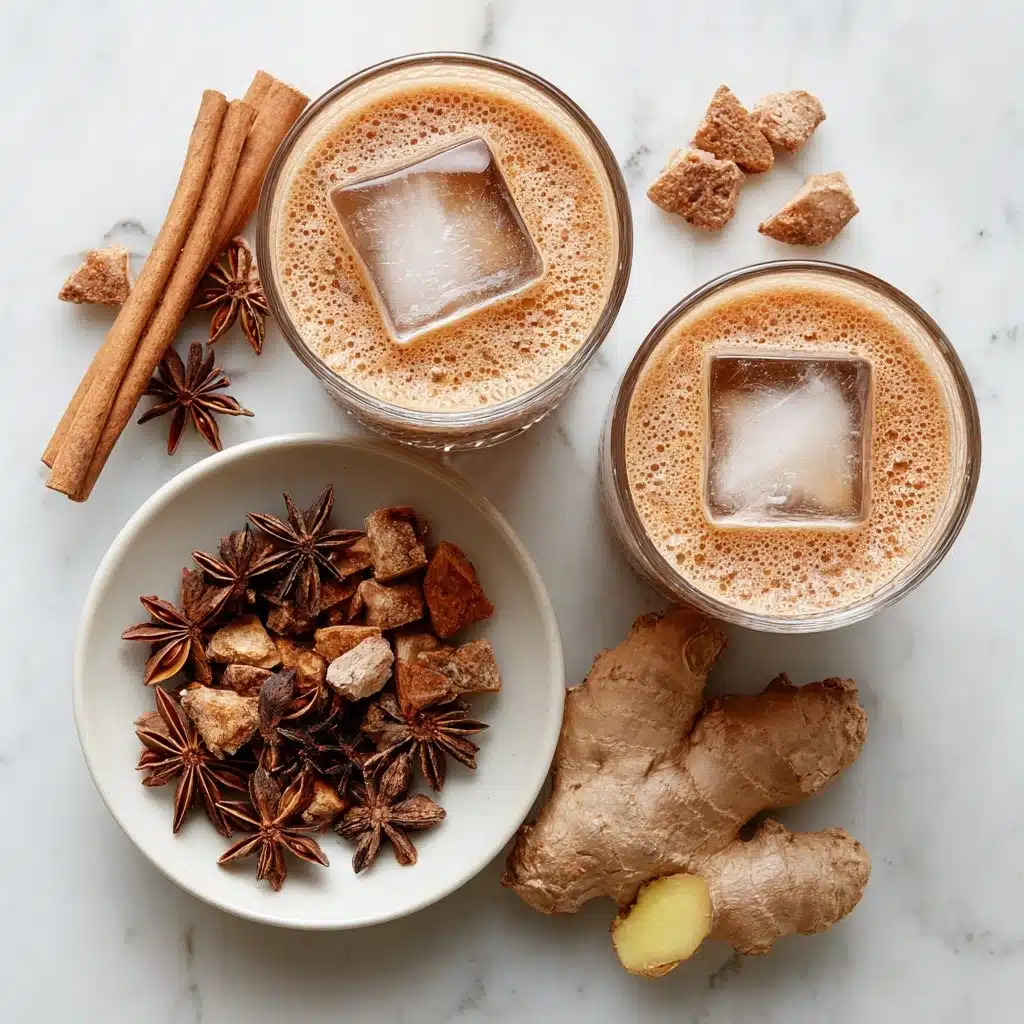
- 1/2 cup sassafras root bark (dried)
- 1/4 cup sarsaparilla root (optional)
- 1 tablespoon dried ginger root
- 1 tablespoon licorice root
- 1 cinnamon stick
Additional Ingredients:
- 1 tablespoon vanilla extract
- 3/4 cup packed brown sugar or 1/2 cup honey
- 1/8 teaspoon active dry yeast (for fermentation)
How to Make Homemade Root Beer
Step 1: Steep the Roots and Spices
In a large pot, pour in your filtered water and add the sassafras root bark, sarsaparilla root, dried ginger root, licorice root, and a cinnamon stick. Bring this robust, aromatic mixture to a boil, then lower the heat and let it simmer gently for 20 to 30 minutes. You’ll notice your kitchen filling with the most delightful, woodsy fragrance — it’s a sure sign you’re brewing something special.
Step 2: Allow to Steep Further
Once the cooking time is up, remove the pot from the heat and let the mixture steep for another 20 minutes. This extra time allows all those incredible flavors to infuse fully, ensuring your homemade root beer has maximum depth and complexity.
Step 3: Strain and Sweeten
Carefully strain the hot liquid through a fine mesh strainer or a cheesecloth into a large bowl, making sure to catch every bit of root and spice. Immediately stir in your brown sugar (or honey) and vanilla extract while the liquid is still warm, so everything dissolves smoothly into a golden, aromatic syrup.
Step 4: Cool Down
Let the sweet, spiced mixture cool completely to room temperature. This step is important because adding yeast to hot liquid can kill it before it has a chance to work its magic.
Step 5: Add Yeast and Bottle
Once the mixture is no longer warm, whisk in a tiny pinch of active dry yeast — just 1/8 teaspoon is all it takes. Stir gently to combine, then pour your soon-to-be root beer into sanitized plastic bottles, leaving about an inch of headspace at the top to allow for carbonation. Cap the bottles tightly to lock in that fizzy potential.
Step 6: Ferment and Chill
Leave your bottles at room temperature for 2 to 3 days, checking them daily to keep an eye on the pressure (plastic bottles are safest for this). As soon as they feel firm to the touch and you notice some bounce-back, move them straight to the refrigerator. Chilling stops the fermentation and locks in the perfect amount of gentle fizz. Simply serve your homemade root beer icy cold, right from the fridge, and enjoy!
How to Serve Homemade Root Beer

Garnishes
Take your homemade root beer experience up a notch with a few fun garnishes! Drop in a scoop of creamy vanilla ice cream for an epic float, add a maraschino cherry for a pop of color, or finish each glass with a swirl of whipped cream for pure decadence. For nostalgic flair, a sprig of fresh mint or a cinnamon stick makes every glass extra special.
Side Dishes
Root beer goes hand-in-hand with classic comfort foods like burgers, fries, and hot dogs. For a more retro vibe, pair your homemade root beer with crispy onion rings and an all-American grilled cheese. At parties, serve with popcorn or spicy snack mixes to let the sweet and spicy notes of your drink shine through.
Creative Ways to Present
Wow your guests by serving homemade root beer in frosted mugs for that authentic soda-fountain experience. Pour into vintage glass bottles and label them for a fun picnic or BBQ centerpiece. Or, set up a DIY root beer float bar with a variety of ice creams, syrups, and toppings so everyone can create their own delicious treat.
Make Ahead and Storage
Storing Leftovers
After bottling, keep leftover homemade root beer chilled in the refrigerator. The fizz will stay delightfully bubbly for several days to a week, especially if your bottles stay tightly sealed between pours.
Freezing
While root beer itself shouldn’t be frozen (it expands and can lose its sparkle), you can pour it into ice cube trays for fun, root beer-infused cubes that keep drinks cold without dilution, or to blend into slushy floats.
Reheating
This beverage is all about staying cold and refreshing, so reheating isn’t necessary. If you’re using root beer syrup (by omitting the yeast), you can gently warm the syrup if needed to dissolve sugar before mixing it with sparkling water for a quick batch.
FAQs
Is it safe to use sassafras in homemade root beer?
Yes — as long as you use food-safe, culinary-grade sassafras root in moderation, it’s perfectly safe. Just make sure you purchase from reputable sources and follow trusted recipes like this one.
Can I make this recipe without yeast and fermentation?
Absolutely! Simply skip the yeast and store your cooled herbal syrup in the fridge. When you’re ready to serve, mix it with icy-cold sparkling water for instant, non-alcoholic homemade root beer.
How can I tell when my root beer is carbonated enough?
Gently squeeze your plastic bottles each day — when they feel firm and resist a soft squeeze, the carbonation is just right. That’s your cue to refrigerate and stop fermentation at the ideal fizz level.
Can I use other sweeteners instead of brown sugar or honey?
You sure can! Try maple syrup for extra depth, agave for a lighter sweetness, or even coconut sugar for a subtle caramel note. Just remember, the taste may vary based on the sweetener you choose.
What if I don’t have every root or spice on the list?
No worries! The beauty of homemade root beer is how customizable it is. If you’re missing sarsaparilla or licorice, double up slightly on sassafras or ginger, and your drink will still be deliciously unique.
Final Thoughts
I can’t recommend making homemade root beer enough — it’s a truly rewarding project that brings old-fashioned charm right to your kitchen. It’s easier than most expect and infinitely more flavorful than the store-bought stuff. Give it a try and let every bubbly, aromatic sip take you back in time!
Print
Homemade Root Beer Recipe
- Total Time: 40 minutes (plus 2–3 days fermentation)
- Yield: 8 servings 1x
- Diet: Vegan, Gluten-Free
Description
Learn how to make delicious homemade root beer using natural ingredients and a simple fermentation process. This recipe yields a refreshing beverage that captures the classic flavors of traditional root beer.
Ingredients
Root Beer Base:
- 8 cups filtered water
- 1/2 cup sassafras root bark (dried)
- 1/4 cup sarsaparilla root (optional)
- 1 tablespoon dried ginger root
- 1 tablespoon licorice root
- 1 cinnamon stick
Additional Ingredients:
- 1 tablespoon vanilla extract
- 3/4 cup packed brown sugar or 1/2 cup honey
- 1/8 teaspoon active dry yeast (for fermentation)
Instructions
- Prepare the Root Beer Base: In a large pot, combine water, sassafras root, sarsaparilla root, ginger, licorice root, and cinnamon. Boil, then simmer for 20–30 minutes. Let steep for 20 minutes. Strain the liquid.
- Add Sweeteners: Stir in brown sugar (or honey) and vanilla extract until dissolved.
- Complete the Mixture: Cool the liquid, add yeast, and gently stir. Pour into bottles, leaving headspace.
- Ferment: Cap bottles and let sit at room temperature for 2–3 days, checking pressure daily.
- Refrigerate and Serve: Once carbonated, refrigerate and enjoy chilled.
Notes
- Use plastic bottles for safety and monitoring pressure.
- Omit yeast for a non-fermented version with sparkling water.
- Use sassafras in moderation from culinary-grade sources.
- Prep Time: 10 minutes
- Cook Time: 30 minutes
- Category: Beverage
- Method: Fermentation
- Cuisine: American
Nutrition
- Serving Size: 1 cup
- Calories: 90
- Sugar: 18g
- Sodium: 10mg
- Fat: 0g
- Saturated Fat: 0g
- Unsaturated Fat: 0g
- Trans Fat: 0g
- Carbohydrates: 22g
- Fiber: 0g
- Protein: 0g
- Cholesterol: 0mg


