If there’s one dessert I could eat all summer long and never get tired of, it’s this Lighter No Bake Cheesecake. Imagine a creamy, tangy slice that’s every bit as luscious as the classic, but with a delicate, airy filling and crisp graham cracker crust you don’t even have to turn on the oven for! Every bite feels indulgent, yet it’s made with better-for-you ingredients like Greek yogurt and light whipped topping. Perfect for satisfying a sweet tooth, cooling off on hot days, or impressing your friends at your next gathering.
Ingredients You’ll Need
The magic of Lighter No Bake Cheesecake comes from a handful of key ingredients, each one bringing something special to the table. From the crumbly base to the fluffy filling, these items are simple but absolutely essential for flavor, texture, and that dreamy appearance.
- Graham cracker crumbs: A toasty, slightly sweet foundation that adds crunch and the classic cheesecake flavor.
- Melted light butter or coconut oil: Helps bind the crust together while keeping it lighter than traditional recipes.
- Honey or maple syrup: Adds natural sweetness and a hint of character that elevates the crust.
- Reduced-fat cream cheese (softened): The star of the show, it’s rich and creamy yet noticeably lighter.
- Plain nonfat Greek yogurt: Adds tang, body, and a healthy dose of protein while making the filling silky smooth.
- Powdered sugar: Sweetens the filling just enough and dissolves quickly for a smooth texture.
- Vanilla extract: Brings warm, aromatic depth to the creamy filling.
- Lemon juice: Gives the cheesecake a bright, fresh note that ties everything together.
- Light whipped topping (such as lite Cool Whip): Folds in air and makes the cheesecake fluffier and lighter than ever.
- Fresh berries for topping (optional): A burst of color and summer sweetness—totally optional, always delightful!
How to Make Lighter No Bake Cheesecake
Step 1: Prepare the Crust
Let’s get started with the base! In a medium bowl, mix together the graham cracker crumbs, melted butter or coconut oil, and a touch of honey until the mixture is evenly moistened. You’ll notice the texture becomes like damp sand—perfect for packing. Firmly press everything into the bottom of your springform pan or baking dish, creating an even layer. Slide the crust into the fridge so it can set up while you whip together the filling.
Step 2: Make the Creamy Filling
Time for that irresistible layer! Using a large mixing bowl, beat the softened reduced-fat cream cheese until it’s completely smooth and no lumps remain. Now add the nonfat Greek yogurt, powdered sugar, vanilla extract, and lemon juice. Mix these until you have a gloriously creamy and well-blended mixture that tastes like summer in a bowl.
Step 3: Lighten It Up
This is where the Lighter No Bake Cheesecake truly shines. Gently fold in the light whipped topping by hand—don’t rush this part! The goal is to keep the filling as airy and fluffy as possible. Once everything is fully combined and your filling feels light, it’s ready for the crust.
Step 4: Assemble & Chill
Spoon the luscious filling onto your prepared crust and spread it into an even layer. The hardest part now is waiting! Cover your cheesecake and let it sit in the refrigerator for at least 4 hours, but overnight is even better. This rest time lets everything meld and set up to sliceable perfection.
Step 5: Top and Serve
Just before you’re ready to serve, load up your cheesecake with the freshest, juiciest berries you can find. Slice, serve, and bask in the oohs and aahs your Lighter No Bake Cheesecake is about to inspire!
How to Serve Lighter No Bake Cheesecake
Garnishes
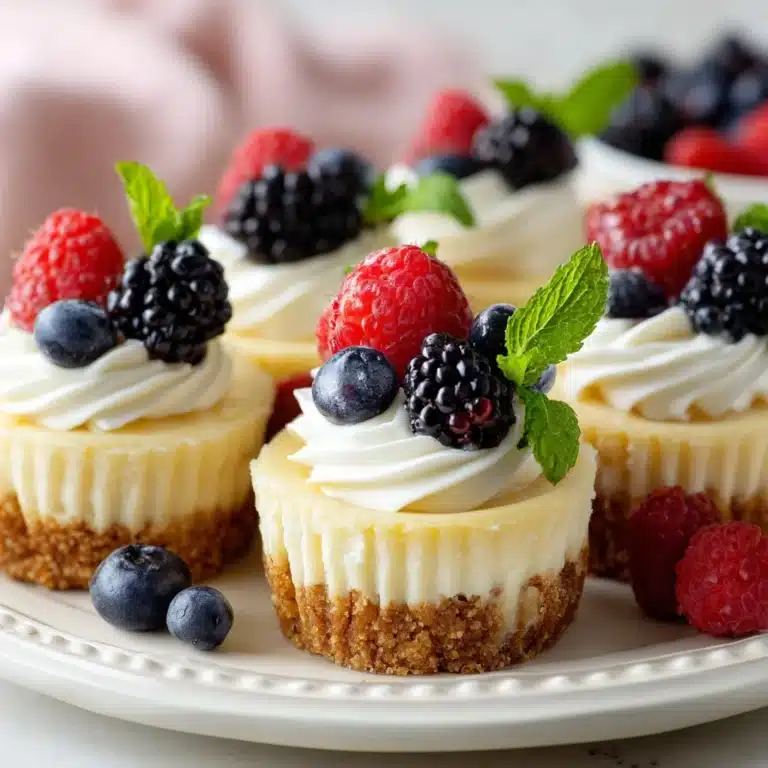
A little flourish goes a long way! I love crowning each slice with a bounty of colorful fresh berries—think strawberries, blueberries, or raspberries. Add a sprig of mint for a touch of elegance, a dusting of powdered sugar, or even delicate curls of lemon zest for a pop of brightness.
Side Dishes
This dessert truly shines all on its own, but if you’re feeling festive, serve it after a light summer meal like grilled chicken or a zesty salad. For a sweet touch, a scoop of berry sorbet or a medley of sliced stone fruits pairs beautifully with Lighter No Bake Cheesecake’s creamy filling.
Creative Ways to Present
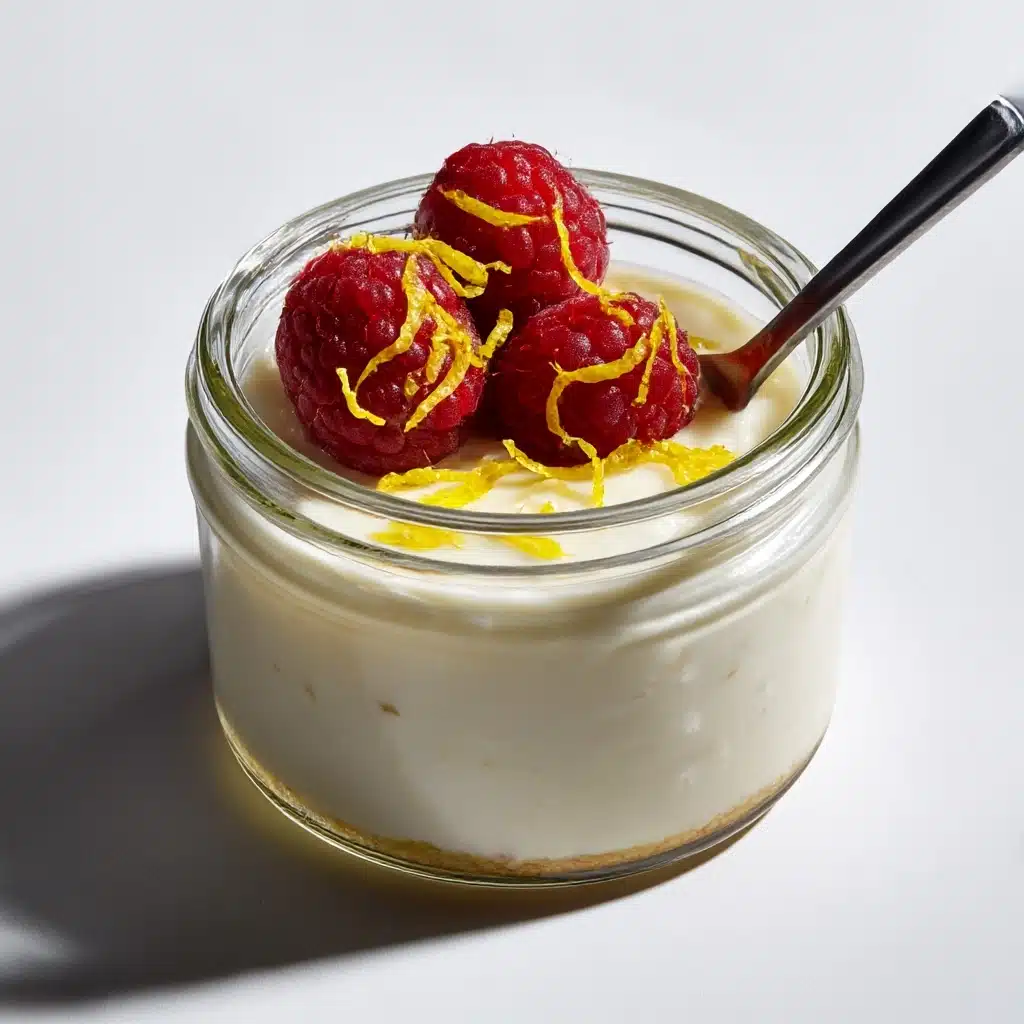
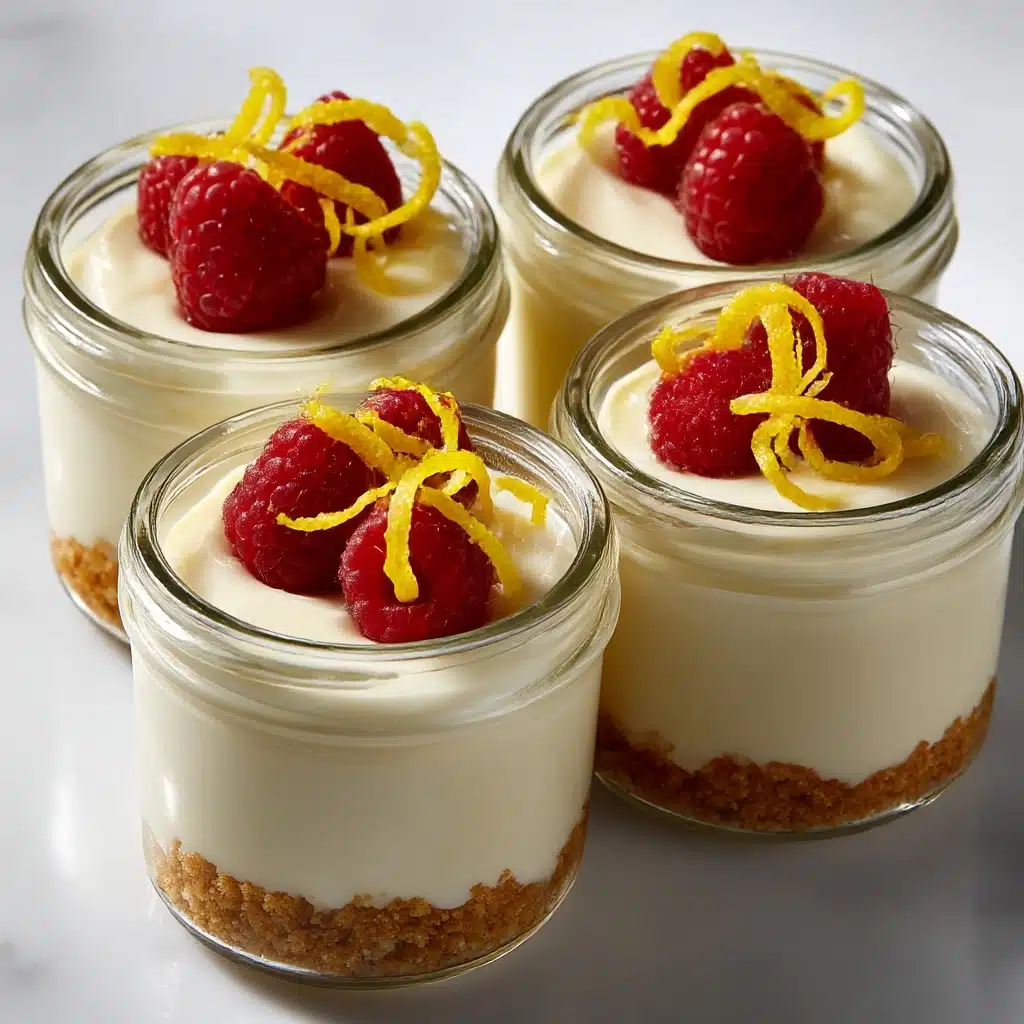
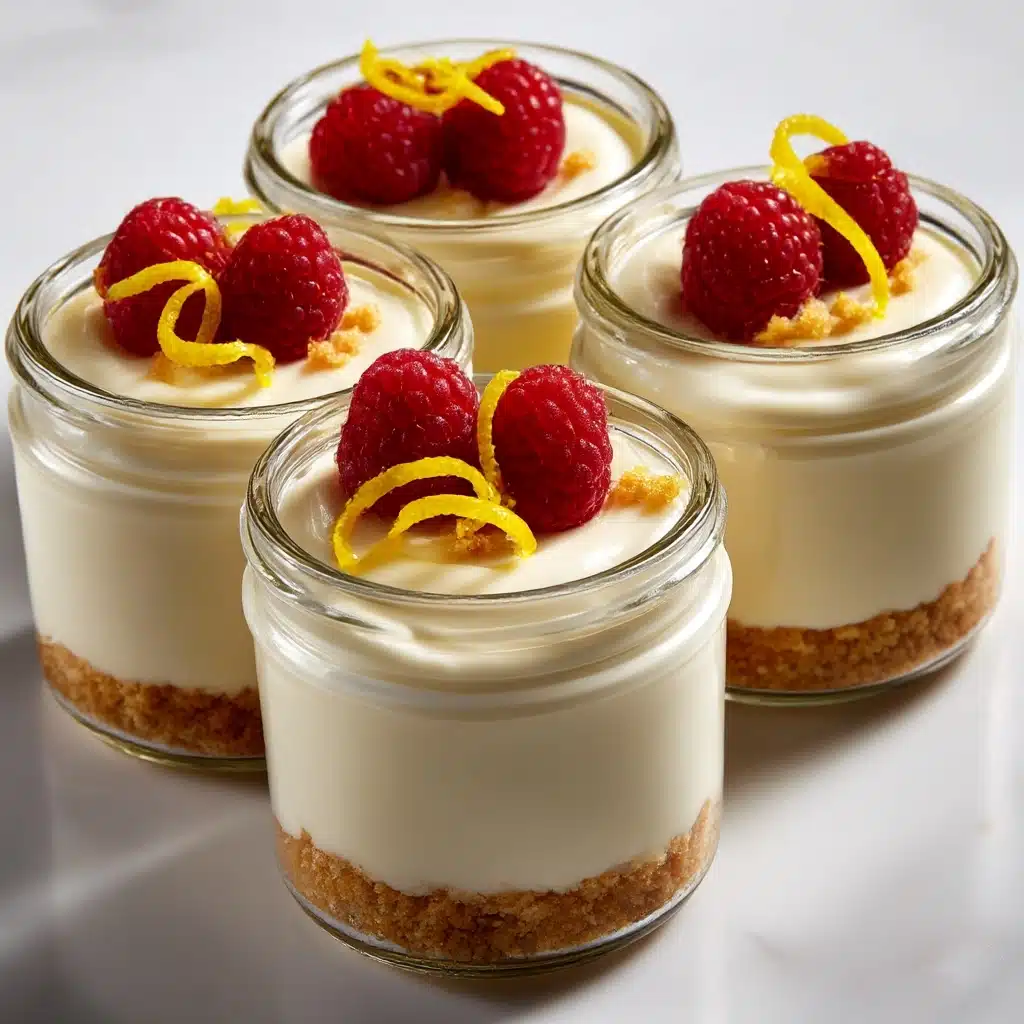
Presentation can be half the fun! Try making individual cheesecakes in glass jars or ramekins for adorable single servings. Or, use cookie cutters to stamp out shapes after the cheesecake has set. Get artistic and drizzle a swirl of berry coulis or salted caramel over the top for extra flair.
Make Ahead and Storage
Storing Leftovers
If you’re lucky enough to have leftovers, keep your Lighter No Bake Cheesecake covered in the fridge. It’ll stay fresh for up to four days, and the texture actually improves with a little resting time. Tightly wrap the pan or transfer slices into airtight containers to keep everything perfect.
Freezing
You can freeze Lighter No Bake Cheesecake for up to two months! Place slices on a tray to freeze until solid, then wrap each one tightly before sealing in a freezer-safe bag. Thaw overnight in the fridge when you’re ready for another treat—just hold off on the fresh berry topping until right before serving.
Reheating
No oven, no reheating necessary. Simply allow frozen slices to thaw gently in the refrigerator for several hours or overnight. The creamy texture will return as good as new, making this dessert ideal for planning ahead.
FAQs
Can I use full-fat cream cheese instead?
Absolutely! While reduced-fat keeps this Lighter No Bake Cheesecake light and airy, you can swap in regular cream cheese for a richer, more traditional taste if you prefer.
Will the crust hold up if I use coconut oil?
Yes, coconut oil works beautifully and adds a subtle coconut note. Just make sure to press the crumbs firmly into the pan so the crust holds together well, especially after chilling.
Can I make this cheesecake dairy-free?
Definitely! Use dairy-free cream cheese, yogurt, and whipped topping. The texture and taste will still be fantastic, and it’s a lovely option for those with dietary needs.
How can I make mini cheesecakes with this recipe?
Spoon the crust and filling into mini mason jars, cupcake liners, or ramekins. The individual servings are adorable and perfect for parties or portion control.
Does it matter what pan I use?
Not at all! A 9-inch springform pan will give you classic slices, while an 8×8-inch dish works well for easy squares. You can even use small jars for a fun twist. Just be sure to chill long enough for the cheesecake to set.
Final Thoughts
If you’ve been searching for a simple, crowd-pleasing dessert that feels utterly indulgent but fits into a lighter lifestyle, this Lighter No Bake Cheesecake is a must-try. I can’t wait for you to experience how easy and irresistible it is—who knew living lighter could taste this good? Give it a whirl and don’t forget the berries on top!
Print
Lighter No Bake Cheesecake Recipe
- Total Time: 4 hours 20 minutes (includes chilling time)
- Yield: 8 servings 1x
- Diet: Non-Vegetarian
Description
Indulge in a guilt-free dessert with this Lighter No Bake Cheesecake recipe. Creamy and delicious, this healthier version is perfect for satisfying your sweet tooth without all the extra calories.
Ingredients
Graham Cracker Crust:
- 1 ¼ cups graham cracker crumbs
- 3 tbsp melted light butter or coconut oil
- 1 tbsp honey or maple syrup
Cheesecake Filling:
- 8 oz reduced-fat cream cheese (softened)
- ½ cup plain nonfat Greek yogurt
- ⅓ cup powdered sugar
- 1 tsp vanilla extract
- 1 tbsp lemon juice
- 1 cup light whipped topping (such as lite Cool Whip)
- Fresh berries for topping (optional)
Instructions
- Graham Cracker Crust: In a medium bowl, mix graham cracker crumbs with melted butter and honey until evenly moistened. Press the mixture firmly into the bottom of a 9-inch springform pan or an 8×8-inch baking dish to form the crust. Chill the crust in the refrigerator while preparing the filling.
- Cheesecake Filling: In a large mixing bowl, beat the softened cream cheese until smooth. Add Greek yogurt, powdered sugar, vanilla extract, and lemon juice, and mix until well combined and creamy. Gently fold in the light whipped topping until the mixture is fluffy and smooth. Spread the filling evenly over the chilled crust. Cover and refrigerate for at least 4 hours or overnight until set. Top with fresh berries just before serving, if desired.
Notes
- For a dairy-free version, use dairy-free cream cheese, yogurt, and whipped topping.
- You can also make individual servings in small jars for a fun presentation.
- Prep Time: 20 minutes
- Cook Time: 0 minutes
- Category: Dessert
- Method: No-Bake
- Cuisine: American
Nutrition
- Serving Size: 1 slice
- Calories: 190
- Sugar: 9g
- Sodium: 180mg
- Fat: 10g
- Saturated Fat: 5g
- Unsaturated Fat: 4g
- Trans Fat: 0g
- Carbohydrates: 20g
- Fiber: 0g
- Protein: 6g
- Cholesterol: 20mg


