Making Homemade Nut Butters is the kitchen secret every wholesome food lover should know. With just a handful of basic pantry staples, you can create velvety spreads in minutes that completely outshine anything you’ll find on a grocery shelf. Imagine customizing the flavors, controlling the sweetness, and choosing your favorite nuts — all while filling your home with the intoxicating aroma of roasted goodness. Whether you slather it on toast, swirl it into oatmeal, or simply spoon it right from the jar, this recipe puts you in control of a nourishing treat that’s as satisfying to make as it is to eat.
Ingredients You’ll Need
One of the best parts of making homemade nut butters is just how simple the ingredient list is. Every item has a job to do, whether it’s lending flavor, perfecting texture, or giving a touch of sweetness. Here’s a look at what you’ll need and why.
- Raw nuts (2 cups): Any variety works, so go with what you love — almonds for a toasty note, cashews for creaminess, peanuts for classic flavor, or hazelnuts for a hint of decadence.
- Salt (1/4 teaspoon): Just a pinch brings all the nuanced nutty flavors to life and balances any added sweetness.
- Neutral oil (1-2 tablespoons, optional): A dash of vegetable or coconut oil can help achieve ultra-smooth, spreadable bliss if your nuts seem dry.
- Honey or maple syrup (1-2 tablespoons, optional): For those who like their nut butters on the sweeter side, these natural sweeteners add delightful depth and a hint of caramel.
How to Make Making Homemade Nut Butters
Step 1: Roast the Nuts
First, preheat your oven to 350°F (175°C). Spread your nuts out in a single layer on a baking sheet. Roasting is key — it deepens the flavor, releases oils for a creamier texture, and fills your kitchen with an inviting, nutty aroma. Bake for 8-12 minutes, giving them a stir halfway through so they brown evenly without burning. Let your nuts cool just enough that you can handle them safely.
Step 2: Blend Until Crumbly
Transfer the warm (but not hot) nuts to your food processor. Pulse for one to two minutes. At first, the mixture will look crumbly and grainy. Don’t worry, this is just the beginning — the magic all happens in the next step.
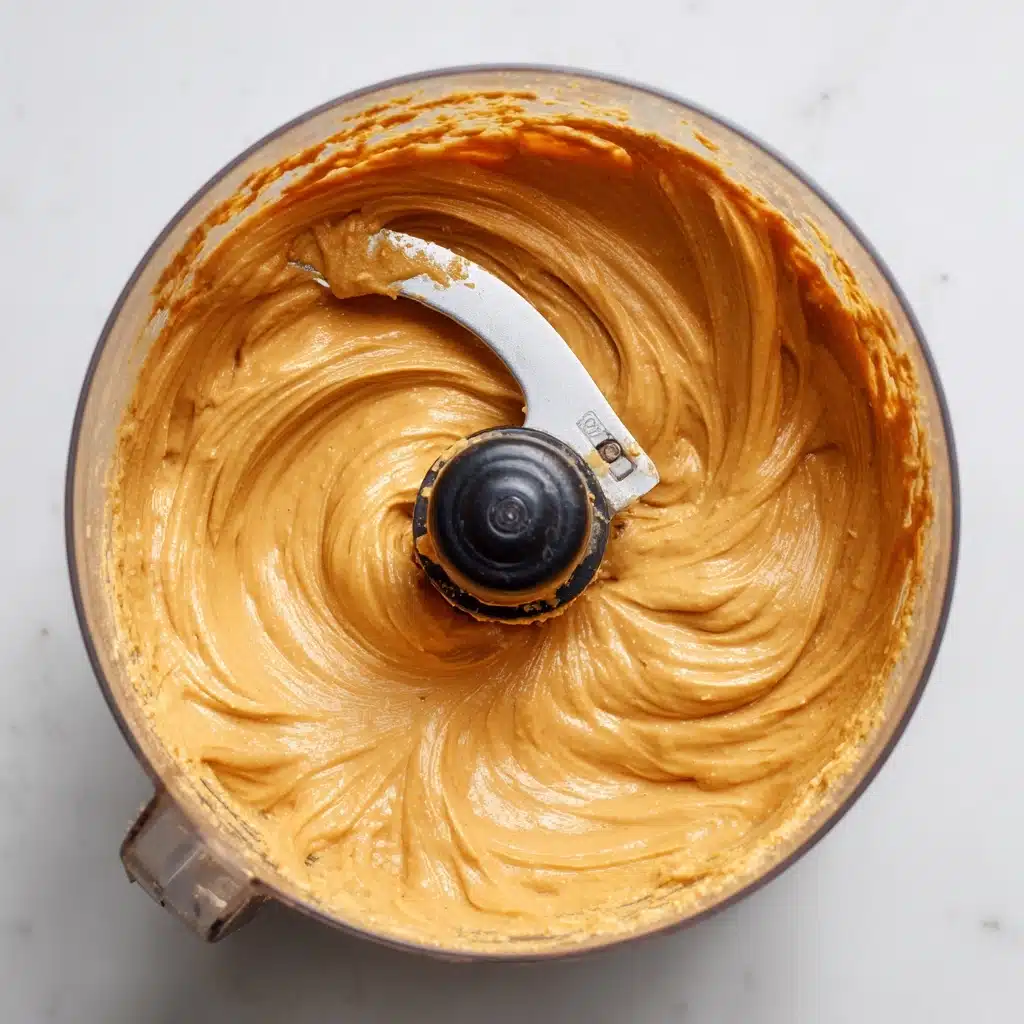
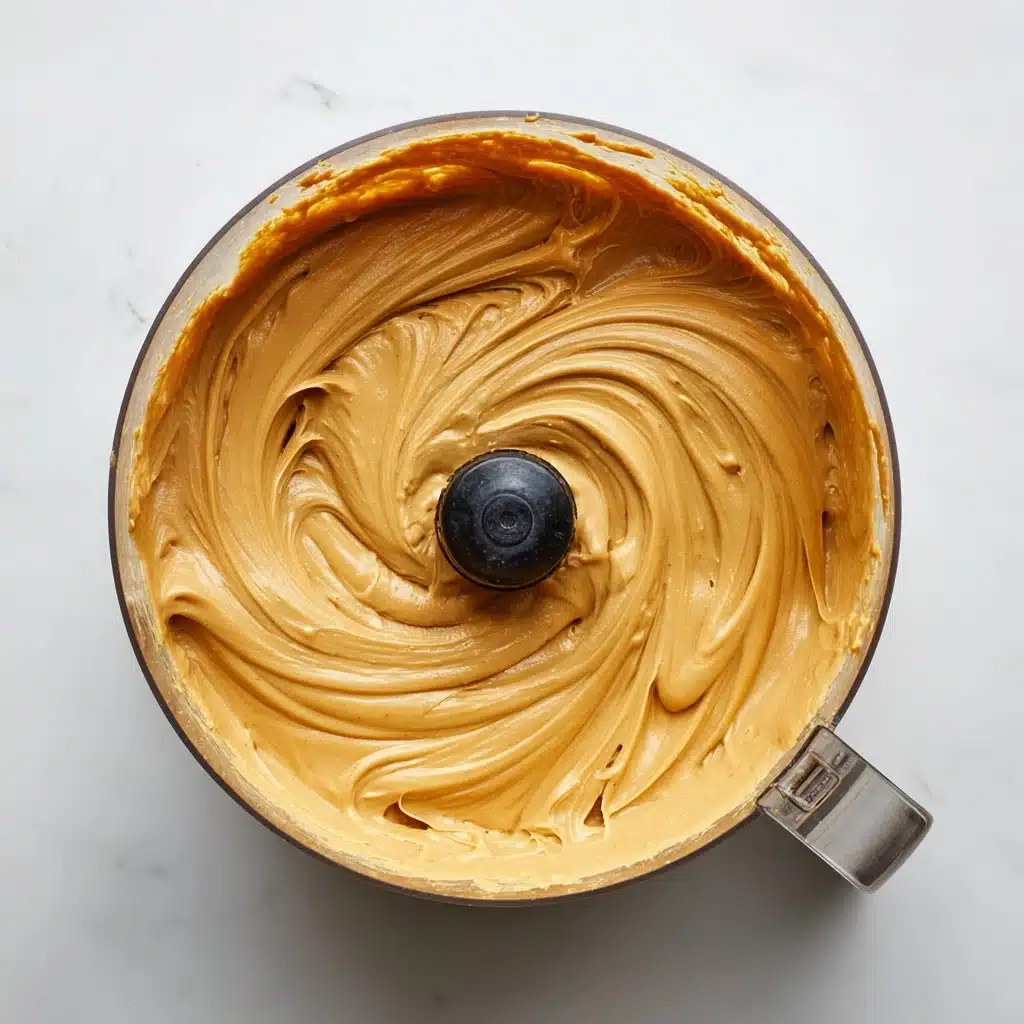
Step 3: Blend Until Smooth and Creamy
Scrape down the sides, then blend again, this time for 5-10 minutes total. You’ll need to pause occasionally to scrape down the bowl — just keep going! First it’ll clump into a ball, then gradually transform into a luscious, glossy butter. Patience is key here; you’ll know it’s ready when it pours off a spoon like liquid gold.
Step 4: Season and Customize
Add salt, and if you desire, a spoonful of honey or maple syrup, and the optional oil to adjust for your preferred taste and consistency. You can get creative here — a dash of cinnamon, a scoop of cocoa powder, or a splash of vanilla extract if you’re feeling adventurous. Give the mixture one last blend to bring everything together.
Step 5: Transfer and Store
Spoon your homemade nut butter into an airtight jar and let it cool completely before sealing. If any natural oils separate during storage, just give it a good stir before you swipe that first spoonful.
How to Serve Making Homemade Nut Butters

Garnishes
Dress up your nut butter with a sprinkle of flaky sea salt, a swirl of honey, or even a dusting of crushed nuts on top for extra crunch. These little flourishes turn an everyday spread into something spoon-lickingly special, perfect for that wow factor at breakfast or brunch.
Side Dishes
Pair making homemade nut butters with slices of crisp apple, juicy pear, or classic celery sticks for a snack that’s as nourishing as it is satisfying. Or try spreading it onto warm, hearty whole-grain bread, stacked pancakes, or even dolloped onto oatmeal or smoothie bowls for a protein-packed start to your day.
Creative Ways to Present
Transform your nut butter into a homemade gift by spooning it into cute glass jars and tying with a ribbon. Or make a sampler platter with a few different nut butters, some fresh fruit, and a mix of crackers and pretzels for dipping — a crowd-pleasing centerpiece at any gathering.
Make Ahead and Storage
Storing Leftovers
Store your homemade nut butter in an airtight jar in the refrigerator. It will stay fresh, creamy, and flavorful for up to three weeks. Natural oils may separate as it sits, so always stir well before each use for the perfect texture.
Freezing
If you’ve made a big batch or want to save some for later, nut butter freezes beautifully. Just transfer it into freezer-safe containers, leaving a little space for expansion, and freeze for up to three months. Thaw in the fridge overnight when you’re ready to enjoy.
Reheating
If your nut butter firms up in the cold, let it sit at room temperature for 10-15 minutes or warm the jar briefly in a bowl of warm water. This brings back that dreamy, dippable consistency without altering the taste.
FAQs
Can I use roasted nuts instead of raw nuts?
Absolutely! Using pre-roasted nuts saves a step, though roasting them yourself brings out a fresher, richer flavor. Just be sure to choose unsalted varieties so you have full control over your seasoning.
Why did my nut butter turn out dry or chunky?
If your butter isn’t creamy, your food processor may need more power, or you may just need to blend longer. Adding a small splash of neutral oil can also help achieve that perfect smoothness in making homemade nut butters.
Is it possible to make this without a food processor?
You can use a high-speed blender — just pause often to scrape the sides down and watch for overheating. Mixing by hand isn’t recommended, as you won’t reach the same creamy texture that’s the hallmark of homemade nut butters.
What are the best nuts for making homemade nut butters?
Almonds, cashews, peanuts, and hazelnuts all shine when blended, but you can get creative with pecans, walnuts, or macadamias. Each brings its own distinct flavor and creaminess, so don’t hesitate to experiment or mix your own custom blend.
How can I make my nut butter sweeter or more flavored?
Sweeten naturally with honey or maple syrup, or infuse with cinnamon, vanilla, or even cocoa powder. Start with small amounts and blend, tasting as you go — that’s one of the real joys of making homemade nut butters from scratch.
Final Thoughts
There’s real joy in making homemade nut butters, from the irresistible aroma of roasting nuts to the reward of creamy, personalized spreads ready at your fingertips. Give it a try and don’t be surprised if it becomes your new go-to kitchen ritual — your taste buds and your wallet will thank you.
Print
Making Homemade Nut Butters Recipe
- Total Time: 15 minutes
- Yield: 1.5 cups 1x
- Diet: Vegan
Description
Learn how to make delicious homemade nut butters with this easy recipe. Customize your nut butter with different nuts and flavorings for a unique spread that’s perfect for toast, sandwiches, or snacking.
Ingredients
Almond Butter:
- 2 cups raw almonds
- 1/4 teaspoon salt
- 1–2 tablespoons neutral oil (optional)
- 1–2 tablespoons honey or maple syrup (optional)
Instructions
- Preheat Oven: Preheat the oven to 350°F (175°C).
- Roast Nuts: Spread almonds on a baking sheet and roast for 8-12 minutes until golden, stirring halfway.
- Blend: Transfer nuts to a food processor and blend until crumbly. Scrape down the sides and continue blending for 5-10 minutes until smooth.
- Adjust: Add salt, sweeteners, or oil to taste and consistency. Blend until fully mixed.
- Store: Transfer to a jar and refrigerate for up to 3 weeks.
Notes
- Enhance with cinnamon, cocoa powder, or vanilla.
- Use a high-speed processor for creamier texture.
- Stir well before use to mix natural oils.
- Prep Time: 5 minutes
- Cook Time: 10 minutes
- Category: Condiment
- Method: Food Processor
- Cuisine: American
Nutrition
- Serving Size: 2 tablespoons
- Calories: 180
- Sugar: 1g
- Sodium: 50mg
- Fat: 16g
- Saturated Fat: 2g
- Unsaturated Fat: 13g
- Trans Fat: 0g
- Carbohydrates: 6g
- Fiber: 3g
- Protein: 6g
- Cholesterol: 0mg


