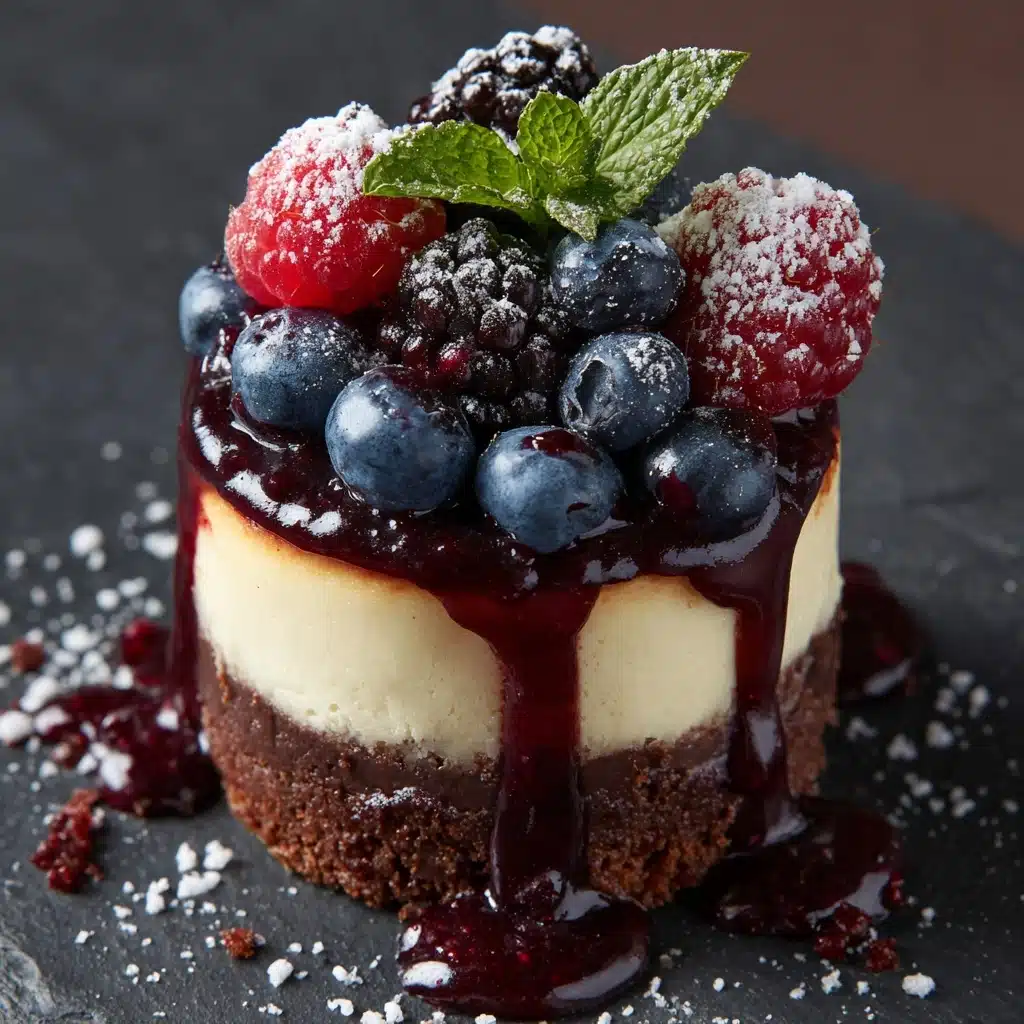
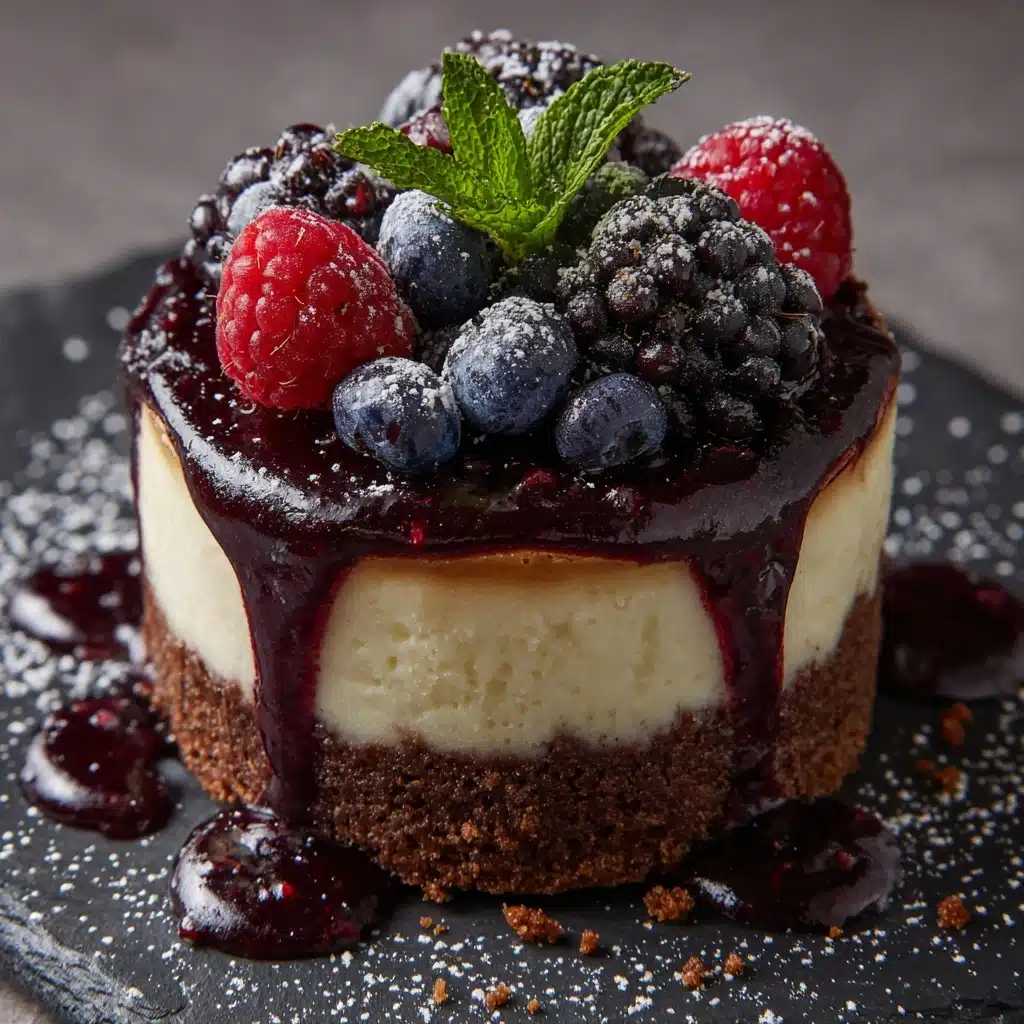
If you’re searching for a dessert that’s guaranteed to steal the show at any gathering, Mini Cheesecakes III is exactly what you need. These adorable, perfectly portioned cheesecakes combine a buttery graham cracker crust with irresistibly creamy filling, all crowned with your favorite fresh fruit or decadent drizzle. Mini Cheesecakes III isn’t just delicious—it’s the ultimate crowd-pleaser, perfect for everything from holiday parties to after-dinner treats. Every bite is rich and satisfying, yet light enough to keep everyone coming back for more!
Ingredients You’ll Need
The beauty of Mini Cheesecakes III lies in how everyday pantry staples come together to create such a delightful dessert. Each ingredient plays an important role, from the crust that adds crunch to the creamy filling that melts in your mouth, ensuring every layer is full of flavor and charm.
- Graham cracker crumbs: These provide the signature crunchy, buttery base that cheesecake lovers crave.
- Granulated sugar: Added to both the crust and filling, it brings the perfect sweetness to balance the tangy cream cheese.
- Unsalted butter (melted): Helps bind the crust together for that classic, golden foundation.
- Cream cheese (softened): The hero of any cheesecake, softened cream cheese whips up smooth and luscious for the best texture.
- Eggs (large): These give structure and silkiness to the filling, making each mini cheesecake tender and light.
- Vanilla extract: Just a teaspoon adds deep aroma and rounds out the creamy flavors.
- Sour cream: Adds a tangy richness and ensures every bite is extra soft and creamy.
- Fresh berries or fruit topping (optional): The finishing touch! Go classic with vibrant berries or get creative with your favorite toppings.
How to Make Mini Cheesecakes III
Step 1: Prep the Pan and Preheat the Oven
Start by preheating your oven to 325°F (165°C) and lining a standard 12-cup muffin tin with paper liners. Using liners not only helps with easy removal, but also gives each cheesecake a lovely finished look. Gathering these essentials now will set you up for smooth sailing through the rest of the recipe.
Step 2: Make the Graham Cracker Crust
In a small bowl, combine your graham cracker crumbs, 3 tablespoons of granulated sugar, and the melted butter. Stir well until every crumb is coated and the mixture resembles wet sand. This ensures an even, flavorful base for your cheesecakes. Scoop about 1 tablespoon into each muffin cup and press it firmly down—using the back of a spoon or your fingers works great here—to create a neat, compact crust.
Step 3: Whip Up the Cream Cheese Filling
Beat the softened cream cheese in a large bowl until it’s ultra-smooth and free of lumps. Add the remaining 1/2 cup granulated sugar and mix until just incorporated. Beat in the eggs one at a time, making sure each one is fully combined before cracking in the next. Sprinkle in the vanilla and fold in the sour cream for a perfectly velvety batter. Take care not to overbeat—just mix until everything is combined and glossy.
Step 4: Fill and Bake
Divide the cheesecake filling evenly among the prepared crusts, gently smoothing out the tops with a spoon. Place the muffin tin on the center rack of your preheated oven and bake for 18 to 22 minutes. You’re looking for centers that are set but still have the tiniest jiggle when you tap the pan—this means they’ll be supremely creamy once chilled!
Step 5: Cool and Chill
Let your Mini Cheesecakes III cool completely in the pan before transferring them to the fridge. This patience pays off, as chilling is what gives the cheesecakes their classic, dense-yet-silky texture. Refrigerate for at least two hours, or overnight if you want to get ahead on prep. When they’re ready, carefully remove the liners—and marvel at your beautiful, mini masterpieces!
How to Serve Mini Cheesecakes III
Garnishes
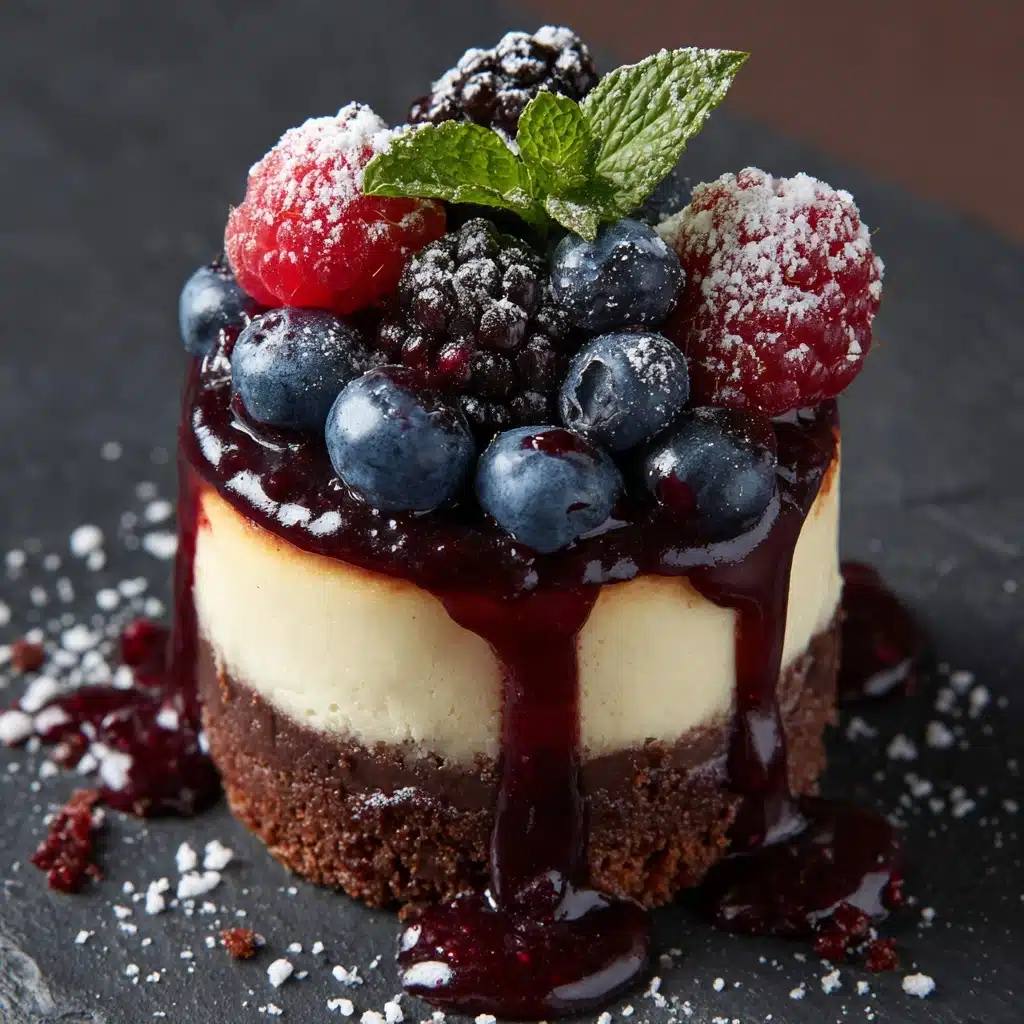
Serving Mini Cheesecakes III with fresh berries, a spoonful of cherry or raspberry preserves, or a playful drizzle of chocolate or caramel instantly elevates their flavor and visual appeal. Not only do garnishes add color, but they also provide a bit of tartness or sweetness that pairs perfectly with the creamy filling.
Side Dishes
While these mini cheesecakes are stars on their own, pairing them with a pot of strong coffee, a light fruit salad, or even a bubbly glass of sparkling wine will turn an ordinary day into a sweet celebration. Their rich texture means just a little something on the side is all you need for a memorable dessert course.
Creative Ways to Present
Dress up your Mini Cheesecakes III for any occasion by nesting them in colorful cupcake wrappers, topping each with a piece of edible gold leaf, or creating a DIY dessert board with a rainbow of toppings for guests to customize their own. Tiered trays or vintage plates also add a special touch for parties and celebrations.
Make Ahead and Storage
Storing Leftovers
After your event (if there are any left!), simply store Mini Cheesecakes III in an airtight container in the refrigerator. They’ll stay fresh and creamy for up to 4 days, making them the perfect make-ahead treat for busy weeks or special moments throughout the week.
Freezing
If you’d like to save some for later, Mini Cheesecakes III freeze beautifully. Once fully chilled, wrap each cheesecake individually in plastic wrap and place in a freezer-safe bag. They’ll keep their flavor and texture for up to 2 months—just thaw in the fridge overnight before serving.
Reheating
These cheesecakes are best enjoyed chilled, but if you prefer a softer bite, take them out of the fridge 10-15 minutes before serving. There’s no need to heat them up; the creamy filling is best when gently cool and melts dreamily in your mouth.
FAQs
Can I use a different crust for Mini Cheesecakes III?
Absolutely! While graham crackers give that classic cheesecake flavor, you can swap them for chocolate wafer cookies, vanilla wafers, or even ginger snaps for a twist. Just keep the measurements about the same and don’t forget the butter to hold it all together.
What’s the secret to a smooth, lump-free filling?
Start with fully softened cream cheese—it makes all the difference! You’ll want to beat it until very smooth before adding sugar and eggs. Scraping down the bowl as you go helps incorporate everything and ensures your Mini Cheesecakes III are silky every time.
Can I swirl in fruit preserves before baking?
Yes! Adding a teaspoon of your favorite fruit preserve on top of each unbaked cheesecake and swirling it in with a toothpick creates a gorgeous marbled finish and pops of fruity flavor throughout.
Do I need a water bath for Mini Cheesecakes III?
No water bath required! Thanks to the smaller size and short baking time, these mini beauties bake evenly without any fuss or worry about cracks. Just be sure not to overbake, and let them cool gently for best results.
How far in advance can I make Mini Cheesecakes III?
You can easily make them a day ahead, or even two. This allows the flavors to blend beautifully and the texture to set just right. Store covered in the fridge and garnish just before serving for the freshest look.
Final Thoughts
Whether you’re a cheesecake aficionado or just looking for a foolproof dessert, Mini Cheesecakes III is a recipe you’ll find yourself reaching for again and again. With their creamy texture, dreamy crust, and endless opportunities for toppings, they’re simply irresistible. Give this recipe a go and let your family and friends enjoy the magic bite by bite!
Print
Mini Cheesecakes III Recipe
- Total Time: 2 hours 35 minutes
- Yield: 12 mini cheesecakes 1x
- Diet: Non-Vegetarian
Description
Indulge in these delightful Mini Cheesecakes, perfect for any occasion. These individual, bite-sized treats are creamy, rich, and topped with fresh berries for a burst of flavor. Easy to make and even easier to enjoy!
Ingredients
Graham Cracker Crust:
- 1 cup graham cracker crumbs
- 3 tablespoons granulated sugar
- 3 tablespoons unsalted butter, melted
Cheesecake Filling:
- 2 packages (8 oz each) cream cheese, softened
- 1/2 cup granulated sugar
- 2 large eggs
- 1 teaspoon vanilla extract
- 1/2 cup sour cream
For Garnish (Optional):
- Fresh berries or fruit topping
Instructions
- Preheat and Prepare: Preheat the oven to 325°F (165°C) and line a 12-cup muffin tin with paper liners.
- Make the Crust: Combine graham cracker crumbs, 3 tablespoons sugar, and melted butter. Press into muffin cups.
- Prepare Filling: Beat cream cheese until smooth. Add sugar, eggs, vanilla, and sour cream; mix until just combined.
- Fill and Bake: Spoon filling over crusts. Bake for 18–22 minutes until set but slightly jiggly.
- Cool and Chill: Cool in the pan, then refrigerate for at least 2 hours.
- Serve: Top with berries or fruit before serving.
Notes
- Mini cheesecakes can be made a day ahead and refrigerated.
- For added flavor, swirl in fruit preserves or drizzle with chocolate or caramel.
- Prep Time: 15 minutes
- Cook Time: 20 minutes
- Category: Dessert
- Method: Baking
- Cuisine: American
Nutrition
- Serving Size: 1 mini cheesecake
- Calories: 220
- Sugar: 15g
- Sodium: 160mg
- Fat: 15g
- Saturated Fat: 9g
- Unsaturated Fat: 5g
- Trans Fat: 0g
- Carbohydrates: 18g
- Fiber: 0g
- Protein: 4g
- Cholesterol: 60mg
