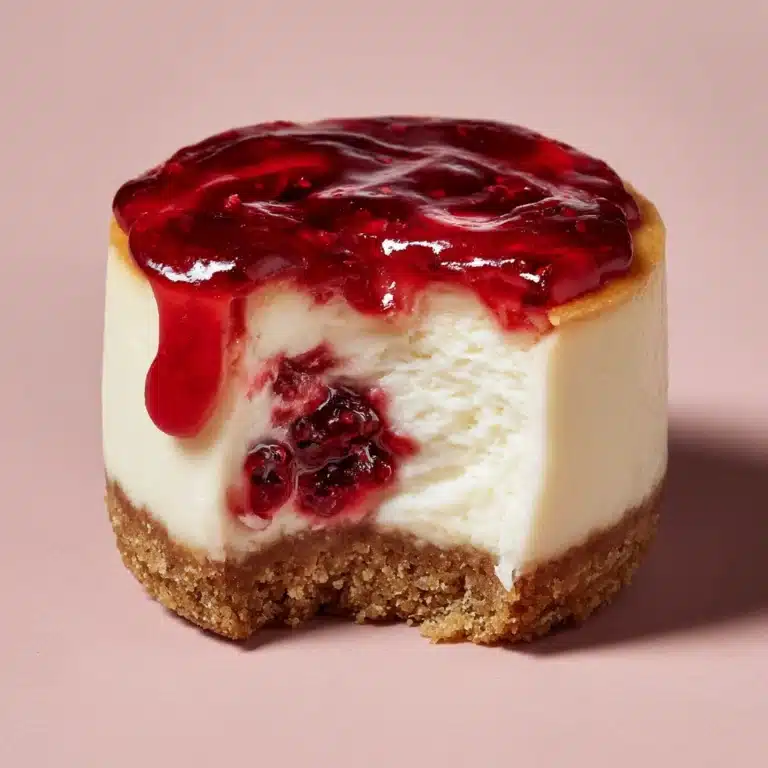
If you dream of a decadent cheesecake that’s bursting with juicy berries, swirled with cherry pie filling, and crowned with chocolate shavings—without even turning on your oven—the No-Bake Black Forest Berry Cheesecake is for you! This creamy, chocolatey dessert is the perfect marriage of rich cheesecake and fruity berries, layered on a chocolate cookie crust. Each bite is as impressive to look at as it is irresistible to eat, making it a showstopper for celebrations or when you just want to treat yourself to something special and effortless.

Ingredients You’ll Need
Here’s the beauty of this recipe: every ingredient has a clear purpose, coming together for a luscious texture and vibrant color. Simple to source, yet nothing short of magical when assembled—each item plays a role in making the No-Bake Black Forest Berry Cheesecake absolutely unforgettable.
- Chocolate cookie crumbs: The foundation of your crust, providing that brownie-like flavor and a satisfying crunch.
- Unsalted butter (melted): Acts as the glue for the crust, with a rich flavor that lets the chocolate shine.
- Cream cheese (softened): The superstar of the filling, creating a tangy, smooth, and creamy base.
- Granulated sugar: Sweetens the cream cheese just enough, balancing the fruit and chocolate beautifully.
- Vanilla extract: Adds a touch of warmth and depth—don’t skip it!
- Heavy whipping cream: Gets whipped to fluffy perfection, then folded in for that light, mousse-like texture.
- Cherry pie filling: Swirled over the top, adding the classic Black Forest cherry flavor and that glossy, jewel-toned finish.
- Fresh or frozen mixed berries: Raspberries, blackberries, and blueberries add pops of tartness and color—thawed and drained if frozen.
- Powdered sugar (optional): A dusting on top for that elegant, bakery-style look.
- Chocolate shavings (optional): Because more chocolate is always a good idea, and they make every slice feel special.
How to Make No-Bake Black Forest Berry Cheesecake
Step 1: Prepare the Chocolate Cookie Crust
Start by mixing your chocolate cookie crumbs and melted butter in a medium bowl. Use a fork or your hands to blend until the mixture resembles damp sand. Spoon this into a 9-inch springform pan and press it down firmly with the bottom of a flat glass or your fingers, forming a tight, even layer. Pop it into the refrigerator while you prep the luscious filling—this ensures your crust sets up nicely and holds together when sliced.
Step 2: Make the Creamy Cheesecake Filling
Grab a large bowl and beat the softened cream cheese, granulated sugar, and vanilla extract together until you have a silky, smooth mixture—no lumps allowed! In another bowl, whip the heavy cream to stiff peaks. This step is crucial for achieving that airy, mousse-like texture that sets no-bake cheesecakes apart. Gently fold the whipped cream into the cream cheese mixture, being careful not to deflate all that precious air. The result should be luxuriously fluffy and cloud-like.
Step 3: Assemble and Layer
Spread your cheesecake filling evenly over the chilled chocolate crust, using a spatula to get a smooth surface. In a small bowl, stir together the cherry pie filling and the fresh (or thawed, well-drained) mixed berries. This combo gives you both the classic cherry flavor and the bright, tart notes from the other berries. Carefully spoon this mixture over the cheesecake layer, letting the juices naturally swirl into beautiful patterns.
Step 4: Chill Until Set
Cover your cheesecake (a layer of foil or plastic wrap works) and let it chill in the refrigerator for at least 6 hours, but overnight is even better. This patience pays off—the flavors meld, the texture firms up, and slicing becomes a dream. Resist the urge to dig in early; the wait is utterly worth it!
Step 5: Garnish and Serve
Right before serving, finish your No-Bake Black Forest Berry Cheesecake with a dusting of powdered sugar and a generous sprinkle of chocolate shavings if you’re feeling fancy. Slice with a sharp, clean knife for picture-perfect servings, and get ready for the oohs and aahs!
How to Serve No-Bake Black Forest Berry Cheesecake

Garnishes
For bakery-level presentation, a light snow of powdered sugar and a scattering of chocolate shavings will make your No-Bake Black Forest Berry Cheesecake look as festive as it tastes. You can also add a few extra fresh berries for a burst of color and freshness.
Side Dishes
This cheesecake is quite the star, but it pairs beautifully with simple accompaniments. Try serving with freshly brewed coffee or espresso for a classic finish, or a splash of berry-infused iced tea for a summery touch. A dollop of whipped cream on the side never hurts, especially for special occasions.
Creative Ways to Present
Try making individual cheesecakes by pressing the crust into cupcake liners or small jars before layering the filling and topping—ideal for parties or picnics! For a dramatic centerpiece, serve the whole cake with a ring of berries and chocolate around the edge, or drizzle with a bit of berry sauce for extra flair.
Make Ahead and Storage
Storing Leftovers
Leftover No-Bake Black Forest Berry Cheesecake keeps wonderfully in the fridge for up to 4 days. Store it tightly covered to keep the berries fresh and the cheesecake creamy. If possible, save extra garnishes to add right before serving, as they look and taste best when just applied.
Freezing
If you’d like to prepare ahead, slice the cheesecake first and freeze individual portions wrapped well in plastic wrap and foil. Thaw overnight in the fridge before serving. The texture remains creamy and delightful, making this a dream dessert to have on hand for last-minute cravings.
Reheating
No need to actually heat your No-Bake Black Forest Berry Cheesecake! Just let refrigerated or frozen slices come to room temperature for 20–30 minutes before serving. This small step makes the flavors and texture their most luxurious.
FAQs
Can I use low-fat cream cheese in this recipe?
You can use low-fat cream cheese, but the cheesecake won’t be quite as creamy or rich. The full-fat version yields the silkiest, most indulgent result, but go with what suits your taste and dietary needs.
What kind of chocolate cookies work best for the crust?
Classic chocolate wafer cookies or chocolate sandwich cookies (with the filling removed) both work beautifully. Choose whichever you love, or opt for graham crackers as a lighter, crunchier alternative.
Can I make No-Bake Black Forest Berry Cheesecake ahead of time?
Absolutely! In fact, making it the night before is ideal as it gives the cheesecake plenty of time to set and the flavors time to mingle. You’ll have a dessert ready to slice and serve—no last-minute stress required.
How do I make clean slices for serving?
Use a large sharp knife dipped in hot water and wiped dry before each slice. This little trick helps cut through the creamy layers and berry topping without dragging—so every slice looks as tempting as the last.
Can I customize the berries in the topping?
Definitely! Use whatever combination of berries you love or have on hand. Blackberries, blueberries, raspberries, or even sliced strawberries work wonders and let you tailor the cake to your taste or the season.
Final Thoughts
Once you taste how creamy, fruity, and impossibly easy this No-Bake Black Forest Berry Cheesecake is, you’ll want to make it again and again. There’s just something special about a dessert that wows with so little effort. I hope you give this recipe a try—you might just find it’s your new go-to for celebrations or any day you deserve a slice of something truly delicious!
Print
No-Bake Black Forest Berry Cheesecake Recipe
- Total Time: 6 hours 25 minutes
- Yield: 12 servings 1x
- Diet: Vegetarian
Description
Indulge in the rich and fruity flavors of this delightful No-Bake Black Forest Berry Cheesecake. A decadent chocolate cookie crust is topped with a luscious cream cheese and whipped cream filling, then crowned with a vibrant mix of cherry pie filling and fresh berries.
Ingredients
For the Crust:
- 1½ cups chocolate cookie crumbs
- 5 tablespoons unsalted butter, melted
For the Filling:
- 16 ounces cream cheese, softened
- ½ cup granulated sugar
- 1 teaspoon vanilla extract
- 1½ cups heavy whipping cream
For Topping:
- 1 cup cherry pie filling
- ½ cup fresh or frozen mixed berries (such as raspberries, blackberries, and blueberries)
- 1 tablespoon powdered sugar, optional, for garnish
- Chocolate shavings, optional, for garnish
Instructions
- Prepare the Crust: Mix chocolate cookie crumbs and melted butter. Press into a 9-inch springform pan. Chill.
- Make the Filling: Beat cream cheese, sugar, and vanilla until smooth. Whip cream separately and fold into cream cheese mixture. Spread over crust.
- Add Topping: Combine cherry pie filling and berries. Spoon over the filling.
- Chill: Refrigerate for at least 6 hours or overnight.
- Garnish: Sprinkle with powdered sugar and chocolate shavings before serving.
Notes
- You can use graham crackers for a lighter crust.
- Thaw and drain frozen berries before use.
- For extra texture, mix a few berries into the filling.
- Prep Time: 25 minutes
- Cook Time: 0 minutes
- Category: Dessert
- Method: No-Bake
- Cuisine: American
Nutrition
- Serving Size: 1 slice
- Calories: 380
- Sugar: 24g
- Sodium: 220mg
- Fat: 28g
- Saturated Fat: 17g
- Unsaturated Fat: 9g
- Trans Fat: 0g
- Carbohydrates: 28g
- Fiber: 1g
- Protein: 5g
- Cholesterol: 85mg

