
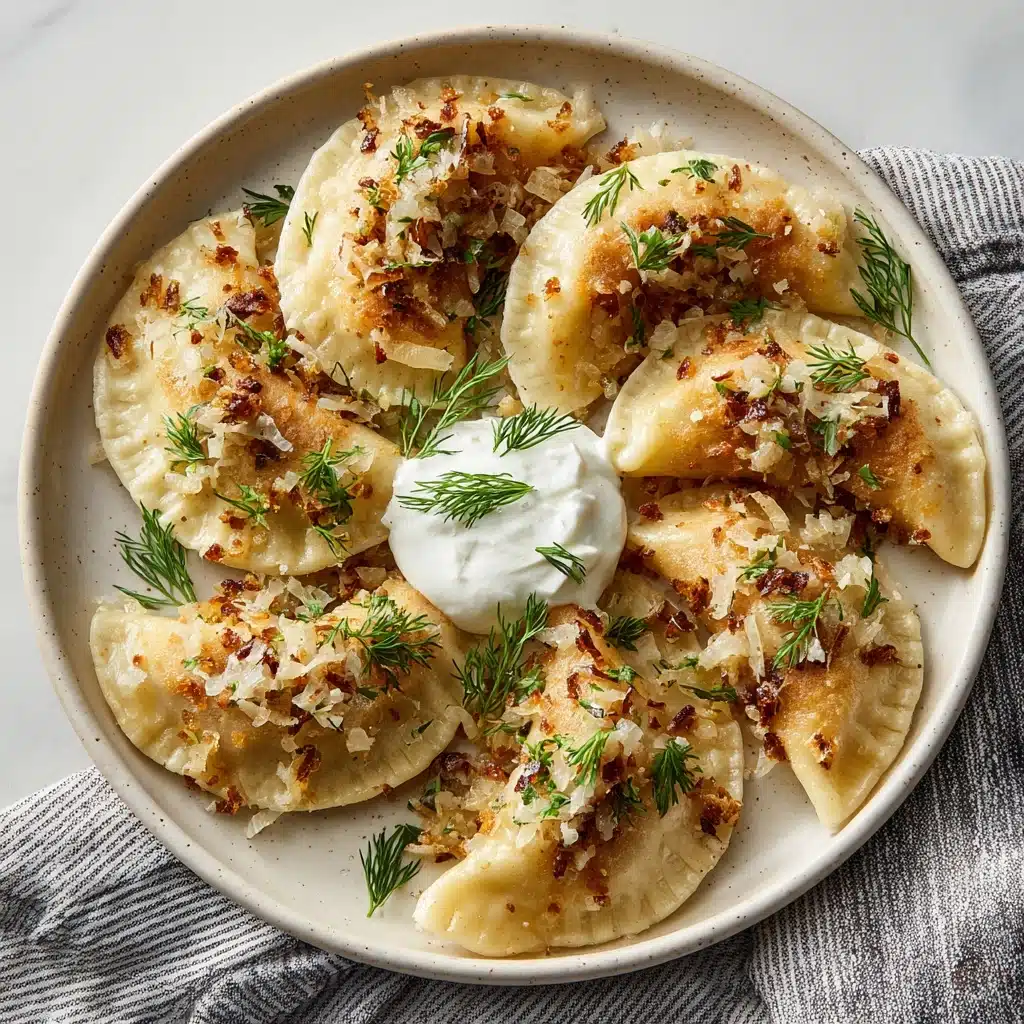
Pierogi is the ultimate comfort food that brings together pillowy-soft dumpling dough and a warm, cheesy potato filling with just the right touch of crispness from pan-fried onions. This traditional Polish dish has delighted families for generations, and once you try making homemade pierogi, you’ll honestly be hooked. Get ready to fall in love with a hearty, rewarding recipe that’s perfect for gatherings, special occasions, or any night you crave soul-satisfying goodness.
Ingredients You’ll Need
You’ll be amazed at how just a handful of staple ingredients can come together to create something so cozy and memorable. Each component plays a starring role in the taste, texture, and golden color of every pierogi you serve.
- All-purpose flour: Provides the structure and tenderness of the dough—be sure to dust your work surface to keep things from sticking!
- Salt: Enhances every bite, whether mingling with the dough or the filling inside.
- Large egg: Adds just the right amount of richness and binding to the pierogi dough.
- Sour cream: Gives the dough a wonderful tang and extra silkiness.
- Unsalted butter, softened: Ensures richness and a melt-in-your-mouth feel—don’t skip this step!
- Mashed potatoes, cooled: The creamy foundation for the filling; leftover mashed potatoes work beautifully here.
- Sharp cheddar cheese, grated: Lends a bold, savory kick that melts down to perfection inside the dumplings.
- Black pepper: Adds a subtle warmth and balance to the cheesy, potato filling.
- Onion, finely chopped: The key to that irresistible golden, sweet-savory finish when sautéed.
- Butter for sautéing: Adds golden color and rich flavor for finishing off your pierogi.
- Sour cream and chopped chives for serving: Classic garnishes that bring brightness and lusciousness to every bite.
How to Make Pierogi
Step 1: Mix and Knead the Dough
Start by pulling out a large bowl and combining the flour and salt. Add in your egg, sour cream, and those lovely pieces of softened butter. Stir together until a shaggy, slightly sticky dough begins to form. Dust your counter, tumble out the dough, and knead for about 5 to 7 minutes. You’ll see it become glossy, smooth, and elastic—just trust the process. Wrap the dough up in plastic and set it aside to rest for at least half an hour; this gives the gluten time to relax for easier rolling later.
Step 2: Prepare the Potato-Cheese Filling
While your dough is resting, mash together the cooled potatoes, grated sharp cheddar cheese, salt, and black pepper in a bowl. Taste the filling—you want a pop of cheddar and just enough seasoning. The mixture should hold together nicely; if it seems too loose, let it chill for a few minutes in the fridge.
Step 3: Roll Out and Cut the Dough
Sprinkle your workspace and rolling pin with flour, then roll out the rested dough to about 1/8-inch thickness. Use a 3-inch round cutter (or a sturdy drinking glass) to stamp out dough circles. Gather up the scraps, re-roll, and repeat until you’ve used up as much dough as possible.
Step 4: Fill and Seal Your Pierogi
Place a heaping tablespoon of filling in the center of each dough circle. Fold the dough over the filling to create a neat half-moon shape (a classic look for pierogi). Carefully pinch the edges together—get in there and make sure the seal is snug, so none of that glorious filling escapes during cooking! If you like, use the tines of a fork for a decorative edge.
Step 5: Boil Until Tender
Bring a big pot of salted water to a lively boil. Drop pierogi in batches, stirring very gently so they don’t stick or tear. In about 3 to 4 minutes, they’ll float to the top; that’s your signal they’re done. Use a slotted spoon to transfer them to a plate—don’t worry if they look a bit plain right now!
Step 6: Pan-Fry with Onions
Melt butter in a large skillet over medium heat and scatter in your chopped onion. Sauté until the onion turns golden and melt-in-your-mouth sweet. Gently add your boiled pierogi and cook for 2 to 3 minutes per side until lightly browned and a little crisp. This is where the magic happens—all the flavors come together, and the outside gets a beautiful finish.
How to Serve Pierogi

Garnishes
Garnishing is half the fun! Offer bowls of cold, tangy sour cream, a sprinkle of vibrant chopped chives, and don’t be shy with extra sautéed onions or melted butter over the top. A dusting of fresh black pepper or even some crispy bacon bits (if you’re feeling indulgent) adds another dimension.
Side Dishes
Pierogi shine alongside simple, classic sides—a bright cucumber salad, tangy sauerkraut, or roasted beets work wonders. A crisp apple slaw or some lightly dressed greens will balance the richness without overshadowing those dumplings.
Creative Ways to Present
Pierogi are wonderfully versatile, making them perfect for family-style platters or as the main dish at a festive dinner. Try arranging them in a spiral on a serving tray, fanning them around a bowl of sour cream dip, or threading a few on skewers for party appetizers. Little touches like edible flowers or pickled veggies nearby will make your plate pop!
Make Ahead and Storage
Storing Leftovers
Store any leftover pierogi in an airtight container in the refrigerator for up to three days. If you know you’ll be keeping some for later, wait to add garnishes until right before serving. They reheat beautifully and honestly might taste even better the next day!
Freezing
Pierogi are fantastic for freezing. After shaping but before boiling, place them on a parchment-lined tray and freeze until solid, then transfer to a freezer bag. They’ll keep well for up to two months. To cook from frozen, simply boil them straight from the freezer, adding a couple extra minutes to the cooking time.
Reheating
Reheat refrigerated pierogi by pan-frying in a bit of butter until warmed through and crisped. If you have a big batch, you can even reheat them in the oven—just spread on a baking sheet, cover lightly with foil, and warm at 350°F for about 10 minutes. Leftover pierogi can also be microwaved, though you may lose a bit of that signature crispy edge.
FAQs
Can I use a different cheese for the filling?
Definitely! While sharp cheddar gives traditional flavor and melt, you could swap in anything from creamy farmer’s cheese to gouda or a blend of your favorites. Just aim for a cheese that melts well and packs flavor.
Do I have to sauté the onions, or can I use them raw?
Sautéing the onions is key to that classic, caramelized sweetness that compliments the pierogi. Raw onions would be too sharp for both the filling and topping, so go for golden and soft every time!
My dough feels sticky—what should I do?
If your pierogi dough is sticking as you knead, dust it and your hands with a little extra flour. Just add it sparingly, as too much will make the dough tough; a bit of patience and gentle kneading helps it smooth out beautifully.
How do I avoid my pierogi opening up while boiling?
Make sure to thoroughly pinch or crimp each edge. A little bit of water along the edge before sealing can help. Avoid overfilling, and handle gently when transferring to the water and during boiling.
Can I make the dough and filling in advance?
Absolutely! Both can be prepped a day ahead. Keep the dough tightly wrapped in plastic and store the prepared filling in an airtight container in the fridge. Assemble the pierogi when you’re ready to cook.
Final Thoughts
Homemade pierogi are truly something special—each bite brings a sense of warmth, nostalgia, and real satisfaction. Whether you’re sharing with friends or savoring them solo, give this recipe a try and let it become your own new favorite tradition!
Print
Pierogi Recipe
- Total Time: 1 hour 5 minutes
- Yield: 4 servings (about 24 pierogi) 1x
- Diet: Vegetarian
Description
Learn how to make delicious homemade Pierogi, traditional Polish dumplings filled with creamy mashed potatoes and cheddar cheese, served with sautéed onions and sour cream.
Ingredients
For the dough:
- 2 1/2 cups all-purpose flour, plus more for dusting
- 1/2 teaspoon salt
- 1 large egg
- 1/2 cup sour cream
- 1/4 cup unsalted butter, softened and cut into pieces
For the filling:
- 2 cups mashed potatoes, cooled
- 1 cup sharp cheddar cheese, grated
- 1/2 teaspoon salt
- 1/4 teaspoon black pepper
To cook and serve:
- 4 tablespoons unsalted butter
- 1 medium onion, finely chopped
- Sour cream and chopped chives for serving
Instructions
- Prepare the dough: In a large bowl, combine the flour and salt. Add the egg, sour cream, and softened butter. Mix until a shaggy dough forms, then knead on a lightly floured surface for about 5-7 minutes until smooth and elastic. Wrap in plastic wrap and let rest for at least 30 minutes.
- Make the filling: Combine the mashed potatoes, grated cheddar cheese, salt, and pepper in a bowl.
- Assemble the pierogi: Roll out the rested dough on a lightly floured surface. Cut out circles and place filling in the center. Fold and seal the edges.
- Cook the pierogi: Boil in salted water for 3-4 minutes. Sauté onions in butter until golden brown. Pan-fry cooked pierogi until crisp.
- Serve: Enjoy warm pierogi with sautéed onions, extra butter, and a dollop of sour cream.
Notes
- Pierogi can be frozen before boiling; place on a parchment-lined sheet until solid, then store in a freezer bag. To cook from frozen, boil a few extra minutes.
- Prep Time: 45 minutes
- Cook Time: 20 minutes
- Category: Main Course
- Method: Boiling, Pan-Frying
- Cuisine: Polish
Nutrition
- Serving Size: 6 pierogi
- Calories: 450
- Sugar: 3g
- Sodium: 400mg
- Fat: 18g
- Saturated Fat: 10g
- Unsaturated Fat: 8g
- Trans Fat: 0g
- Carbohydrates: 57g
- Fiber: 3g
- Protein: 13g
- Cholesterol: 85mg


