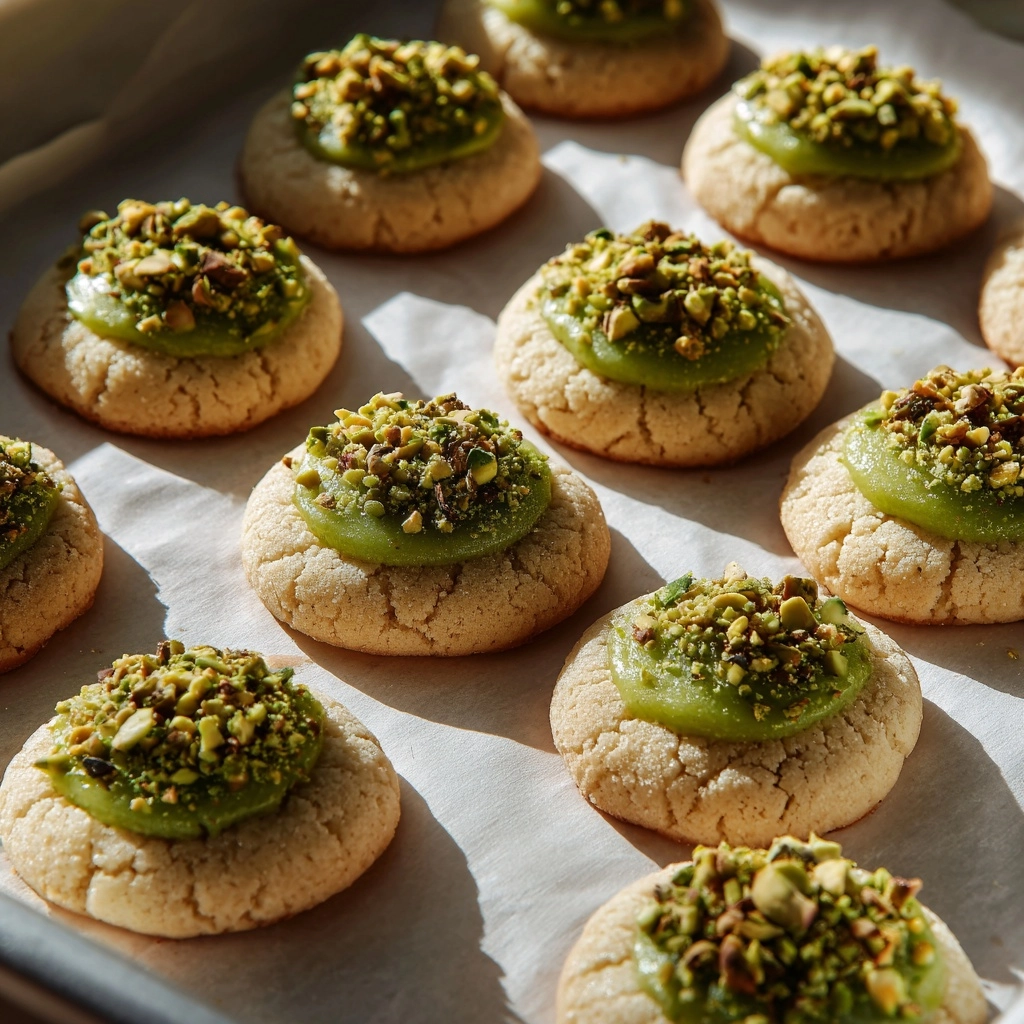
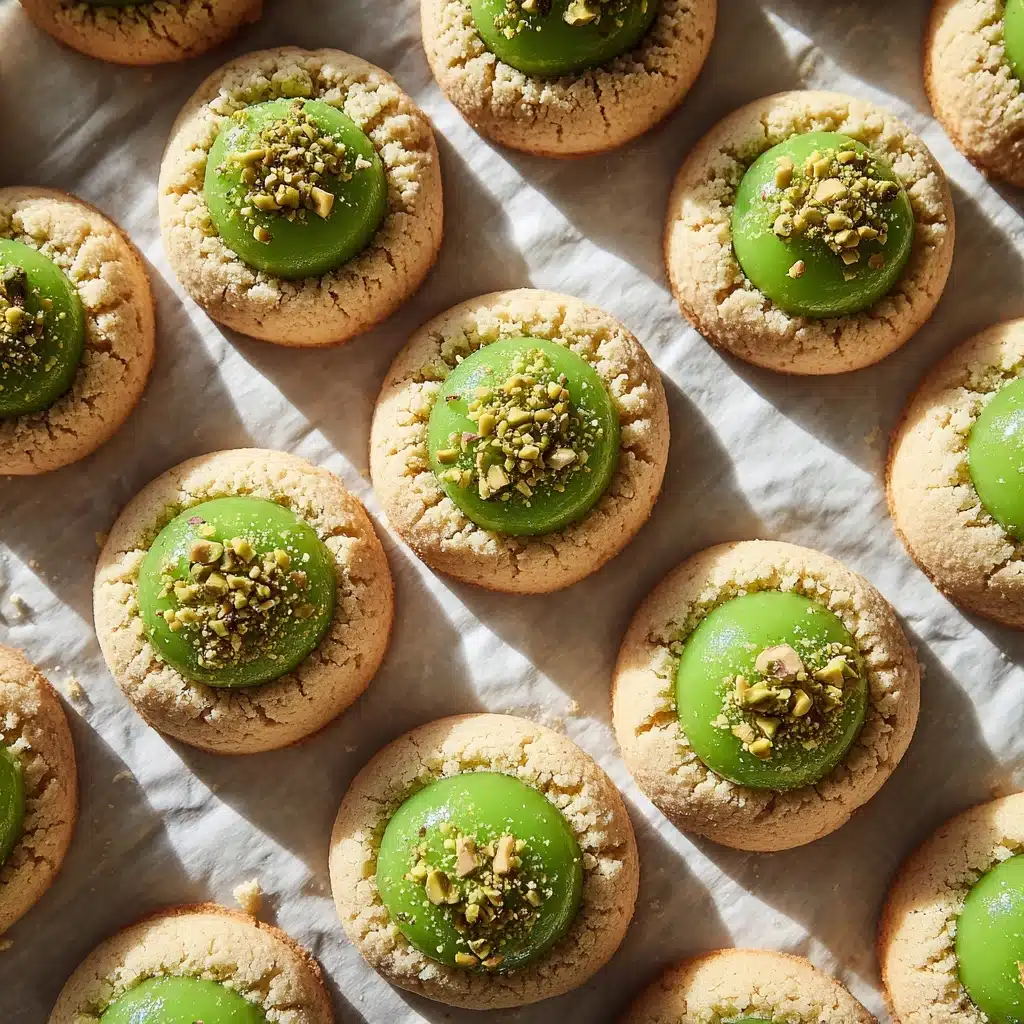
If you’re searching for a treat that bridges festive beauty with nutty, luxurious flavor, look no further than these Pistachio Thumbprint Cookies. Buttery and tender, each bite is filled with the richness of pistachios, the sweet sparkle of jewel-toned jam, and the nostalgic comfort you only get from a homemade cookie. Whether they’re making an entrance at a holiday party or brightening up your afternoon coffee break, Pistachio Thumbprint Cookies are impossible to resist and a total crowd-pleaser from the very first crumb.
Ingredients You’ll Need
The magic of Pistachio Thumbprint Cookies truly starts with a handful of simple, high-quality ingredients. Each one brings something special—nutty depth, a delicate crumb, or a pop of color—coming together in the coziest, tastiest harmony.
- Unsalted butter (1 cup, softened): This gives your cookies that melt-in-your-mouth texture and rich flavor, so don’t skimp on quality here.
- Granulated sugar (1/2 cup): Adds just the right amount of sweetness to balance the subtle earthiness of pistachios.
- Almond extract (1/2 teaspoon): Just a dash lifts the entire dough with a floral, almost marzipan-like aroma.
- All-purpose flour (2 cups): The backbone of the cookie—perfect for creating a tender, yet slightly crisp bite.
- Salt (1/2 teaspoon): Essential for enhancing every flavor note and keeping the cookies from tasting flat.
- Finely chopped pistachios (1/2 cup): Sprinkle in color, crunch, and that unmistakable nutty flavor we all love.
- Pistachio or raspberry jam (1/2 cup): The jammy center is both sweet and slightly tart—a beautiful counterpoint to the buttery base.
- Optional powdered sugar for dusting: A final snowy touch that makes your cookies as beautiful as they are luscious.
How to Make Pistachio Thumbprint Cookies
Step 1: Prepare the Baking Sheet and Preheat Oven
Start by preheating your oven to 350°F (175°C) to guarantee even baking. Line a baking sheet with parchment paper to keep your Pistachio Thumbprint Cookies from sticking and to make cleanup a breeze. This small step really sets you up for success.
Step 2: Cream Butter and Sugar
In a large mixing bowl, cream together the softened butter and granulated sugar until the mixture is light and fluffy. This process is the secret to that delicate, melt-in-your-mouth texture—be patient and beat for 2 to 3 minutes for the best results.
Step 3: Add Almond Extract
Stir in the almond extract, just until it’s blended. It’s a small addition that infuses the dough with subtle floral notes, elevating every bite of your Pistachio Thumbprint Cookies.
Step 4: Mix in Dry Ingredients
Gradually add the flour and salt to the butter mixture, mixing on low speed or by hand until a soft dough forms. The dough should come together easily without being sticky—if it looks crumbly, gently knead it together.
Step 5: Add Pistachios
Stir in the finely chopped pistachios until they’re evenly distributed throughout the dough. Each cookie will have a pop of green, a little crunch, and a whole lot of flavor.
Step 6: Shape the Cookies
Scoop tablespoon-sized portions of dough and roll them into balls; line them up about 2 inches apart on your prepared baking sheet. The space allows them to spread a little and get lightly golden around the edges.
Step 7: Make Thumbprint Indentations
Use your thumb or the back of a spoon to gently create a small well in the center of each cookie. Be careful not to press all the way through; just enough to nestle a little jam.
Step 8: Fill with Jam
Spoon about 1/2 teaspoon of pistachio or raspberry jam into each indentation. The jam will bake into a glossy, jewel-toned center that’s both beautiful and delicious.
Step 9: Bake to Perfection
Slide the tray into your preheated oven and bake for 12 to 14 minutes. The cookies are ready when their edges are just turning golden. They’ll still feel a bit soft, but will firm up as they cool.
Step 10: Cool and (Optional) Dust
Let the cookies cool on the pan for a few minutes, then transfer them to a wire rack. Once completely cool, dust with powdered sugar if you like a snowy, elegant finish.
How to Serve Pistachio Thumbprint Cookies

Garnishes
Pistachio Thumbprint Cookies are naturally photogenic, but a final sprinkle of powdered sugar gives them that extra sparkle. For even more visual interest, try adding a pinch of finely chopped pistachios on top of the jam before serving. These little touches highlight the nutty flavors and elevate your presentation.
Side Dishes
These cookies sing when served alongside a warm drink—think coffee, a chai latte, or a pot of good black tea. For a festive dessert plate, pair them with fresh fruit or a dollop of whipped cream. Their sweet, nutty character makes them the highlight of any treat spread.
Creative Ways to Present
If you’re gifting them, layer the Pistachio Thumbprint Cookies in a clear box or glass jar, separating the layers with parchment paper. For parties, arrange them on a tiered cake stand with pops of fresh mint or cranberries for a hint of color. For an extra-special touch, alternate raspberry and pistachio jam for festive red-and-green jewels.
Make Ahead and Storage
Storing Leftovers
Store cooled Pistachio Thumbprint Cookies in an airtight container at room temperature for up to 5 days. They stay fresh and tender, with the jam center maintaining its lovely, slightly chewy texture.
Freezing
You can freeze these cookies either baked or unbaked. For baked cookies, simply layer between sheets of parchment in an airtight container and freeze for up to 2 months. If you prefer to freeze the dough, shape and indent, then freeze unbaked; just add jam and bake from frozen, adding a minute or two extra to the baking time.
Reheating
If you’d like to refresh your cookies, warm them on a baking sheet in a 300°F oven for about 5 minutes. This brings back their freshly-baked aroma and slightly soft center. Let cool slightly before eating so you don’t burn your mouth on that molten jam center!
FAQs
Can I use a different kind of nut in these cookies?
Absolutely! While pistachios offer a bright color and delicate flavor, you can swap in finely chopped almonds, pecans, or walnuts for a fun twist. Just be aware that it will change the overall flavor profile.
Is it possible to make these cookies gluten-free?
Yes, these Pistachio Thumbprint Cookies adapt well to gluten-free baking. Substitute your favorite one-to-one gluten-free flour blend in place of the all-purpose flour. Be aware that the texture might be slightly different, but still delicious.
What other jams can I use for the filling?
Almost any thick jam will work beautifully! Try apricot, strawberry, or even fig for a slightly different flavor. Just be sure your jam isn’t too runny or it may bubble out during baking.
How do I keep the cookies from spreading too much?
If your cookies are spreading more than you’d like, try chilling the dough for 30 minutes before shaping and baking. This helps solidify the butter, keeping the cookies thick and tender.
Can I double the recipe for a crowd?
Definitely! Pistachio Thumbprint Cookies are perfect for gatherings. Double all the ingredients and bake in batches. Just make sure not to overcrowd your baking sheets for even results.
Final Thoughts
Whether you’re baking for the holidays or simply treating yourself, Pistachio Thumbprint Cookies always deliver smiles and plenty of “oohs” and “aahs.” Invite friends or family into your kitchen, and turn a simple baking project into sweet memories—these cookies are far too delightful not to share. Give them a try and let them become a favorite in your own cookie collection!
Print
Pistachio Thumbprint Cookies Recipe
- Total Time: 34 minutes
- Yield: 24 cookies 1x
- Diet: Vegetarian
Description
These delightful Pistachio Thumbprint Cookies are a perfect treat for any occasion. With a buttery base, crunchy pistachios, and a sweet jam filling, they are sure to impress your guests.
Ingredients
Ingredients:
- 1 cup unsalted butter (softened)
- 1/2 cup granulated sugar
- 1/2 teaspoon almond extract
- 2 cups all-purpose flour
- 1/2 teaspoon salt
- 1/2 cup finely chopped pistachios
- 1/2 cup pistachio or raspberry jam
- Optional powdered sugar for dusting
Instructions
- Preheat the oven: to 350°F (175°C) and line a baking sheet with parchment paper.
- Cream butter and sugar: In a large bowl, cream together the softened butter and sugar until light and fluffy. Mix in the almond extract.
- Add dry ingredients: Gradually add the flour and salt, mixing until a soft dough forms. Stir in the chopped pistachios.
- Shape the cookies: Scoop out tablespoon-sized portions of dough and roll into balls. Place them on the prepared baking sheet about 2 inches apart.
- Add jam: Use your thumb or the back of a spoon to press a small well into the center of each cookie. Fill each indentation with about 1/2 teaspoon of jam.
- Bake: Bake for 12–14 minutes or until the edges are lightly golden.
- Cool and serve: Let cool on the pan for a few minutes before transferring to a wire rack. Dust with powdered sugar if desired.
Notes
- For a festive touch, use red raspberry and green pistachio jam for contrast.
- Cookies can be stored in an airtight container at room temperature for up to 5 days.
- Prep Time: 20 minutes
- Cook Time: 14 minutes
- Category: Dessert
- Method: Baking
- Cuisine: American
Nutrition
- Serving Size: 1 cookie
- Calories: 140
- Sugar: 7g
- Sodium: 45mg
- Fat: 9g
- Saturated Fat: 5g
- Unsaturated Fat: 3g
- Trans Fat: 0g
- Carbohydrates: 14g
- Fiber: 0g
- Protein: 1g
- Cholesterol: 20mg


