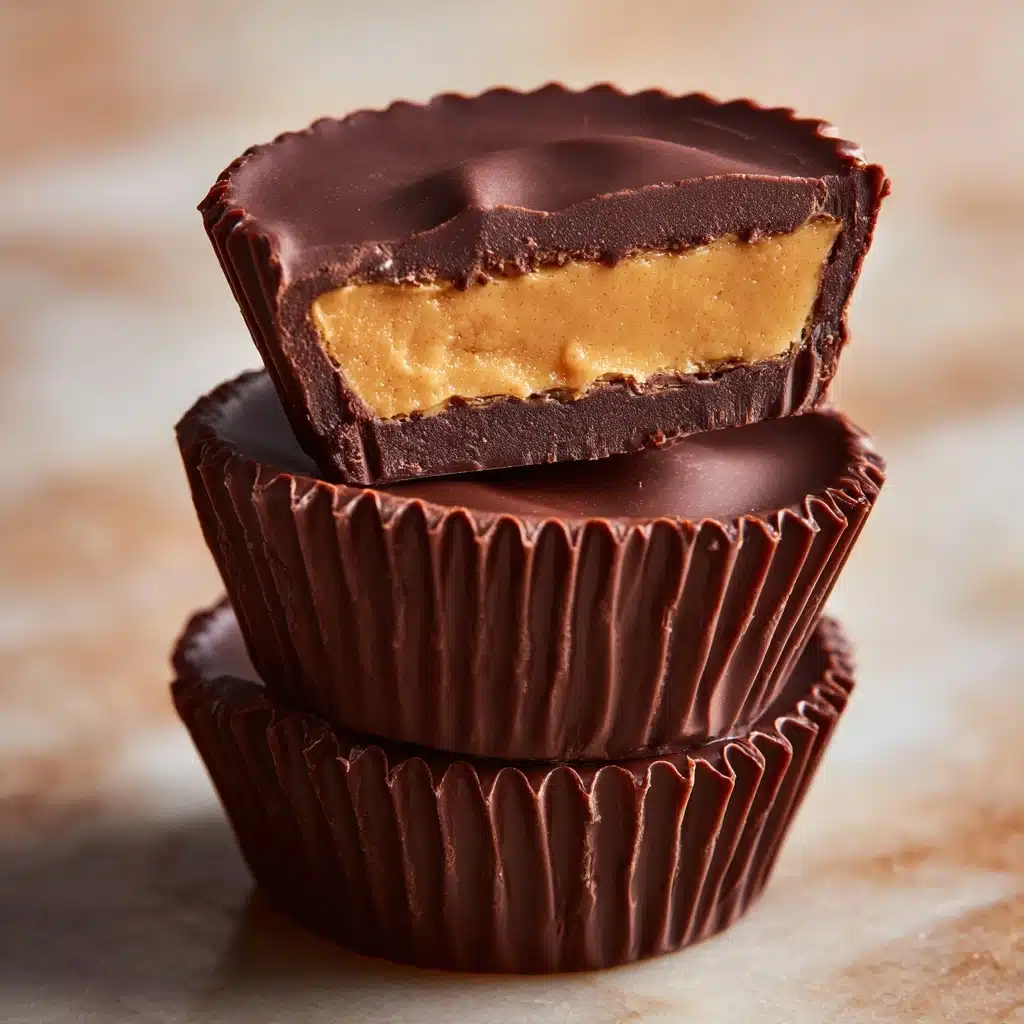
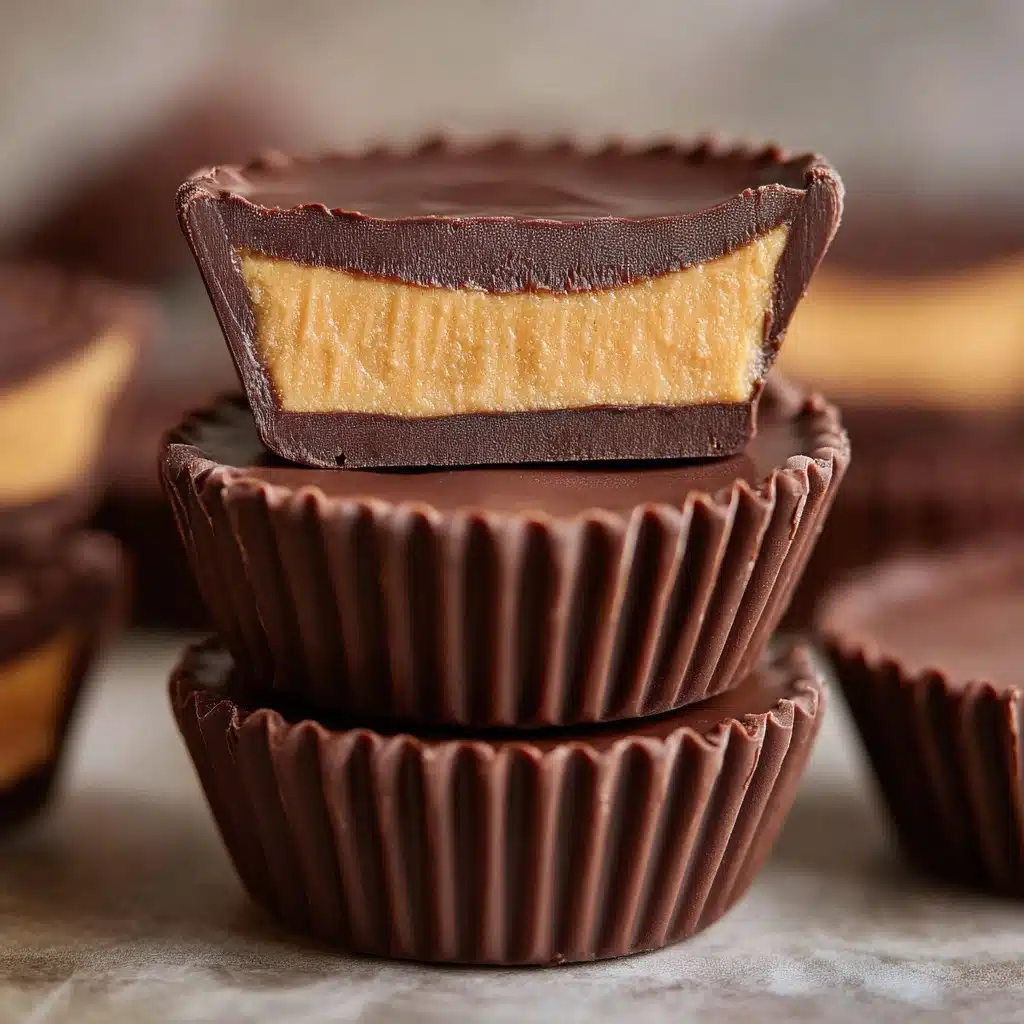
If you have a sweet tooth but need your snacks to work as hard as you do, then this Protein Peanut Butter Cups Recipe is about to become your new best friend. Imagine the rich blend of creamy peanut butter and dark chocolate—now add a boost of satisfying protein and a touch of pure maple sweetness. These no-bake cups are ridiculously easy, naturally gluten-free, and just the thing for a healthy treat or quick energy boost. Whether you’re fueling up after the gym or sneaking something sweet between Zoom calls, this powerhouse snack does it all—deliciously!
Ingredients You’ll Need
Gather just a handful of pantry staples for this Protein Peanut Butter Cups Recipe. Each ingredient brings something special to the table, from silkiness and structure to that dreamy snap of chocolate that wraps it all together. Here’s what you’ll need, and why each one matters:
- Natural peanut butter: The nutty, creamy heart of the recipe—choose smooth for classic cups, or crunchy if you want a bit of texture.
- Vanilla or chocolate protein powder: Adds satisfying protein and a flavor twist—pick your fave to personalize every batch.
- Maple syrup or honey: Naturally sweetens the cups and helps bind the filling for perfect bite-ability.
- Coconut flour (optional): Thickens the peanut butter mixture for a firmer, dough-like texture (great if you prefer less gooey centers).
- Dark or semi-sweet chocolate chips: Melt down to form the rich, snappy casing that makes these cups so nostalgic.
- Coconut oil: Helps the chocolate melt smoothly and gives that glossy, irresistible finish.
- Flaky sea salt (optional): Just a pinch on top makes the flavors pop and gives a gourmet twist.
How to Make Protein Peanut Butter Cups Recipe
Step 1: Mix the Protein Peanut Butter Filling
Start by combining the natural peanut butter, your chosen protein powder, maple syrup or honey, and coconut flour if you want a thicker texture. Give it a good stir until you have a smooth, thick mixture that holds its shape. You’re looking for a “playdough” consistency—soft but not runny. Taste a tiny bit if you’re tempted. (No judgment, I can never resist!)
Step 2: Prepare Your Pan
Grab a muffin tin and line it with paper liners; both mini and standard sizes work well, depending on your snack preference. The liners make for easy removal, plus you get that authentic “peanut butter cup” experience.
Step 3: Melt the Chocolate
In a microwave-safe bowl, combine the chocolate chips and coconut oil. Microwave in 20-second bursts, stirring between each interval, until you have shiny, smooth melted chocolate. Be patient—not rushing this step means you get a silky, lump-free chocolate shell with every cup.
Step 4: Build the Base
Spoon a small amount of the melted chocolate into each paper liner, using the back of your spoon to nudge the chocolate gently up the sides. This creates the perfect chocolate “home” for your peanut butter filling. Pop the pan in the freezer for about 10 minutes, or until the base is set and no longer sticky to the touch.
Step 5: Add the Protein Peanut Butter Center
Scoop out a heaping tablespoon of your protein-packed peanut butter mixture (use a bit less for minis) and roll it gently into a disk. Press the disk lightly into each chocolate-lined cup, making sure it doesn’t quite touch the edges—leave a little space for more chocolate to flow around the filling.
Step 6: Top and Finish
Pour more melted chocolate over each peanut butter mound, making sure it’s nicely concealed. Smooth out the tops with your spoon, then give the pan a gentle tap on the counter to even everything out. For the perfect finishing touch, sprinkle each cup with a pinch of flaky sea salt—if you’re in a fancy mood!
Step 7: Chill and Enjoy
Pop the full tray back in the refrigerator or freezer for 15 to 20 minutes until set and solid. Once firm, they’re ready to eat! The first bite of this Protein Peanut Butter Cups Recipe is guaranteed to have you swooning.
How to Serve Protein Peanut Butter Cups Recipe

Garnishes
A little flourish goes a long way here. Try a sprinkle of flaky sea salt for a sophisticated crunch, or drizzle a bit of melted peanut butter or extra chocolate over the top. Crushed roasted peanuts add extra texture and a nostalgic look, or go wild with mini chocolate chips or chopped dried fruit for a pop of color and flavor.
Side Dishes
While these cups make a stellar stand-alone snack, they also shine alongside fresh berries, a cold glass of your favorite non-dairy milk, or even a creamy vanilla protein smoothie. If you’re serving them as a dessert, pair them with sliced bananas and a little dusting of cocoa powder for pure decadence.
Creative Ways to Present
Layer your Protein Peanut Butter Cups Recipe in a glass jar for a fun on-the-go energy pack, or wrap them up in colorful cupcake liners for party favors. Serve them on a three-tier dessert stand for a crowd, or chop into tiny squares and add to your favorite bowl of overnight oats or Greek yogurt for a dreamy breakfast treat.
Make Ahead and Storage
Storing Leftovers
Keep your protein peanut butter cups fresh in an airtight container in the fridge. They’ll happily stay at peak deliciousness for up to one week, making it easy to grab a quick bite whenever a craving strikes. Just be sure to separate layers with parchment paper to prevent them from sticking together.
Freezing
This Protein Peanut Butter Cups Recipe is a freezer-friendly wonder! Pop any extras into a zip-top bag or sealed freezer container, and they’ll last for up to three months. When you need a snack, just pull one out and let it sit at room temperature for a few minutes—or enjoy it straight from the freezer for a firmer, ice-cold treat.
Reheating
No reheating needed for these no-bake beauties! If you’ve stored them in the freezer, allow them to thaw slightly at room temperature for five to ten minutes so the centers soften up, then take a big bite. The chocolate is just the right amount of snappy and the filling perfectly creamy.
FAQs
Can I use a different nut or seed butter?
Absolutely! Swap in almond butter, cashew butter, or sunflower seed butter if you need a peanut-free option. Each brings a unique flavor, and all work beautifully in this Protein Peanut Butter Cups Recipe. Just make sure your butter is unsweetened and natural for the best texture.
Which protein powder works best?
Go for whatever you love most—whey, plant-based, or collagen peptides all work well. Flavored options like chocolate or vanilla are extra tasty here, but unflavored is fine, too. The key is to choose a powder that blends smoothly into the filling without a chalky aftertaste.
Can I make these vegan?
Of course! Use a vegan protein powder and swap maple syrup for honey, and you’ve got a vegan-friendly version of the Protein Peanut Butter Cups Recipe. Just double-check that your chocolate chips and protein powder are fully plant-based, and you’re all set.
How do I keep the chocolate from sticking to the liners?
If you’re not a fan of stubborn liners, try using silicone cupcake molds instead. They peel right off without a fuss. Chilling your cups until they’re fully set also makes a big difference when removing them from traditional paper liners.
Is coconut flour necessary?
Nope, it’s totally optional! If you like a more solid, almost cookie dough-like texture in your peanut butter layer, add it in. If you prefer something gooier and classic, just leave it out—your Protein Peanut Butter Cups Recipe will turn out wonderfully either way.
Final Thoughts
If you’re looking for a snack that’s as nourishing as it is crave-worthy, this Protein Peanut Butter Cups Recipe is a must-try. Trust me—once you taste the amazing combo of creamy, chocolatey, protein-packed goodness, you’ll want them on repeat in your fridge. Happy snacking, and enjoy every bite!
Print
Protein Peanut Butter Cups Recipe
- Total Time: 30 minutes (including chilling time)
- Yield: 12 regular or 24 mini cups 1x
- Diet: Vegetarian
Description
Indulge in these Protein Peanut Butter Cups for a wholesome treat that combines the richness of dark chocolate with a protein-packed, nutty peanut butter filling. These no-bake cups are easy to make and perfect for satisfying your sweet cravings with a healthier twist.
Ingredients
Peanut Butter Filling:
- 1 cup natural peanut butter (smooth or crunchy)
- 1/4 cup vanilla or chocolate protein powder
- 2 tablespoons maple syrup or honey
- 1 tablespoon coconut flour (optional, for thicker texture)
Chocolate Coating:
- 1 1/2 cups dark or semi-sweet chocolate chips
- 1 tablespoon coconut oil
- Flaky sea salt for topping (optional)
Instructions
- Prepare Peanut Butter Filling: In a medium bowl, mix together peanut butter, protein powder, maple syrup (or honey), and coconut flour if using. Stir until a thick, dough-like mixture forms.
- Line Muffin Tin: Line a muffin tin with paper liners (use mini or standard size, depending on preference).
- Melt Chocolate: In a microwave-safe bowl, melt the chocolate chips and coconut oil in 20-second intervals, stirring between each, until smooth.
- Assemble Cups: Spoon a small amount of melted chocolate into the bottom of each liner and spread it slightly up the sides. Chill in the freezer for 10 minutes to set. Roll the peanut butter mixture into disks and press into each cup. Top with more melted chocolate, sprinkle with sea salt if desired.
- Chill: Refrigerate or freeze until fully set, about 15–20 minutes. Store in the fridge for up to 1 week or freezer for longer.
Notes
- Use your favorite protein powder flavor to switch things up.
- Almond butter or sunflower seed butter can be used for variations.
- Great for pre- or post-workout snacks.
- Prep Time: 15 minutes
- Cook Time: 0 minutes
- Category: Snack, Dessert
- Method: No-Bake
- Cuisine: American
Nutrition
- Serving Size: 1 regular cup
- Calories: 190
- Sugar: 6g
- Sodium: 65mg
- Fat: 14g
- Saturated Fat: 5g
- Unsaturated Fat: 8g
- Trans Fat: 0g
- Carbohydrates: 10g
- Fiber: 2g
- Protein: 6g
- Cholesterol: 0mg


