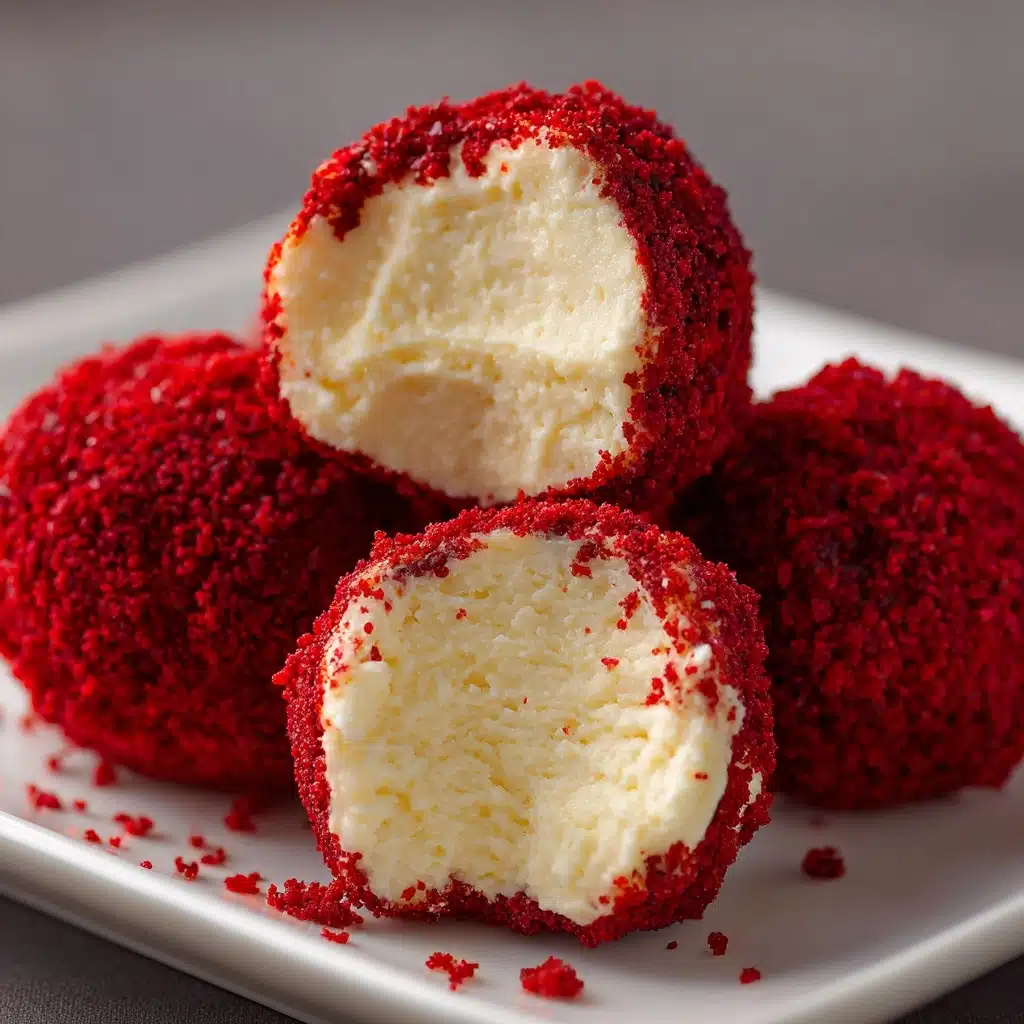
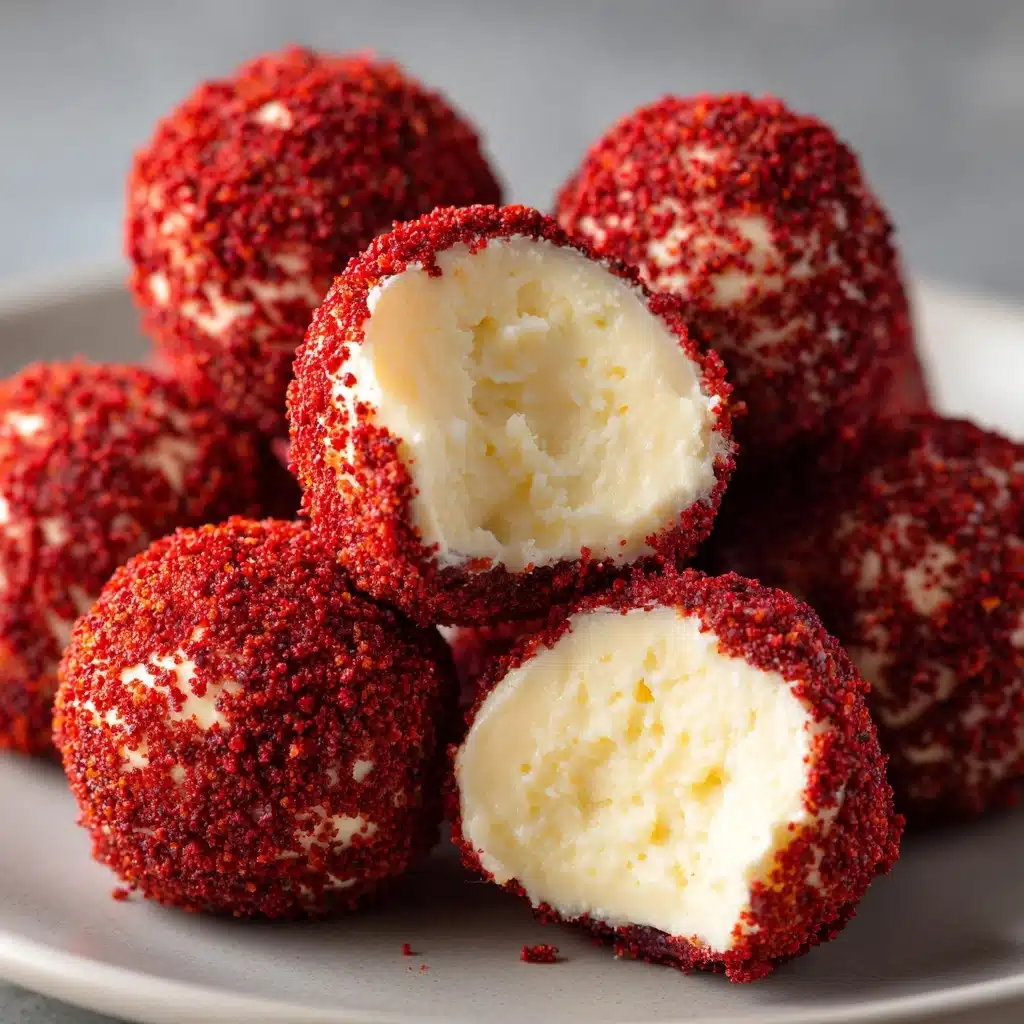
Imagine sinking your teeth into a rich, moist, and vibrantly colored treat that combines the best of two worlds: classic red velvet cake and creamy cheesecake. That’s the magic of Red Velvet Cheesecake Balls! These bite-sized indulgences are every bit as dreamy as they sound — soft, tangy, and dipped in a luscious white chocolate coating. Whether you’re celebrating with friends or looking for a show-stopping homemade gift, this recipe comes together with just a few accessible ingredients, transforming simple pantry staples into a bakery-worthy delight.
Ingredients You’ll Need
The beauty of Red Velvet Cheesecake Balls lies in how effortlessly a handful of ingredients can transform into something so extraordinary. Each component shines, providing just the right balance of flavor, texture, and that signature pop of color.
- Red velvet cake mix (baked and cooled): The foundation for these bite-sized treats, giving the balls their gorgeous hue and hint of cocoa.
- Cream cheese (softened): This adds an irresistible creaminess and just the right touch of tang — the secret to that cheesecake flavor.
- Vanilla extract: A splash of vanilla brings a warm, fragrant note that rounds out the flavors beautifully.
- White chocolate (melted): For the glossy, decadent shell that makes these balls so eye-catching and deliciously sweet.
- Red velvet cake crumbs or red sprinkles (for garnish): These little touches add sparkle and a festive finish to every bite.
How to Make Red Velvet Cheesecake Balls
Step 1: Crumble the Cake
Once your red velvet cake has baked and cooled completely, break it apart into a large mixing bowl. Use your hands or a fork to crumble it into small, fine pieces — this step is a bit messy, but it’s oddly satisfying and ensures that your cheesecake balls will have a uniform, smooth texture.
Step 2: Mix in Cream Cheese and Vanilla
Add softened cream cheese and vanilla extract directly to the cake crumbs. Using a spatula (or your hands for some old-fashioned fun), blend everything together until you have a dough-like mixture. The cream cheese acts like a glue, binding the crumbs and creating that signature luscious, tangy base.
Step 3: Shape the Balls
Take generous tablespoons of the mixture and roll them between your palms into 1-inch balls. Even sizing ensures they look stunning when served and helps the white chocolate coat them evenly. Place each ball on a parchment-lined baking sheet as you go.
Step 4: Chill Until Firm
Pop the baking sheet with your Red Velvet Cheesecake Balls into the fridge for at least one hour. This step firms up the balls, making them solid enough to dip in chocolate without falling apart.
Step 5: Dip in White Chocolate
Melt the white chocolate until it’s silky smooth, then, one by one, lower the chilled balls into the chocolate. Use a fork to lift them out and let excess chocolate drip off so they keep a neat shape.
Step 6: Garnish and Set
While the chocolate is still wet, sprinkle each ball with extra cake crumbs or red sprinkles for a charming finishing touch. Let your Red Velvet Cheesecake Balls set at room temperature, or pop them back in the fridge for a quick chill. Once firm and glossy, they’re ready to steal the show!
How to Serve Red Velvet Cheesecake Balls

Garnishes
Giving your Red Velvet Cheesecake Balls a final flourish makes them truly irresistible. A shower of red velvet cake crumbs or a scattering of red sprinkles adds a pop of color and signals just how special these treats are. For an extra elegant touch, try drizzling them with a bit of melted dark chocolate for contrast or sprinkling on a dust of edible gold for special celebrations.
Side Dishes
While these decadent little bites can absolutely shine on their own, they also play well with others! Arrange them on a dessert platter alongside fresh berries, chocolate-dipped strawberries, or mini cups of espresso. They’re a perfect complement to a glass of sparkling wine or a cozy mug of coffee, transforming an ordinary evening into a mini celebration.
Creative Ways to Present
If you like to get crafty, there are limitless ways to make these treats stand out. For parties, skewer each Red Velvet Cheesecake Ball with a decorative toothpick and nestle them in mini cupcake liners. For gifting, pack them in a festive box lined with parchment and tied with a ribbon. You can even stack them into a tower for a dramatic dessert centerpiece that’s as fun to eat as it is to admire!
Make Ahead and Storage
Storing Leftovers
Leftovers, if you’re lucky enough to have them, will keep beautifully in an airtight container in the refrigerator for up to five days. The white chocolate keeps the cheesecake center moist, ensuring every bite stays creamy and flavorful. Just let them come to room temperature for a few minutes before serving so the centers soften up again.
Freezing
Want to get ahead for the holidays or a special event? Red Velvet Cheesecake Balls freeze like a dream! Store the finished balls in a single layer in an airtight container; they’ll keep perfectly for up to two months. Thaw in the fridge overnight before enjoying — the flavor and texture will be just as delightful as the day you made them.
Reheating
No need to reheat these treats! They’re best enjoyed chilled or at room temperature. If you’ve frozen them, simply allow them to thaw slowly in the fridge, then serve when softened. The texture stays creamy and the chocolate coating remains perfectly snappy.
FAQs
Can I use homemade red velvet cake instead of a cake mix?
Absolutely! Homemade red velvet cake works perfectly in this recipe. Just make sure it’s cooled completely before you start crumbling it up; a moist, slightly dense cake creates the best texture for rolling into balls.
What if I don’t have white chocolate for dipping?
No problem — you can use milk or dark chocolate instead, or even colored candy melts for a playful twist. Each coating brings a different flavor note, so pick your favorite or try a mix to please a crowd.
Can I make Red Velvet Cheesecake Balls in advance?
Definitely! These are one of the best make-ahead desserts. They’re ideal for parties or gifting, as you can prepare a big batch several days (or even weeks, if freezing) ahead of time. Simply store them in the fridge or freezer and garnish right before serving for the freshest look.
Can I add nuts or other mix-ins?
Of course! For extra texture, feel free to fold in some finely chopped pecans or walnuts, or toss in mini chocolate chips to the cake and cream cheese mixture before rolling. Just make sure your additions are finely chopped so the balls hold together well.
Are these Red Velvet Cheesecake Balls gluten free?
As written, this recipe uses a traditional red velvet cake mix that contains gluten. However, you can easily swap in a gluten-free cake mix and make sure your other ingredients are gluten free for a crowd-pleasing treat anyone can enjoy!
Final Thoughts
There’s something undeniably joyful about making and sharing Red Velvet Cheesecake Balls. They’re easy enough for a weekday craving, but impressive enough for the fanciest of gatherings. I hope you have as much fun making (and eating!) them as I do. Give them a try — your taste buds and your friends will thank you!
Print
Red Velvet Cheesecake Balls Recipe
- Total Time: 50 minutes + chilling
- Yield: 24 balls 1x
- Diet: Vegetarian
Description
These Red Velvet Cheesecake Balls are a delightful treat combining the flavors of red velvet cake with creamy cheesecake, all coated in white chocolate. Perfect for holiday gatherings or as a sweet indulgence any time of year.
Ingredients
For the Red Velvet Cake Balls:
- 1 box red velvet cake mix (baked and cooled)
- 8 ounces cream cheese (softened)
- 1 teaspoon vanilla extract
For Coating and Garnish:
- 12 ounces white chocolate (melted)
- 1/4 cup red velvet cake crumbs or red sprinkles
Instructions
- Bake the Red Velvet Cake: Prepare and bake the red velvet cake according to package instructions. Let it cool completely.
- Prepare the Cake Mixture: Crumble the cooled cake into fine crumbs in a mixing bowl. Add softened cream cheese and vanilla extract. Mix until well combined into a thick dough.
- Shape the Balls: Roll the mixture into 1-inch balls and place them on a parchment-lined baking sheet.
- Chill the Balls: Refrigerate the balls for at least 1 hour until firm.
- Coat with White Chocolate: Dip each ball into melted white chocolate, allowing excess to drip off. Place back on the sheet.
- Decorate: Immediately sprinkle with cake crumbs or red sprinkles before the chocolate sets.
- Set and Serve: Let the coating set at room temperature or in the refrigerator until firm before serving.
Notes
- Store the cheesecake balls in an airtight container in the refrigerator for up to 5 days.
- They can be frozen for up to 2 months; thaw before serving.
- For a festive touch, drizzle with melted dark chocolate as well.
- Prep Time: 20 minutes
- Cook Time: 30 minutes (cake baking)
- Category: Dessert, Confection
- Method: Baking, No-Bake Assembly
- Cuisine: American
Nutrition
- Serving Size: 1 ball
- Calories: 160
- Sugar: 14 g
- Sodium: 135 mg
- Fat: 9 g
- Saturated Fat: 5 g
- Unsaturated Fat: 3 g
- Trans Fat: 0 g
- Carbohydrates: 18 g
- Fiber: 0 g
- Protein: 2 g
- Cholesterol: 20 mg


