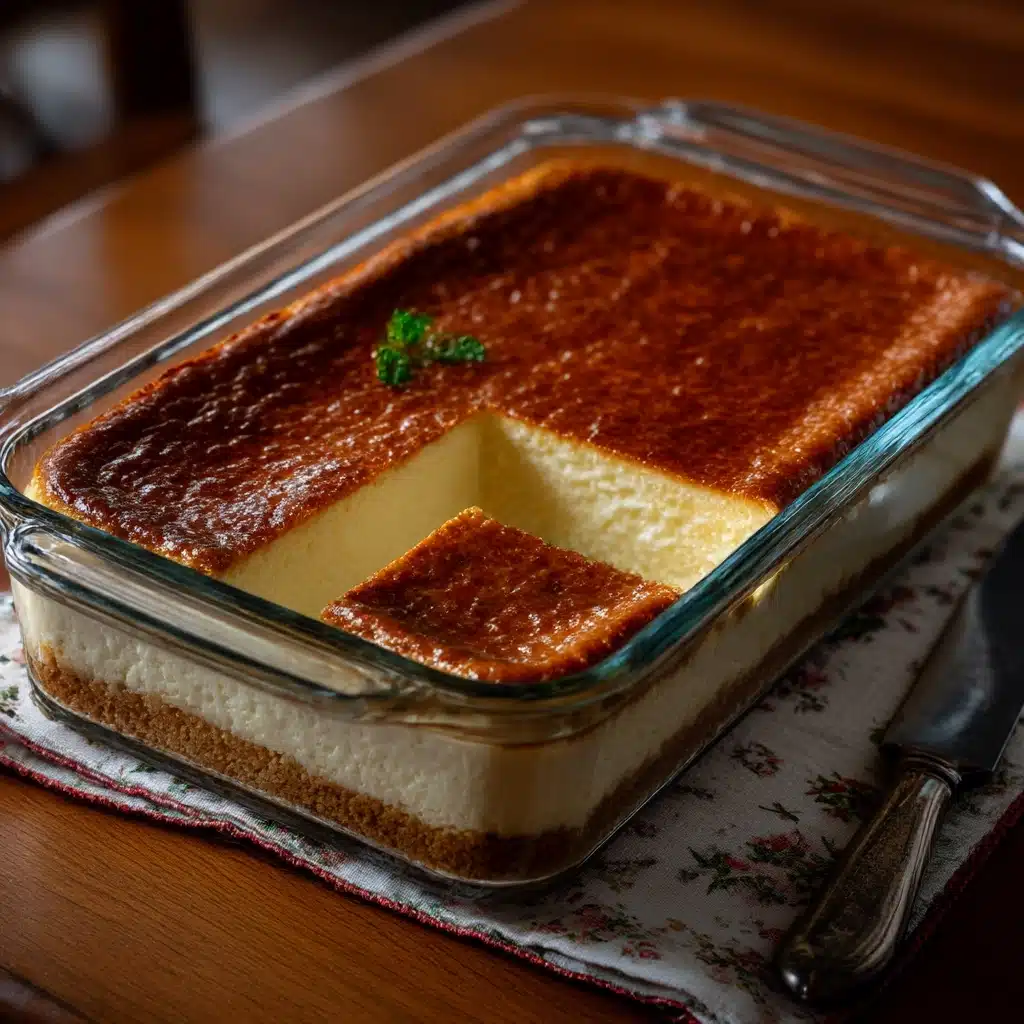
The Ricotta Self-Filling Cake is the kind of dessert that draws everyone to the kitchen from the first tempting aroma. This magical Italian-inspired treat forms its own tender crust and silky, creamy ricotta layer as it bakes — no fussy cake techniques required. Every bite is a perfect balance of buttery pastry and tangy-sweet ricotta filling, kissed with a hint of lemon and finished with a delicate powdered sugar snowfall. Whether for a cozy afternoon coffee break or to wow guests at the end of a meal, the Ricotta Self-Filling Cake brings an air of effortless elegance and true homemade comfort.
Ingredients You’ll Need
This Ricotta Self-Filling Cake shines with just a handful of kitchen staples, each playing a key role in creating its dreamy layers and flavor. Let’s look at what brings this cake to life and makes every bite so memorable.
- All-purpose flour: Provides the structure for both the top and bottom crust, giving that perfect crumbly texture.
- Granulated sugar: Sweetens the crust while complementing the tang of the ricotta.
- Baking powder: Adds a gentle lift for a softer bite.
- Salt: Just a touch enhances the overall flavors and keeps the cake from tasting flat.
- Unsalted butter (cold and cubed): Ensures a tender, melt-in-your-mouth crust with a rich buttery flavor.
- Vanilla extract: Brings a warm aroma and depth to both crust and filling.
- Large eggs (divided): One egg holds the crumbly crust together, while the other helps set and enrich the ricotta layer.
- Whole milk ricotta cheese: The star ingredient, it creates a delightfully creamy and luscious filling.
- Powdered sugar: Adds gentle sweetness to the ricotta filling without the graininess of regular sugar.
- Lemon zest (optional): Lends bright, fresh citrus notes that wake up every slice.
- Lemon juice (optional): Enhances the flavor and balances the cake’s sweetness.
- Powdered sugar for dusting (optional): Gives the finished cake a gorgeous, elegant touch.
How to Make Ricotta Self-Filling Cake
Step 1: Prep the Oven and Pan
Start by preheating your oven to 350°F (175°C) so it’s ready for baking. Generously grease a 9-inch springform pan to make sure your Ricotta Self-Filling Cake slips out effortlessly once baked. A springform is perfect here — it makes both baking and serving so much easier, keeping those beautiful edges intact.
Step 2: Mix the Dry Ingredients
Grab a medium bowl and whisk together the flour, granulated sugar, baking powder, and salt. This simple mix sets the foundation for both the crumbly crust and topping, and even distribution here means your bake will be even and balanced.
Step 3: Cut in the Butter
Add the cold, cubed butter to your dry mix. Use a pastry cutter or your fingers to work in the butter until it becomes a crumbly mixture that resembles coarse sand. Don’t rush this bit — those little butter pieces are what make the crust ultra-tender and flavorful in the Ricotta Self-Filling Cake.
Step 4: Add Vanilla and the First Egg
Pour in the vanilla extract and crack in one of the eggs. Mix gently just until it starts to come together as a sticky, crumbly dough. This ensures the dough is cohesive without losing its trademark crumbly texture.
Step 5: Press Half the Dough Into the Pan
Take half of your dough and press it firmly and evenly into the bottom of the prepared springform pan to form a thick, sturdy crust. Don’t worry if it seems crumbly — it will bake up beautifully and keep the ricotta filling from seeping through.
Step 6: Prepare the Ricotta Filling
In a clean bowl, blend together the ricotta, powdered sugar, lemon zest, lemon juice, and the second egg. Whisk until the mixture is silky-smooth and completely blended. The result is a luscious, fragrant filling that sets itself up in the oven — the secret to the Ricotta Self-Filling Cake’s name.
Step 7: Layer and Top
Pour the lovely, rich ricotta mixture over the crust. Smooth the top gently with a spatula, making sure it reaches all the edges. Then, scatter the remaining dough over the ricotta layer, leaving some bits big and some small for a gorgeous, rustic finish.
Step 8: Bake to Golden Perfection
Bake for 45–50 minutes until the top is a tempting golden brown and the center no longer jiggles. Your kitchen will smell amazing by this point! Cool the cake completely in the pan before releasing the sides. This rest time helps the filling to set perfectly.
Step 9: Add a Finishing Touch
Once the Ricotta Self-Filling Cake is completely cooled, dust the surface with powdered sugar. This not only adds a touch of sweetness but also gives your cake a classic, bakery-style finish. Now, all that’s left is to slice into it and enjoy!
How to Serve Ricotta Self-Filling Cake
Garnishes
A simple yet generous dusting of powdered sugar is all you need to make this cake look like it belongs in a pastry shop window. If you’re feeling fancy, add a few curls of lemon zest on top, or scatter some fresh berries around the sides for a pop of color and freshness.
Side Dishes
This Ricotta Self-Filling Cake is a dream alongside a cup of espresso or strong coffee. For something cool and creamy, serve it with a scoop of vanilla gelato or a dollop of whipped cream. It’s equally lovely next to a few orange slices or a fresh fruit salad, which highlight the cake’s bright citrus notes.
Creative Ways to Present
Try cutting the Ricotta Self-Filling Cake into small wedges and serving each one on a colorful dessert plate. You could also layer slices with fresh fruit in parfait glasses for a modern touch, or top each piece with a sprig of mint. For a festive occasion, add candied citrus peel curls for sparkle and crunch. Every serving style brings a different personality to this delightful dessert.
Make Ahead and Storage
Storing Leftovers
If you happen to have any leftover Ricotta Self-Filling Cake, wrap it snugly in plastic wrap or place it in an airtight container. Store it in the refrigerator for up to 4 days. The flavors and texture actually improve after a night in the fridge, letting everything meld together.
Freezing
To freeze, wrap the cooled, unsugared cake (or individual slices) tightly in plastic wrap and then in foil. It keeps beautifully in the freezer for up to 2 months. When you’re ready to serve, thaw in the fridge overnight and then dust with powdered sugar just before serving to refresh the look and taste.
Reheating
This cake is wonderful cold, but if you’d like a slightly warmed slice, pop it in the microwave for 10–15 seconds or reheat gently in a low oven, wrapped loosely in foil. Avoid overheating, as the ricotta layer can dry out if too hot.
FAQs
Can I use part-skim ricotta instead of whole milk ricotta?
Yes, you can substitute part-skim ricotta, though the filling will be slightly less rich and creamy. Whole milk ricotta really gives the best texture for Ricotta Self-Filling Cake, but part-skim works in a pinch.
What’s the best way to tell when the cake is done?
The top should be golden brown and the center set — it shouldn’t jiggle when you gently shake the pan. If you’re unsure, insert a toothpick in the center; it should come out mostly clean with just a few moist crumbs.
Can I make Ricotta Self-Filling Cake a day ahead?
Absolutely! This cake actually develops even better flavor and texture after chilling. Bake it the day before, cool, wrap, and refrigerate overnight. Just give it a fresh dusting of powdered sugar before serving.
Is it necessary to use a springform pan?
While you can use a regular cake pan lined with parchment, a springform pan makes it so much easier to release and present the cake without damaging the delicate layers. If you love baking, it’s a worthwhile little investment!
Can I swap the lemon for orange in the filling?
Definitely! Orange zest and juice are delicious in Ricotta Self-Filling Cake, bringing a different citrus vibe. Feel free to experiment with your favorite flavor combinations — even a dash of almond extract can be lovely.
Final Thoughts
If you’ve been searching for a show-stopping dessert that’s as easy as it is impressive, you have to try Ricotta Self-Filling Cake. From its creamy filling to its crumbly crust, every bite feels like an invitation to slow down and savor. I hope it becomes a beloved staple in your baking rotation, ready to bring joy to gatherings and quiet evenings alike.
Print
Ricotta Self-Filling Cake Recipe
- Total Time: 1 hour 5 minutes
- Yield: 8 slices
- Diet: Vegetarian
Description
Indulge in the delightful flavors of this Ricotta Self-Filling Cake, a luscious Italian dessert that combines a crumbly crust with a creamy ricotta filling. Perfect for any occasion, this cake is a true crowd-pleaser.
Ingredients
Crust:
1 1/4 cups all-purpose flour, 1/2 cup granulated sugar, 1/2 teaspoon baking powder, 1/4 teaspoon salt, 1/2 cup unsalted butter (cold and cubed), 1 teaspoon vanilla extract, 1 large egg
Ricotta Filling:
1 1/4 cups whole milk ricotta cheese, 1/3 cup powdered sugar, zest of 1 lemon (optional), 1 tablespoon lemon juice (optional)
powdered sugar for dusting (optional)
Instructions
- Preheat the Oven: Preheat the oven to 350°F (175°C) and grease a 9-inch springform pan.
- Prepare the Crust: In a medium bowl, mix flour, sugar, baking powder, and salt. Add cold butter and blend until it resembles coarse crumbs. Add vanilla and egg, mix gently to form a crumbly dough. Press half of the dough into the pan.
- Make the Ricotta Filling: In another bowl, mix ricotta, powdered sugar, lemon zest, lemon juice, and egg until smooth. Pour over the crust.
- Bake: Crumble remaining dough over the filling. Bake for 45–50 minutes until golden brown and set. Let cool before serving.
Notes
- This cake tastes better when chilled, so consider making it a day ahead.
- You can use orange zest instead of lemon for a citrus variation.
- Prep Time: 15 minutes
- Cook Time: 50 minutes
- Category: Dessert
- Method: Baking
- Cuisine: Italian
Nutrition
- Serving Size: 1 slice
- Calories: 310
- Sugar: 18g
- Sodium: 160mg
- Fat: 18g
- Saturated Fat: 11g
- Unsaturated Fat: 6g
- Trans Fat: 0g
- Carbohydrates: 28g
- Fiber: 1g
- Protein: 9g
- Cholesterol: 90mg


