
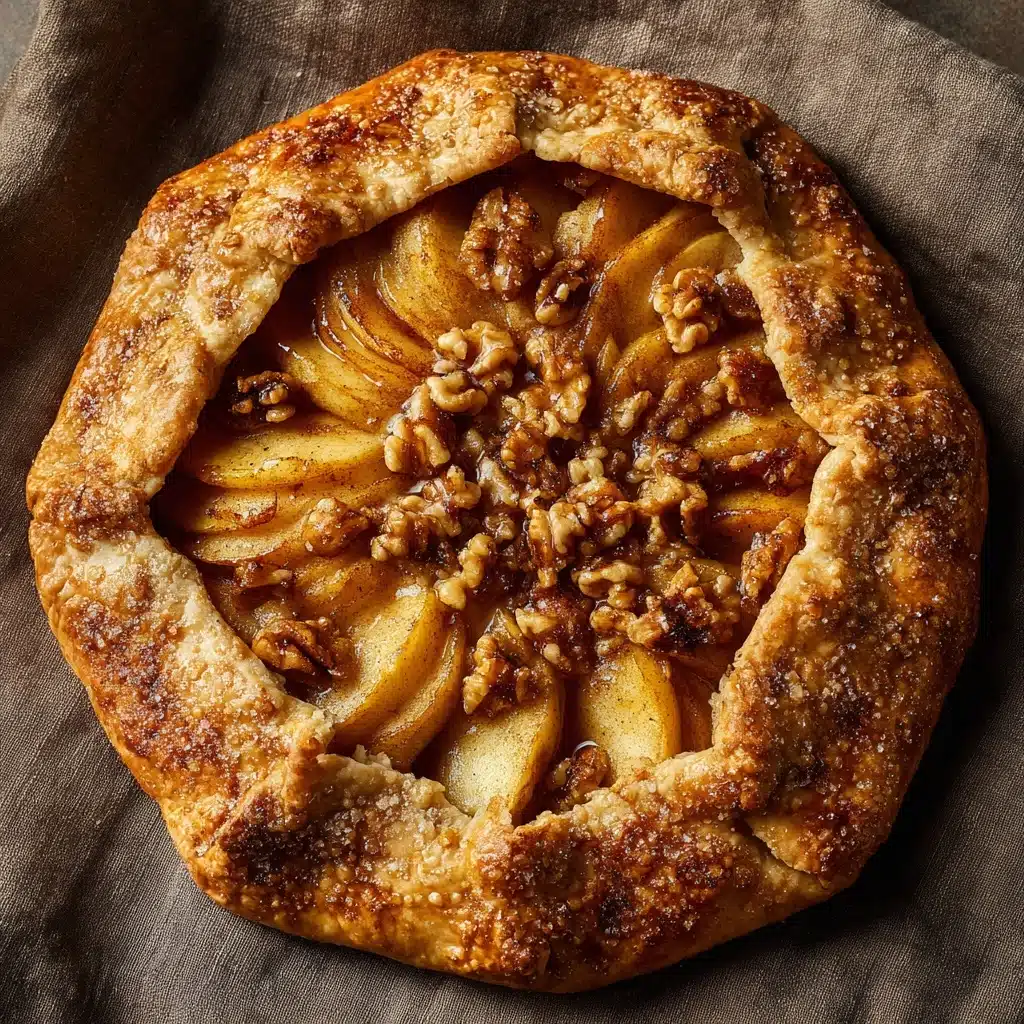
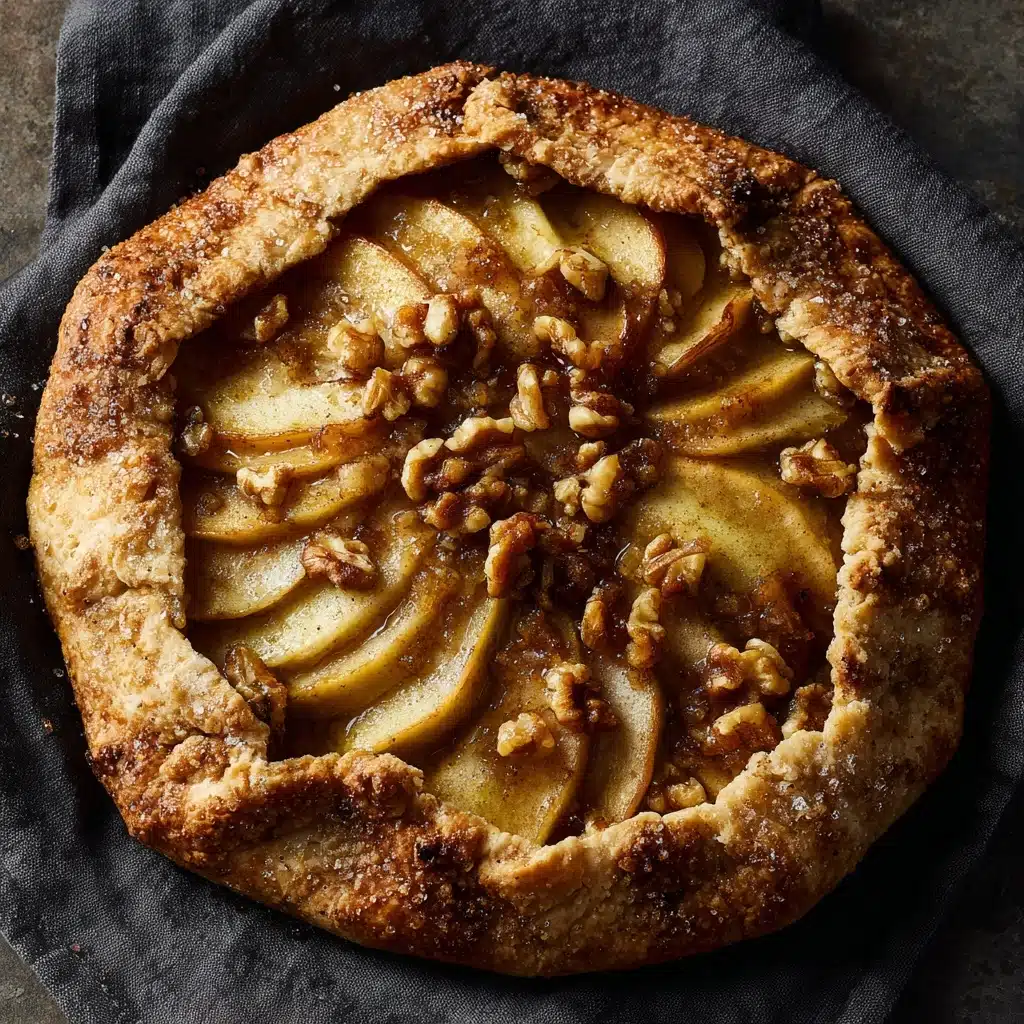
Treat yourself to a showstopper that looks like it came straight out of a countryside bakery window: the Rustic Pear and Walnut Crostata. This simple yet elegant dessert folds ripe pears and crunchy walnuts into a golden, buttery pastry, capturing the flavors of fall and that homemade touch we all crave. You’ll love how this free-form tart is as easy to make as it is impressive, and every bite promises a blend of tender fruit, warm spices, and a satisfyingly crisp crust. Whether served with a scoop of ice cream or a drizzle of honey, it’s a dessert that welcomes you in.
Ingredients You’ll Need
For this Rustic Pear and Walnut Crostata, each ingredient is carefully chosen to build layers of flavor and texture, while keeping the process delightfully straightforward. You’ll find that even pantry staples contribute something special, from the buttery pastry to the spiced pear filling.
- All-purpose flour: Forms the foundation of a tender, flaky crust that holds everything together beautifully.
- Granulated sugar: Adds the perfect touch of sweetness both in the dough and the filling.
- Salt: Just a bit enhances all the flavors in both the crust and filling.
- Unsalted butter, chilled and cubed: Using cold butter is essential for a flaky, irresistible crust—work quickly to keep it cold!
- Ice water: The secret weapon for bringing your dough together without melting the butter.
- Ripe pears, peeled, cored, and thinly sliced: Go for pears that are just soft enough; they’ll turn lusciously tender while baking.
- Chopped walnuts: Their earthy crunch offers a lovely contrast to soft baked pears.
- Light brown sugar: Brings a gentle caramel note to the filling.
- Additional granulated sugar: For the filling, a pinch helps highlight the pears’ natural sweetness.
- Ground cinnamon: A classic spice that adds warmth and depth without overpowering the fruit.
- All-purpose flour (for filling): Thickens any juices so your crostata stays beautifully crisp.
- Lemon juice: Both brightens the flavor and keeps the pears from browning.
- Egg (beaten, for egg wash): A quick brush gives the crust that gorgeous golden sheen.
- Coarse sugar (optional): Sprinkled on top, it sparkles and creates a delicately crunchy finish.
How to Make Rustic Pear and Walnut Crostata
Step 1: Make the Crust
Begin by whisking together your flour, sugar, and salt in a large bowl. Cut in the chilled butter, working quickly with a pastry cutter or the tips of your fingers, until the mixture looks like coarse crumbs—that’s the key to a flaky, unforgettable crust. Add the ice water slowly, just until the dough starts to come together (don’t overmix!). Shape it into a disk, wrap tightly in plastic, and let it chill for at least 30 minutes so the flour can relax and the butter stays cold.
Step 2: Prepare the Pear Filling
While your dough chills, combine the thinly sliced pears with walnuts, the duo of brown and granulated sugar, cinnamon, a touch of flour, and a squeeze of lemon juice. Toss everything gently so the pears are evenly coated. This mix not only ensures a flavorful, aromatic filling, but it also captures the natural juices of the fruit for a perfectly textured result when baked.
Step 3: Roll Out the Dough
Dust your surface lightly with flour and roll out the cold dough into a rough 12-inch circle. Don’t fret about making it perfectly round—the charm of a Rustic Pear and Walnut Crostata is in its uneven, cozy appearance. Transfer the rolled-out dough to a parchment-lined baking sheet to make assembly a breeze.
Step 4: Assemble the Crostata
Pile your prepared pear and walnut mixture right in the center of the dough, leaving a 2-inch border all around. Fold that border over the filling, pleating it as you go so it hugs the fruit in a rustic, free-form crust. No tart pans and no perfection required—just a natural, homey look. Brush the crust generously with beaten egg and, if you’re feeling festive, sprinkle on a bit of coarse sugar for extra sparkle.
Step 5: Bake to Golden Perfection
Bake your crostata in a preheated 400°F oven for 30 to 35 minutes. You’ll know it’s ready when the crust is golden brown and the pears are bubbling and tender. Let it cool for a bit on the pan—this helps the filling set—before transferring to a rack or slicing straight from the sheet.
How to Serve Rustic Pear and Walnut Crostata
Garnishes
A warm slice of Rustic Pear and Walnut Crostata is delightful on its own, but a few garnishes can really take it over the top. Try a dusting of powdered sugar, a scoop of vanilla ice cream, or a drizzle of honey to add extra indulgence. A spoonful of whipped cream is never out of place either!
Side Dishes
Give your dessert plate the company it deserves. Pair your crostata with a refreshing fruit salad, a cozy mug of spiced tea, or a tumbler of crisp white wine. For brunch, it’s right at home next to creamy Greek yogurt or a handful of fresh berries.
Creative Ways to Present
Celebrate the homespun look of your crostata by serving it directly on its parchment for a true rustic vibe, or slice it into wedges and display on a wooden board with some extra walnuts scattered around. For special occasions, individual mini crostatas are a charming touch—just adjust the baking time accordingly.
Make Ahead and Storage
Storing Leftovers
If you have any leftover Rustic Pear and Walnut Crostata (a rare occurrence!), cover it loosely with foil or plastic wrap and keep it at room temperature for up to one day. After that, move it to the fridge, where it will stay tasty for another two days—though the crust may soften slightly.
Freezing
You can freeze the baked crostata, wrapped well, for up to one month. For best results, let it cool completely, wrap tightly in plastic wrap and then in foil to prevent freezer burn. Thaw overnight in the refrigerator before reheating.
Reheating
To enjoy your crostata warm, reheat slices in a 350°F oven for about 10 minutes, or until heated through and the crust is crisp again. Avoid the microwave, as it tends to make the crust soggy.
FAQs
Can I use apples instead of pears for this crostata?
Absolutely! Apples are a wonderful substitute for pears in the Rustic Pear and Walnut Crostata, though you may want to choose a sweet, crisp variety that bakes well, like Honeycrisp or Fuji. Adjust the sugar slightly based on the apple’s sweetness.
How do I know when the crostata is fully baked?
Your crostata is ready when the crust has a deep golden color, and the filling is bubbling gently—the pears should be fork-tender and aromatic. If the edges brown too quickly, tent with a bit of foil for the final minutes.
Can I make the dough ahead of time?
Yes! The pastry dough for your Rustic Pear and Walnut Crostata can be made up to two days ahead and kept refrigerated. You can also freeze the dough disk and let it thaw overnight in the fridge when you’re ready to bake.
What other nuts can I use besides walnuts?
Pecans are a lovely alternative and bring a buttery richness to the crostata. If you like, try almonds or hazelnuts for a different spin—but chop them coarsely so you still get that pleasant crunch.
Can I make this crostata gluten free?
Certainly! Simply swap the all-purpose flour with a gluten-free flour blend intended for baking. Just be sure your blend includes xanthan gum for structure, and check the consistency of your dough as you go.
Final Thoughts
Once you try the Rustic Pear and Walnut Crostata, you’ll find yourself dreaming up new variations for every season and occasion. It’s the kind of dessert that’s as fulfilling to make as it is to share, filling your kitchen with warmth and sweet aromas. Gather your pears, roll out the dough, and let yourself enjoy a little rustic magic—you absolutely deserve it!
Print
Rustic Pear and Walnut Crostata Recipe
- Total Time: 1 hour 5 minutes (plus chill time)
- Yield: 6 servings 1x
- Diet: Vegetarian
Description
Indulge in the delightful flavors of this Rustic Pear and Walnut Crostata, a perfect combination of sweet pears, crunchy walnuts, and warm spices nestled in a flaky, buttery crust. This easy-to-make dessert is a wonderful treat for any occasion.
Ingredients
Dough:
- 1 1/4 cups all-purpose flour
- 1 tablespoon granulated sugar
- 1/4 teaspoon salt
- 8 tablespoons unsalted butter, chilled and cubed
- 3–4 tablespoons ice water
Filling:
- 3 medium ripe pears, peeled, cored, and thinly sliced
- 1/4 cup chopped walnuts
- 2 tablespoons light brown sugar
- 1 tablespoon granulated sugar
- 1/2 teaspoon ground cinnamon
- 1 tablespoon all-purpose flour
- 1 teaspoon lemon juice
Finishing:
- 1 egg, beaten (for egg wash)
- Coarse sugar for sprinkling (optional)
Instructions
- Dough Preparation: In a large bowl, whisk together flour, sugar, and salt. Cut in the chilled butter until mixture resembles coarse crumbs. Drizzle in ice water, one tablespoon at a time, until dough just comes together. Form into a disk, wrap, and chill for at least 30 minutes.
- Filling: Preheat oven to 400°F (200°C). Toss pears with walnuts, sugars, cinnamon, flour, and lemon juice. Roll out dough into a 12-inch circle on a floured surface. Transfer to a baking sheet.
- Assembly: Pile pear mixture in the center of the dough, leaving a border. Fold edges over filling, pleating as needed. Brush with egg wash and sprinkle with coarse sugar.
- Baking: Bake for 30-35 minutes until golden and pears are tender. Cool slightly before serving.
Notes
- Serve warm with vanilla ice cream or honey.
- Substitute pecans for walnuts if desired.
- Prep Time: 30 minutes
- Cook Time: 35 minutes
- Category: Dessert
- Method: Baking
- Cuisine: French-American
Nutrition
- Serving Size: 1 slice
- Calories: 310
- Sugar: 14g
- Sodium: 100mg
- Fat: 17g
- Saturated Fat: 9g
- Unsaturated Fat: 7g
- Trans Fat: 0g
- Carbohydrates: 38g
- Fiber: 3g
- Protein: 4g
- Cholesterol: 50mg


