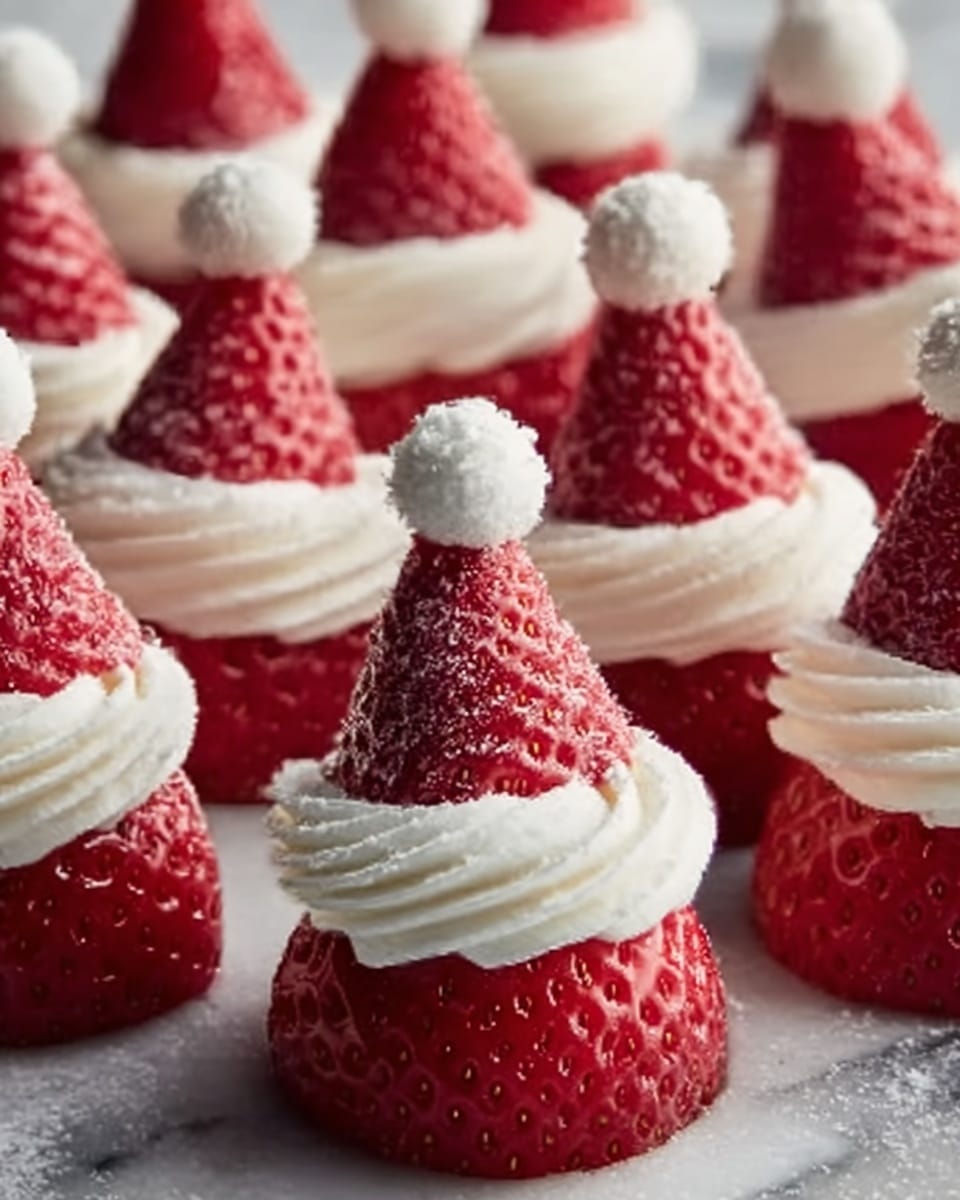
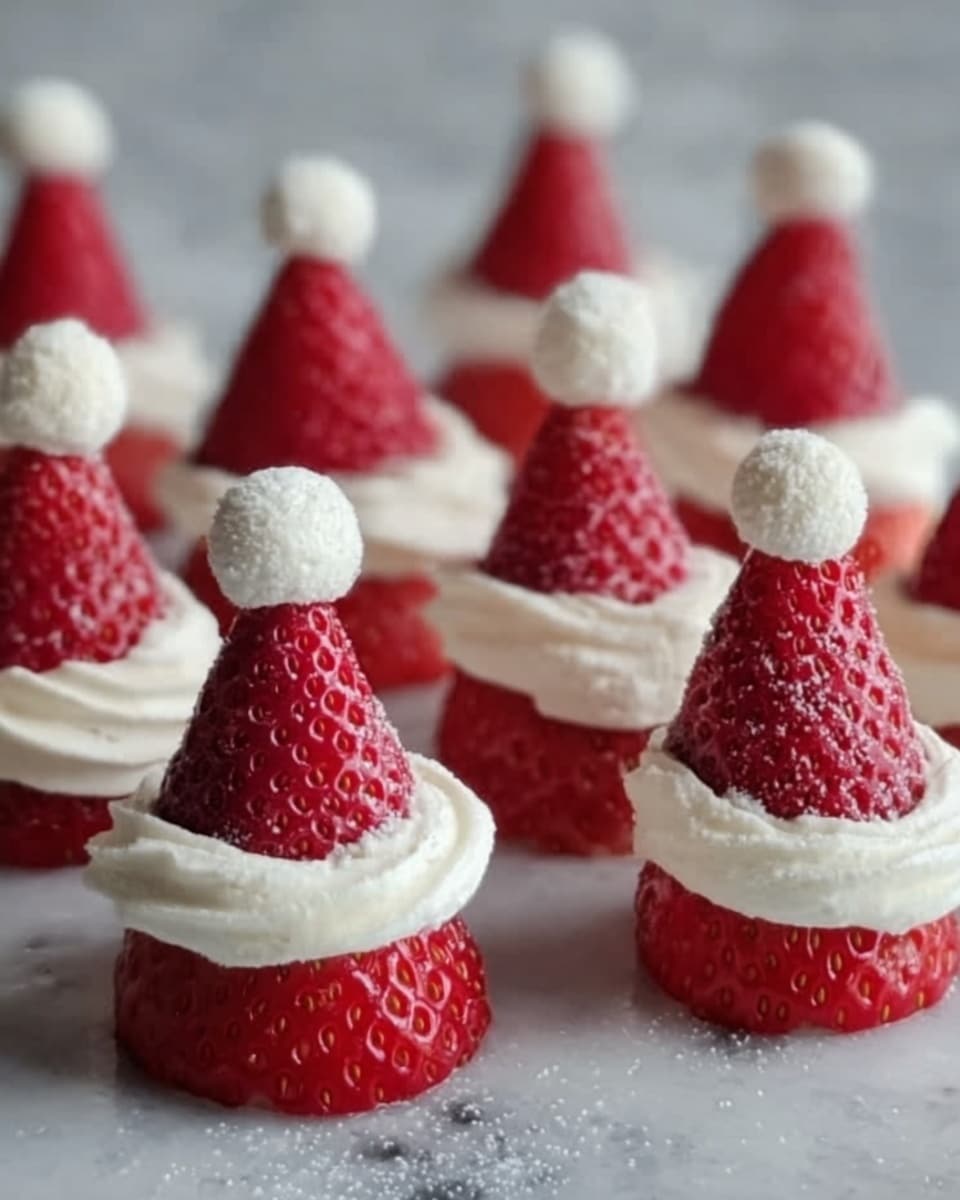
If you’re looking for a festive treat that’s as charming as it is delicious, the Strawberry Santas Recipe is going to steal your heart. These adorable little delights combine juicy, fresh strawberries with fluffy whipped cream to create the perfect bite-sized Santa figures. Not only do they look dazzling on any holiday table, but they also bring a lovely balance of sweetness and freshness that everyone will adore. Whether you’re whipping them up for a party, a kids’ event, or just a whimsical snack, this recipe brings cheer and smiles with every bite.
Ingredients You’ll Need
Gathering simple ingredients is the best part of this recipe. Each one plays a vital role—from the bright red strawberries that bring color and natural sweetness to the rich whipped cream that adds texture and creaminess. The little extras give each Strawberry Santa its personality and holiday charm.
- Fresh strawberries: Choose large, evenly shaped berries to give your Santas a sturdy and festive foundation.
- Heavy whipping cream: This adds luscious, fluffy texture and acts as Santa’s fluffy beard and hat trim.
- Powdered sugar: Sweetens the whipped cream just right without overpowering the natural strawberry flavor.
- Vanilla extract: A touch of vanilla enhances the whipped cream’s flavor and lends warmth to the creaminess.
- Mini chocolate chips or black sesame seeds: Perfect for Santa’s twinkling eyes—small details that bring him to life.
- Optional small candies or sprinkles: For buttons or extra decoration, adding a fun and festive touch.
How to Make Strawberry Santas Recipe
Step 1: Prep the Strawberries
Start by washing and drying your strawberries thoroughly to remove any dirt but keeping their freshness intact. Cut off the green stem ends carefully so that each strawberry can stand upright without wobbling. Then slice off about a quarter from the pointed tip of each berry; this piece will become Santa’s iconic red hat.
Step 2: Whip Up That Creamy Magic
In a chilled bowl, beat the heavy whipping cream along with powdered sugar and vanilla extract until stiff peaks form—this means when you lift the whisk, the cream holds its shape firmly. A perfectly whipped cream is crucial because it acts as both Santa’s snowy beard and his hat’s fluffy trim. Transfer this creamy cloud to a piping bag or a zip-top bag with a small corner cut off for easy decorating.
Step 3: Assemble Your Santa Figures
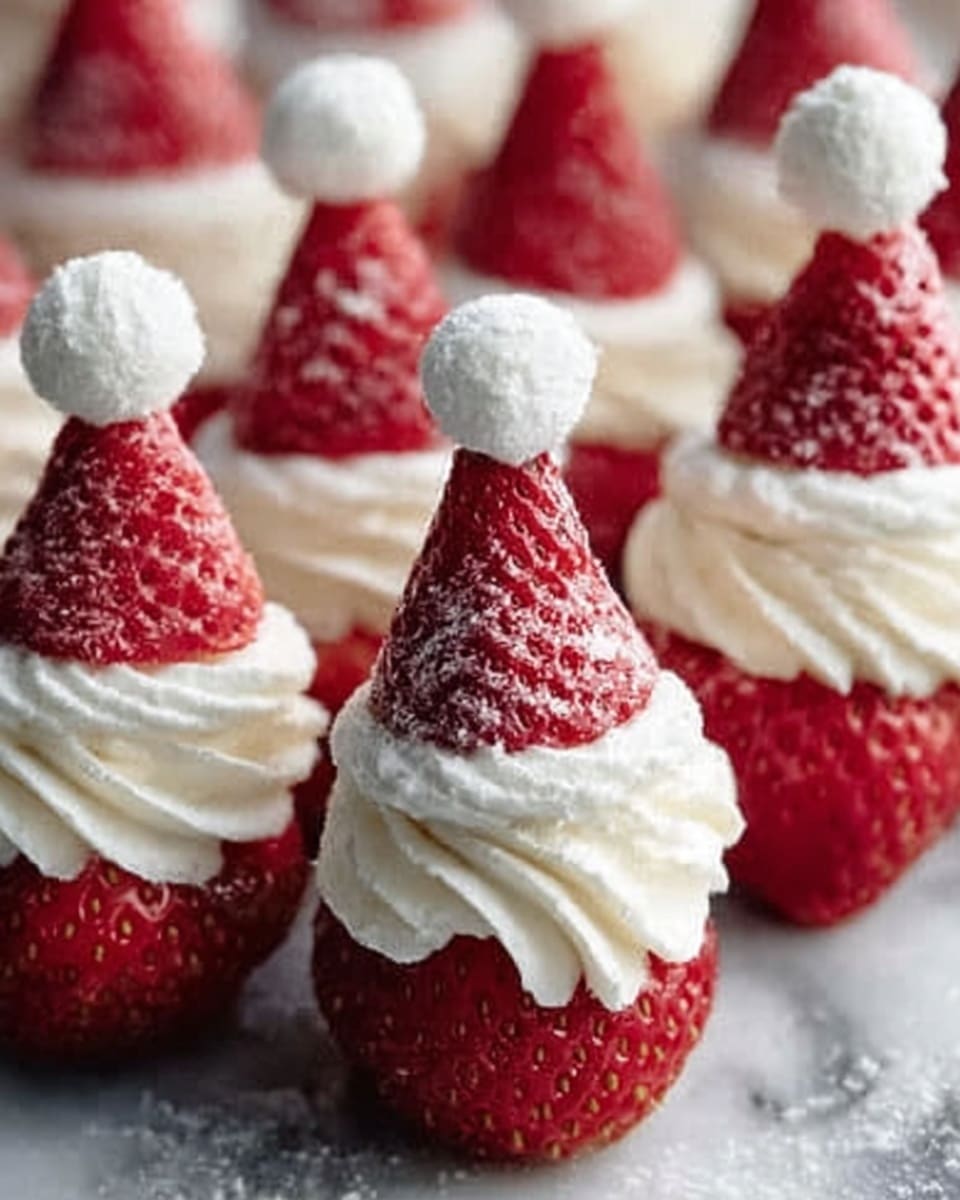
Pipe a generous swirl of whipped cream onto the flat base of the strawberry—it will look like Santa’s face and beard. Then place the reserved pointed strawberry tip back on top to serve as the lively red hat. Add a small whipped cream dollop on the hat tip to mimic the classic fluffy pom-pom.
Step 4: Add the Final Facial Features
Bring your Santas to life by gently pressing mini chocolate chips or black sesame seeds into the whipped cream for eyes. If you want to jazz them up a little more, add tiny whipped cream dots or colorful candies down the front to serve as buttons. These delightful details make every Strawberry Santa unique and irresistibly cute.
Step 5: Chill or Serve Immediately
Strawberry Santas are best enjoyed fresh, so serve them right away for maximum charm and flavor. If you need to make them in advance, keep them chilled in the fridge but no longer than two hours to maintain their texture and freshness.
How to Serve Strawberry Santas Recipe
Garnishes
Adding extra garnishes can make your Strawberry Santas even more eye-catching. Think edible glitter to add sparkle, fresh mint leaves to bring a pop of green, or a light dusting of powdered sugar resembling a frosty snow effect. These small touches elevate the presentation without complicating the recipe.
Side Dishes
These darling treats pair well with other simple sides like a bowl of mixed nuts, an assortment of cheeses, or a colorful fruit platter. They’re especially wonderful alongside hot cocoa, eggnog, or your favorite holiday punch to create a sweet and balanced festive spread.
Creative Ways to Present
You can serve the Strawberry Santas on a beautiful platter dusted with powdered sugar for a snowy effect, or stick them on decorative skewers for a fun party display. Another idea is arranging them on mini cupcake liners, turning each Santa into an individual party favor. The possibilities to make this recipe the star of your table are endless!
Make Ahead and Storage
Storing Leftovers
If you happen to have leftovers, keep your Strawberry Santas in an airtight container in the refrigerator for up to 2 hours. Beyond that, the whipped cream may lose its fluffiness and the strawberries can release water, affecting texture and appearance.
Freezing
Unfortunately, freezing isn’t ideal for this recipe. The whipped cream will not hold up well after thawing, and the strawberries’ texture can become mushy, which means your Strawberry Santas may lose the charm that makes them special.
Reheating
Since this is a fresh, no-cook dessert, reheating is not recommended. Best enjoyed chilled or at cool room temperature to preserve the perfect balance of flavors and textures.
FAQs
Can I use frozen strawberries for this recipe?
It’s best to use fresh strawberries because frozen ones tend to be mushy and watery, which can make assembling the Santas tricky and affect the overall texture.
Can I substitute the whipped cream with something else?
While the whipped cream is key to the classic look and taste of Strawberry Santas, you could try whipped coconut cream for a dairy-free option, though flavor and consistency might differ slightly.
How far in advance can I prepare the Strawberry Santas Recipe?
These are best made no more than 2 hours before serving to keep the whipped cream fresh and the strawberries firm.
What other decorations can I add besides mini chocolate chips?
Small edible decorations like candy eyes, colored sugar sprinkles, or even tiny chocolate pearls work beautifully as alternative eyes and buttons.
Is this recipe kid-friendly?
Absolutely! Strawberry Santas Recipe is a fun and safe treat for kids to both enjoy and help assemble, making it a great holiday activity for little hands.
Final Thoughts
There is something truly joyful about creating and sharing the Strawberry Santas Recipe. It’s a delightful combination of simplicity, flavor, and festive fun that brings a bit of magic to any gathering. I encourage you to give this recipe a try and watch how these sweet little Santas become an instant holiday favorite in your home.
Print
Strawberry Santas Recipe
- Total Time: 15 minutes
- Yield: 12 servings 1x
- Diet: Vegetarian
Description
Strawberry Santas are a delightful and festive no-bake dessert perfect for holiday gatherings. These charming treats are made by assembling fresh strawberries with whipped cream to create the look of Santa Claus, complete with a creamy beard, a hat, and adorable facial features. Quick to prepare and visually appealing, they make a fun and delicious addition to any celebration.
Ingredients
Strawberries
- 1 pint fresh strawberries (choose large, evenly shaped ones)
Whipped Cream
- ½ cup heavy whipping cream
- 1–2 tbsp powdered sugar (to taste)
- ½ tsp vanilla extract
Decorations
- Mini chocolate chips or black sesame seeds (for eyes)
- Optional: small candies or sprinkles for buttons
Instructions
- Prep the strawberries: Wash and dry the strawberries thoroughly to remove any dirt. Cut off the stem end so each berry can stand flat on its base. Then, slice off about ¼ of the pointed tip to form the Santa’s “hat.”
- Make the whipped cream: In a chilled bowl, beat the heavy whipping cream with powdered sugar and vanilla extract until stiff peaks form. This whipped cream will serve as Santa’s face and beard. Transfer the whipped cream to a piping bag or a zip-top plastic bag with a small corner snipped off for easy piping.
- Assemble the Santas: Pipe a generous swirl of whipped cream on the flat base of each strawberry to create the face and beard. Then, place the top portion of the strawberry (the “hat”) back on top of the whipped cream, and add a small dot of whipped cream to the tip of the hat for a snowy effect.
- Decorate the face: Use mini chocolate chips or black sesame seeds to add eyes to Santa’s face. Optionally, add two small whipped cream buttons on the front of the strawberry for extra decoration and festive flair.
- Chill or serve immediately: These treats are best served fresh. If you prefer to prepare them ahead of time, store the assembled Santas in the refrigerator and serve within 2 hours for optimal freshness and appearance.
Notes
- Choose large, firm, and evenly shaped strawberries for the best visual effect and easier assembly.
- Make sure the whipped cream is chilled before whipping to achieve stiff peaks.
- Serve the Strawberry Santas shortly after assembly to prevent the whipped cream from melting or the strawberries from becoming soggy.
- These can be a fun activity to assemble with kids for holiday parties.
- For a sugar-free version, consider using a sugar substitute in the whipped cream.
- Prep Time: 10 minutes
- Cook Time: 0 minutes
- Category: Dessert
- Method: No-Cook
- Cuisine: American
