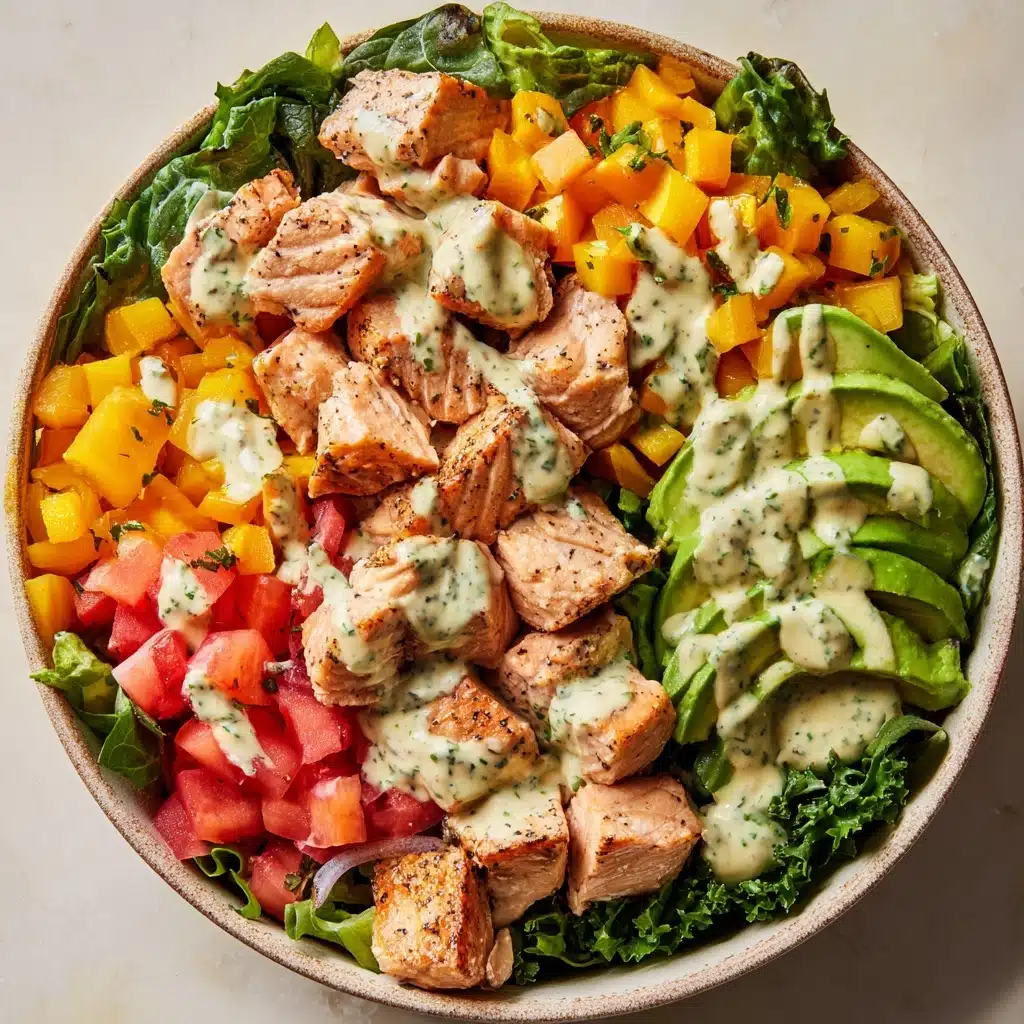
If you’re looking for a salad that’s as vibrant and satisfying as it is steeped in tradition, The Oliver’s Salad is about to become your new favorite. Imagine creamy potatoes, sweet carrots, juicy chicken, briny pickles, and pops of green pea all mingling with a luscious mayo-mustard dressing. This Russian classic, also known as Olivier Salad, brings bold flavor to every bite while remaining irresistibly familiar. Whether you’re gathering friends for a festive spread or simply want a quick, nourishing meal to lift your week, The Oliver’s Salad is here to delight.

Ingredients You’ll Need
The magic of The Oliver’s Salad lies in its simple-yet-essential lineup of ingredients. Each element infuses the dish with a unique layer of taste, crunch, or creaminess, making every scoop an experience in flavor and color.
- Potatoes (3 medium, boiled and diced): The creamy backbone of the salad, giving substance and comfort to every bite.
- Carrots (2 medium, boiled and diced): For a hint of sweetness and a burst of cheery orange color.
- Cooked chicken breast (1 cup, diced): Adds protein and delicate savory notes that anchor the salad.
- Canned peas (1/2 cup, drained): A classic pop of green and slight earthiness, balancing out the richness.
- Hard-boiled eggs (3 large, diced): These bring velvety texture and extra heartiness to the mix.
- Dill pickles (4 small, finely chopped): Expect a salty, tangy crunch in every forkful.
- Green onions (1/4 cup, finely chopped): For freshness and a little sharpness that keeps the salad lively.
- Mayonnaise (3/4 cup): The creamy, comforting glue binding every ingredient together.
- Dijon mustard (1 tablespoon): Secret weapon alert! This boosts tang and adds depth to the mayo.
- Salt and black pepper (to taste): Don’t skip a final seasoning; it’s essential for harmony.
- Fresh dill (optional, for garnish): A sprinkle just before serving makes the whole bowl feel special.
How to Make The Oliver’s Salad
Step 1: Cook and Dice the Vegetables
Begin by boiling the potatoes and carrots just until they’re fork-tender but not falling apart; about 20 minutes should do the trick. Once they’re cool enough to handle, dice them into small, even cubes. This step ensures every bite of The Oliver’s Salad will have that perfect, comforting texture without turning mushy.
Step 2: Combine the Main Ingredients
Grab your largest mixing bowl—trust me, this is a generous salad! Add the diced potatoes, carrots, cooked chicken breast, drained peas, chopped hard-boiled eggs, those dill pickles, and snappy green onions. Gently toss everything together so the flavors mingle but the veggies keep their shape.
Step 3: Make the Creamy Dressing
In a separate bowl, whisk together mayonnaise and Dijon mustard. This simple duo forms the unforgettable creamy-tangy dressing that makes The Oliver’s Salad so crave-worthy. You can adjust the ratio to suit your tastes—prefer a punchier tang? Add a touch more mustard.
Step 4: Mix and Season
Pour the dressing over your vibrant salad ingredients, then gently fold until everything is evenly coated and glistening. Finish with salt and black pepper to taste. This is where patience pays off: give the salad a taste and add another sprinkle of either if needed.
Step 5: Chill and Garnish
Pop the whole bowl into the refrigerator for at least an hour. This chilling time gives flavors a chance to meld and intensify, turning The Oliver’s Salad into a cohesive masterpiece. Right before serving, crown it with freshly chopped dill if you like your salads with a herbal, aromatic finish.
How to Serve The Oliver’s Salad

Garnishes
A simple shower of fresh dill on top not only brightens up The Oliver’s Salad but also infuses it with a lovely fragrance. You can even add extra slices of boiled egg or a few more chopped pickles for a gourmet finish.
Side Dishes
This salad pairs beautifully with thick slices of crusty bread or rye to soak up the luscious dressing. For a full Russian-inspired meal, serve alongside smoked fish, cured meats, or hearty soups. The Oliver’s Salad is also fantastic as part of a potluck spread.
Creative Ways to Present
Serve The Oliver’s Salad in small glass cups for individual starters, or use a ring mold to shape it into elegant towers for a dinner party. For picnics, spoon it into jars for grab-and-go ease. Sprinkle each serving with a few peas or a tiny dill sprig to make them pop with color and freshness.
Make Ahead and Storage
Storing Leftovers
Keep leftover Oliver’s Salad in an airtight container in the refrigerator for up to three days. The flavors actually intensify over time, making tomorrow’s lunch even tastier than today’s.
Freezing
Freezing The Oliver’s Salad isn’t recommended since ingredients like potatoes and mayonnaise-based dressings can become watery and lose their signature texture once thawed.
Reheating
No need to reheat! The Oliver’s Salad is meant to be enjoyed chilled or at cool room temperature. Just give it a gentle stir before serving again, and you’re all set.
FAQs
Can I use ham or bologna instead of chicken?
Absolutely! Ham and bologna are both traditional choices for Olivier salad, lending a saltier, even more nostalgic flavor profile. Just dice and add in place of the chicken.
Is The Oliver’s Salad suitable for gluten-free diets?
Yes, The Oliver’s Salad is naturally gluten-free, as long as your mustard and pickles are gluten-free. Always check ingredient labels to be sure if you’re cooking for someone with celiac or sensitivities.
How far in advance can I make The Oliver’s Salad?
It’s best when made at least a few hours in advance—up to a full day—since the flavors deepen over time. Just wait to garnish until right before serving for peak freshness.
Can I lighten up the dressing?
Definitely! Swap in half Greek yogurt for some of the mayonnaise or use a lighter mayo. This will keep The Oliver’s Salad creamy but make it a bit gentler on the waistline.
What type Salad
Waxy potatoes like Yukon Gold or red potatoes are best because they hold their shape after boiling and stay creamy. Avoid starchy baking potatoes, which can become crumbly.
Final Thoughts
I hope you fall in love with The Oliver’s Salad just as much as I have. Its creamy delight, colorful appearance, and timeless appeal make every occasion feel a little more special. Don’t be surprised if it becomes a new favorite in your kitchen too—give it a try and savor every hearty bite!
Print
The Oliver’s Salad Recipe
- Total Time: 40 minutes
- Yield: 6 servings 1x
- Diet: Non-Vegetarian
Description
The Oliver’s Salad is a classic Russian salad known for its hearty and flavorful combination of ingredients. This salad features a mix of diced potatoes, carrots, chicken, peas, hard-boiled eggs, pickles, and green onions, all tossed in a creamy dressing. Perfect for gatherings or as a side dish, this salad is a crowd-pleaser with its satisfying textures and savory taste.
Ingredients
Potato Mixture:
- 3 medium potatoes, boiled and diced
- 2 medium carrots, boiled and diced
Salad:
- 1 cup cooked chicken breast, diced
- 1/2 cup canned peas, drained
- 3 large hard-boiled eggs, diced
- 4 small dill pickles, finely chopped
- 1/4 cup finely chopped green onions
Dressing:
- 3/4 cup mayonnaise
- 1 tablespoon Dijon mustard
- Salt and black pepper to taste
- Fresh dill for garnish (optional)
Instructions
- Prepare Potatoes and Carrots: Boil the potatoes and carrots until tender but still firm. Let them cool, then dice into small cubes.
- Combine Salad Ingredients: In a large bowl, mix the diced potatoes, carrots, cooked chicken, peas, eggs, pickles, and green onions.
- Make Dressing: In a small bowl, whisk together mayonnaise and Dijon mustard. Add to the salad, mix gently to coat evenly.
- Season and Chill: Season with salt and pepper, then chill in the fridge for at least 1 hour.
- Garnish and Serve: Garnish with fresh dill before serving.
Notes
- You can substitute the chicken with cooked ham or bologna for a more traditional Russian Olivier salad.
- Adjust the amount of mayonnaise to suit your taste preference.
- Prep Time: 20 minutes
- Cook Time: 20 minutes
- Category: Salad
- Method: Mixing
- Cuisine: Russian
Nutrition
- Serving Size: 1 cup
- Calories: 320
- Sugar: 3g
- Sodium: 620mg
- Fat: 23g
- Saturated Fat: 4g
- Unsaturated Fat: 17g
- Trans Fat: 0g
- Carbohydrates: 20g
- Fiber: 3g
- Protein: 11g
- Cholesterol: 135mg