
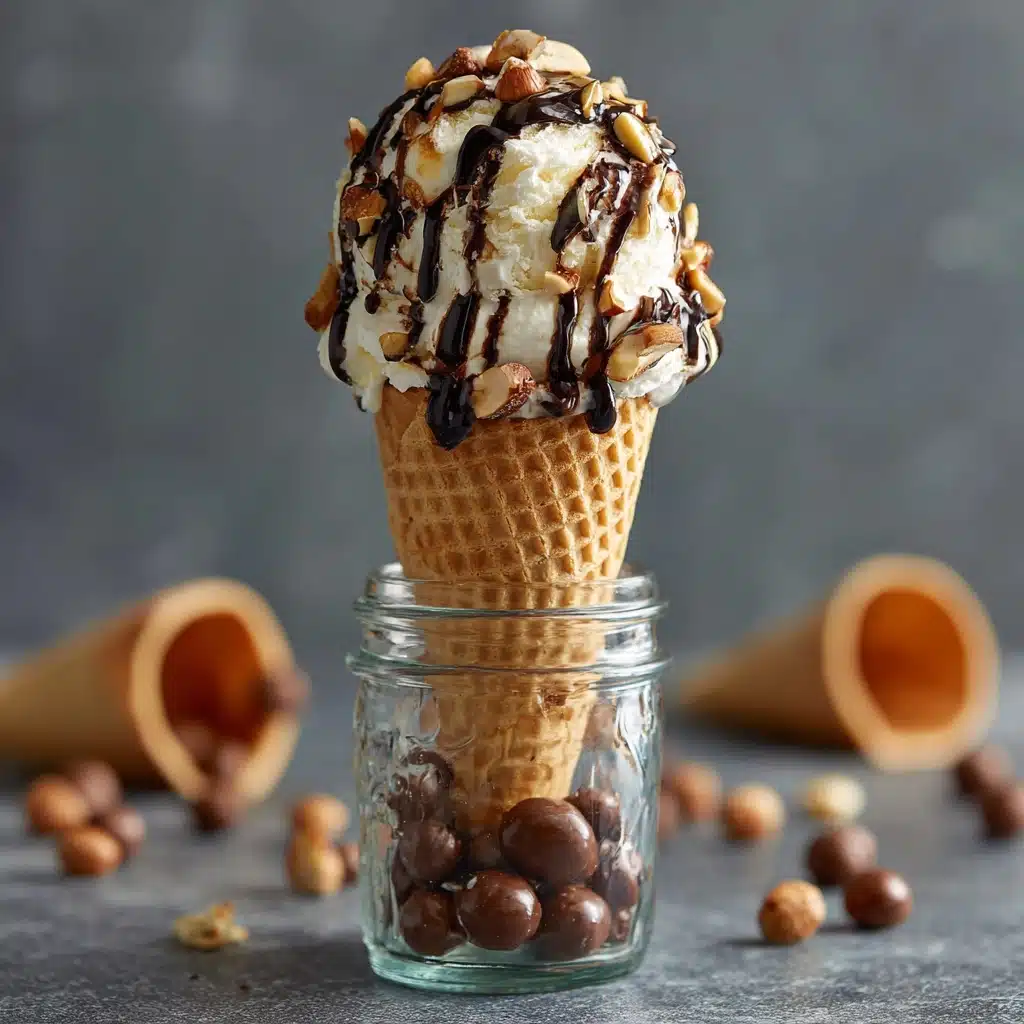
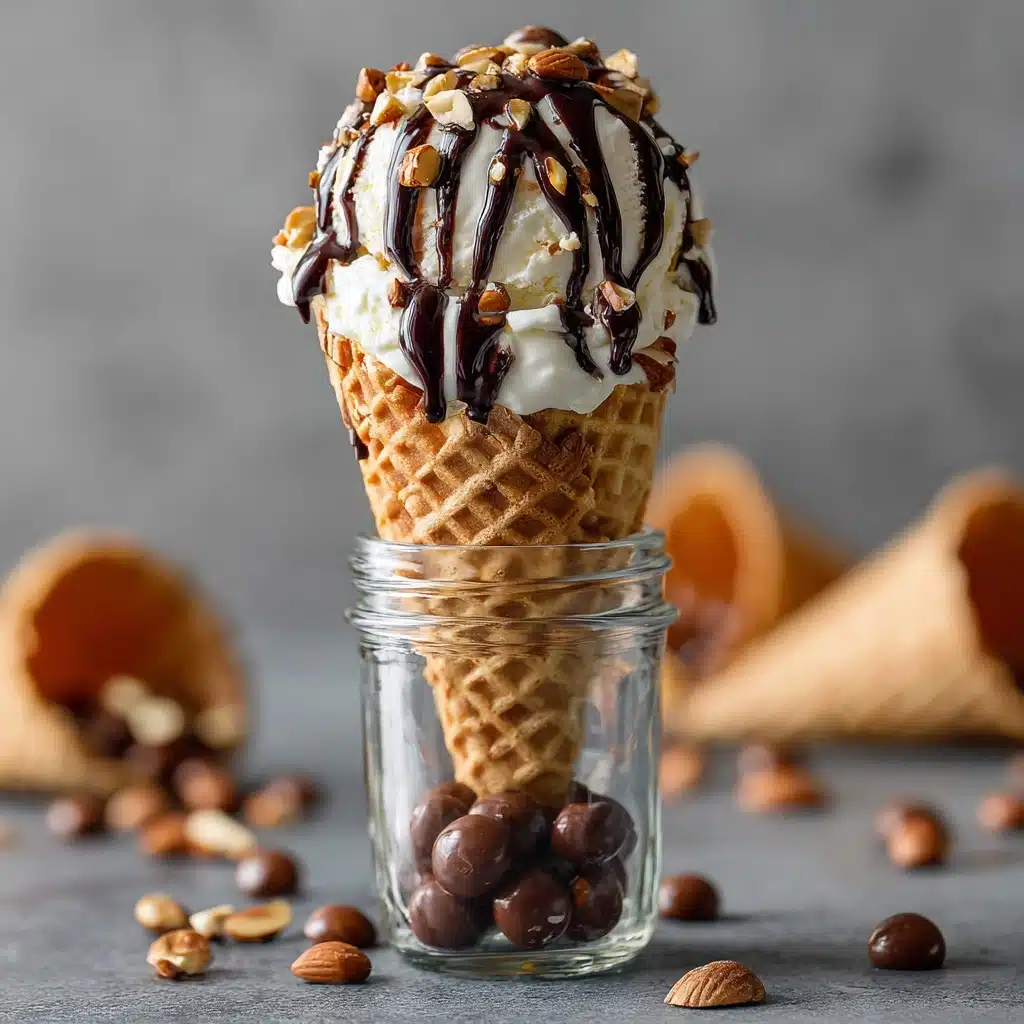
There’s nothing quite as nostalgia-inducing as a scoop of Tin Roof Ice Cream with Crushed Waffle Cone — creamy vanilla base ribboned with rich fudge, crunchy chocolate peanuts, and golden morsels of cone. This classic treat is a joyful mashup of textures and flavors, hopping from sweet and salty to smooth and crispy in every delightful bite. Whether you’re treating friends or channeling your inner child, this ice cream brings an old-fashioned parlor right into your home, no tickets or tokens required!
Ingredients You’ll Need
This homemade Tin Roof Ice Cream with Crushed Waffle Cone gets its irresistible texture and crave-worthy flavor from ingredients you probably already have! Each component is handpicked to deliver a carnival of crunch, creaminess, and true ice cream parlor magic.
- Heavy cream: The base of all luscious homemade ice cream, heavy cream keeps everything rich and silky.
- Whole milk: Lightens the ice cream just enough, striking the right balance between thick and scoopable.
- Granulated sugar: Sweetens the base, and helps keep the finished ice cream scoopable.
- Vanilla extract: Don’t skimp! Vanilla is the simple but necessary backdrop that makes every other flavor pop.
- Chocolate-covered peanuts: They’re the signature “tin roof” crunch — salty, chocolaty, and oh-so-addictive.
- Hot fudge sauce (cooled): Drizzled in luscious ribbons, fudge adds a decadent surprise to each bite.
- Crushed waffle cone pieces: These bring an irresistible, toasty crunch; save an extra handful for topping!
- Pinch of salt: A little salt heightens all the sweetness and sharpens the chocolatey notes.
How to Make Tin Roof Ice Cream with Crushed Waffle Cone
Step 1: Prepare the Creamy Base
In a medium mixing bowl, whisk together the heavy cream, whole milk, granulated sugar, vanilla extract, and just a pinch of salt. Mix until the sugar is fully dissolved. This simple blend creates a lush, vanilla-scented foundation for your Tin Roof Ice Cream with Crushed Waffle Cone, setting the stage for every crunchy, chocolatey add-in.
Step 2: Churn to Soft-Serve Perfection
Pour your creamy mixture into your ice cream maker, and churn according to the manufacturer’s directions. This should take about 20–25 minutes. You’ll want the mixture to reach a consistency that looks like soft-serve — that’s the secret to super-smooth homemade ice cream.
Step 3: Fold In the Crunchy Mix-Ins
When the churning is complete, remove the bowl from your machine and gently fold in the chocolate-covered peanuts and crushed waffle cone pieces. Don’t overmix! The more carefully you incorporate them, the crunchier they’ll stay in the finished dessert. Now your Tin Roof Ice Cream with Crushed Waffle Cone really starts to come alive.
Step 4: Ribbon in Fudge Sauce
Layer your ice cream mixture into a freezer-safe container, pausing every so often to drizzle in cooled hot fudge sauce. Take a butter knife and gently swirl the sauce for a beautiful marble effect. This step adds those pockets of chocolate fudge that make every scoop exciting — no two are ever quite the same!
Step 5: Freeze Until Set
Cover the container and pop it in the freezer for at least 4 hours, or until fully firm. Patiently waiting is arguably the hardest part, but this step transforms your Tin Roof Ice Cream with Crushed Waffle Cone into a dessert worthy of a celebration.
How to Serve Tin Roof Ice Cream with Crushed Waffle Cone
Garnishes
Top each scoop with a shower of extra crushed waffle cone, another sprinkle of chocolate-covered peanuts, or an extra drizzle of hot fudge. You can even add a maraschino cherry for that whimsical “old-school sundae” vibe!
Side Dishes
Pair this ice cream with a crisp butter cookie, espresso shot, or fresh fruit. The cool, indulgent Tin Roof Ice Cream with Crushed Waffle Cone makes a winning combo with anything that loves vanilla, chocolate, and a little crunch.
Creative Ways to Present
Try sandwiching generous scoops between two chocolate chip cookies, or serving in waffle cone bowls for bonus crunch. For a party, set up a sundae bar with toppings alongside the Tin Roof Ice Cream with Crushed Waffle Cone so guests can personalize each bowl and make their own sweet memories.
Make Ahead and Storage
Storing Leftovers
Keep any leftover Tin Roof Ice Cream with Crushed Waffle Cone tightly covered in a freezer-safe container. Press a piece of parchment or plastic wrap directly onto the surface before sealing the lid to prevent ice crystals from forming.
Freezing
Homemade ice cream is best enjoyed within two weeks for peak creaminess and flavor. The fudge and cone pieces will stay crisp as long as the ice cream is kept airtight and away from freezer odors.
Reheating
No real reheating needed, but if your ice cream is super firm straight from the freezer, let it stand on the counter for 5–10 minutes before scooping. This guarantees easy serving and preserves the delicate swirl of fudge.
FAQs
Can I make Tin Roof Ice Cream with Crushed Waffle Cone without an ice cream maker?
Yes! Whip the cream and sugar until soft peaks form, fold in the other ingredients, and freeze in a container. The texture won’t be quite as aerated, but you’ll still get those yummy swirls and crunch.
What if I’m allergic to peanuts?
No worries — swap in chocolate-covered almonds, cashews, or even sunflower seeds for a nut-free version. Adjust to your taste and dietary needs!
Can I use store-bought fudge sauce?
Absolutely — using a good-quality store fudge sauce (just make sure it’s fully cooled) will save time and keep things simple without sacrificing that signature ribbon effect.
Why do my waffle cone pieces get soft?
Humidity is usually the culprit. To keep the waffle cone extra crispy, crush and fold them in at the very last moment before freezing, and consider adding more as a topping when serving.
Can I customize the mix-ins?
Definitely! Try pretzels, caramel bits, toffee chips, or sprinkle with sea salt flakes for a different twist on your Tin Roof Ice Cream with Crushed Waffle Cone. The more creative, the better!
Final Thoughts
If you’re hunting for a dessert that brings fun, flavor, and a crowd-pleasing wow factor, look no further than Tin Roof Ice Cream with Crushed Waffle Cone. It’s the kind of homemade treat that sparks smiles and sweet summer memories, one delicious, crunchy bite at a time. I promise, it’s destined to become a favorite in your kitchen — so go ahead and give it a try!
Print
Tin Roof Ice Cream with Crushed Waffle Cone Recipe
- Total Time: 4 hours 15 minutes
- Yield: 8 servings 1x
- Diet: Vegetarian
Description
Indulge in the delightful combination of creamy homemade ice cream swirled with chocolate-covered peanuts, crushed waffle cone pieces, and rich hot fudge sauce in this Tin Roof Ice Cream recipe.
Ingredients
Ice Cream Base:
- 2 cups heavy cream
- 1 cup whole milk
- 3/4 cup granulated sugar
- 1 tablespoon vanilla extract
- Pinch of salt
Mix-Ins:
- 1/2 cup chocolate-covered peanuts
- 1/2 cup hot fudge sauce (cooled)
- 1 cup crushed waffle cone pieces
Instructions
- Prepare Ice Cream Base: In a medium bowl, whisk together heavy cream, whole milk, sugar, vanilla extract, and salt until sugar dissolves.
- Churn: Pour the mixture into the ice cream maker and churn according to manufacturer’s instructions until a soft-serve consistency is reached.
- Combine Mix-Ins: Gently fold in chocolate-covered peanuts and crushed waffle cone pieces.
- Layer and Swirl: Layer the ice cream in a freezer-safe container, drizzling cooled hot fudge sauce between layers. Swirl lightly with a knife for a ribbon effect.
- Freeze: Cover and freeze for at least 4 hours or until firm.
- Serve: Scoop and enjoy!
Notes
- For extra crunch, sprinkle additional crushed waffle cone pieces on top when serving.
- Substitute caramel sauce for the fudge for a different twist.
- Prep Time: 15 minutes
- Cook Time: 0 minutes
- Category: Dessert
- Method: Freezing
- Cuisine: American
Nutrition
- Serving Size: 1/2 cup
- Calories: 320
- Sugar: 22g
- Sodium: 60mg
- Fat: 21g
- Saturated Fat: 12g
- Unsaturated Fat: 7g
- Trans Fat: 0g
- Carbohydrates: 28g
- Fiber: 1g
- Protein: 5g
- Cholesterol: 70mg


