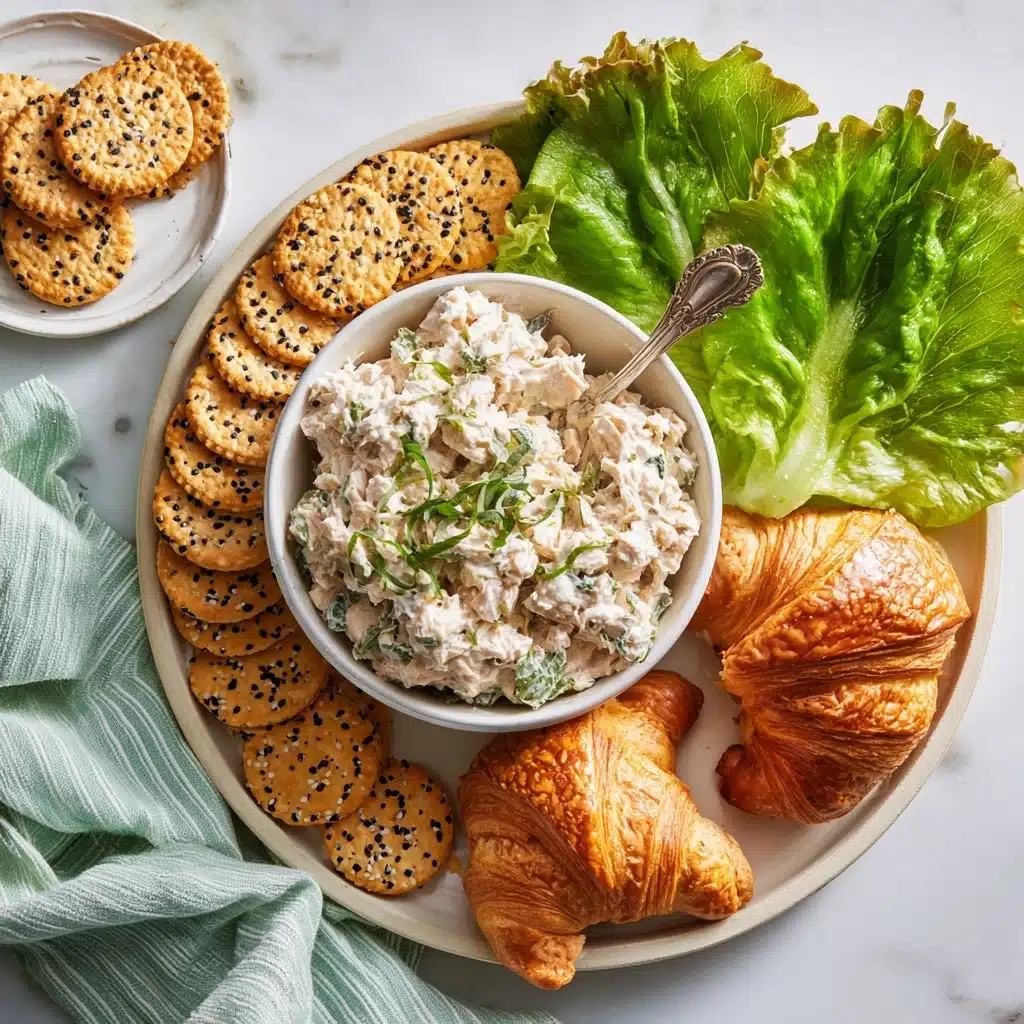
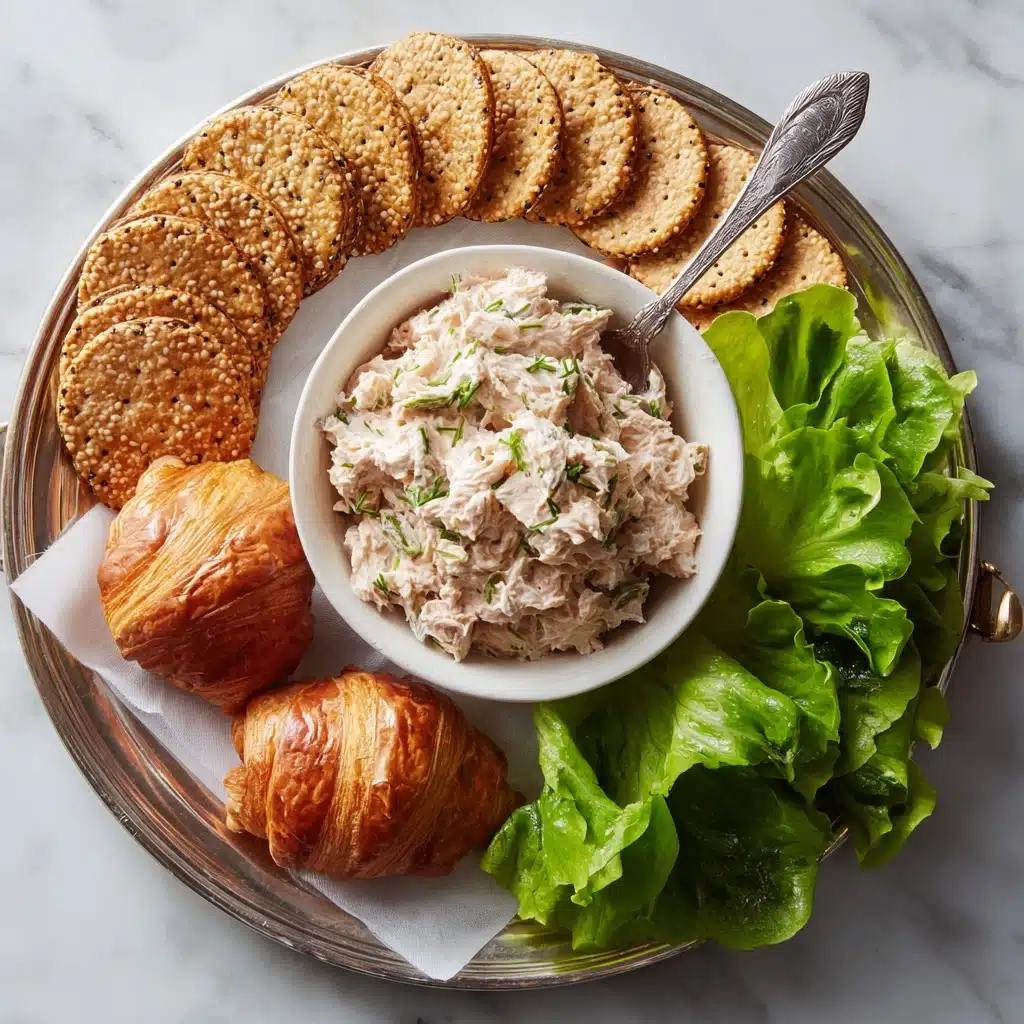
If you’re craving something fresh, satisfying, and effortlessly delicious, look no further than Tuna Salad. This classic dish is a lunchtime hero: creamy, tangy, pleasantly crunchy, and endlessly customizable. With a handful of pantry staples and crisp veggies, you’ll have a nourishing meal on the table in mere minutes, perfect for sandwiches, lettuce wraps, or even spooned straight from the bowl. Whether you’re meal-prepping for the week or seeking a last-minute bite, Tuna Salad is the answer that never disappoints.
Ingredients You’ll Need
Making the perfect Tuna Salad is all about simplicity and balance. Every ingredient, from the briny tuna to the zippy lemon juice, adds its own magic. Gather these essentials and get ready to build flavor, crunch, and that classic creamy texture you know and love.
- Tuna: Opt for 2 (5 oz) cans of tuna, either packed in water or oil; flaked and drained well for the base of your salad.
- Mayonnaise: ¼ cup gives that unmistakable creamy richness that ties everything together.
- Dijon or Yellow Mustard: 1 tablespoon adds a zesty tang and depth to the dressing.
- Lemon Juice: 1 tablespoon fresh-squeezed brightens every bite.
- Celery: 2 tablespoons finely chopped; brings crunch and a touch of freshness.
- Red Onion: 2 tablespoons finely chopped; adds color, bite, and a subtle sweetness.
- Dill Pickles or Relish: 1 tablespoon, chopped; for a briny, punchy accent.
- Salt and Black Pepper: Season to taste, balancing all the vibrant flavors.
- Optional Add-ins: Try chopped hard-boiled egg, fresh dill, or parsley for extra protein, color, or a hint of herbal brightness.
How to Make Tuna Salad
Step 1: Mix the Dressing Base
In a medium bowl, combine the mayonnaise, Dijon or yellow mustard, and lemon juice. Stir until smooth and completely blended. This creamy, tangy base is what makes Tuna Salad so wonderfully luscious and flavorful.
Step 2: Add Tuna and Blend
Gently fold in the drained tuna, making sure to break up large chunks with a fork. Mix until well incorporated but leave some bits intact for texture. The tuna should be evenly coated with the dressing without being muddled to mush.
Step 3: Fold in Vegetables and Pickles
Add the chopped celery, red onion, and dill pickles or relish. Stir everything together until the vegetables are distributed throughout, ensuring you get a little crunch and zing in every spoonful.
Step 4: Season and Taste
Sprinkle in salt and freshly ground black pepper to your liking. This is your moment to taste and fine-tune the flavors. Don’t be shy—one more pinch of salt or a few extra grinds of pepper can make your Tuna Salad truly sing.
Step 5: Optional Add-Ins
If you like, toss in chopped hard-boiled egg for extra richness and protein, fresh dill for a citrusy lift, or parsley for a pop of green. Feel free to get creative and make it your own.
Step 6: Chill for Best Flavor
Cover your bowl and let the Tuna Salad rest in the refrigerator for 15–30 minutes. This quick chill melds the flavors and boosts the salad’s refreshing quality—though we won’t blame you if you dig in right away!
How to Serve Tuna Salad

Garnishes
Brighten up your Tuna Salad with a sprinkle of fresh dill or parsley. A twist of fresh black pepper or a few thinly sliced scallions also work wonders. Adding a wedge of lemon alongside not only looks inviting but allows diners to add a spritz of citrus just before eating.
Side Dishes
This salad pairs beautifully with so many sides: try it with crisp potato chips, a simple green salad, or even a handful of crunchy veggie sticks. For a more filling lunch, serve it alongside your favorite soup or a hearty slice of whole-grain bread.
Creative Ways to Present
Think beyond the classic sandwich! Spoon Tuna Salad into avocado halves or hollowed tomatoes for a stunning presentation. Pile it onto crackers for party-ready bites, or tuck it into lettuce cups for a low-carb twist. Your lunch box (and your guests) will thank you for these simple, eye-catching upgrades.
Make Ahead and Storage
Storing Leftovers
Leftover Tuna Salad keeps beautifully in an airtight container in the refrigerator for up to 3 days. The flavors continue to develop, making tomorrow’s lunch even more delicious. Just give it a gentle stir before serving to recombine the ingredients and ensure every bite is just as moist and flavorful as the first.
Freezing
Freezing Tuna Salad isn’t generally recommended, as the creamy base can separate and the veggies may turn mushy once thawed. For best results, enjoy it fresh or plan to make only what you’ll eat within a few days. If you need to prep ahead, store just the tuna and dressing (without veggies), then add the crisp vegetables after thawing.
Reheating
No reheating required! Tuna Salad is best enjoyed cold, straight from the fridge. If you prefer it closer to room temperature, let it sit out for a few minutes after taking it from the fridge—just long enough to take off the chill, but not so long that it loses its freshness.
FAQs
Can I substitute mayonnaise in Tuna Salad?
Absolutely! If you’d like a lighter version, try swapping some or all of the mayo for Greek yogurt or even mashed avocado. Both provide creaminess while cutting a bit of the fat and adding a nutritional boost.
What type Lunch
Both tuna packed in water and in oil work well; it’s truly a matter of personal preference. Tuna in oil gives a richer mouthfeel, while water-packed is a bit lighter. Just be sure to drain it well before mixing.
Is Tuna Salad gluten-free?
Yes, this recipe is naturally gluten-free. Just serve it on gluten-free bread, lettuce, or with gluten-free crackers if you’re avoiding gluten altogether.
How can I add extra protein or vegetables?
Toss in a diced hard-boiled egg, or amp up the vegetable power with extra celery, bell peppers, or even grated carrot. The beauty of Tuna Salad is that you can tailor it to your heart’s (and stomach’s) content.
Can I make Tuna Salad ahead of time?
Definitely! In fact, letting it chill for a bit only enhances the flavors. Make it up to a day in advance and keep it refrigerated until you’re ready to enjoy. It’s a lifesaver for quick, grab-and-go meals.
Final Thoughts
If you’re looking for a lunchtime staple that’s both simple and sensational, Tuna Salad should top your list. With its bright, zippy flavors and countless serving possibilities, this classic really is the ultimate in no-fuss comfort. Give it a try—your taste buds (and your busy schedule) will thank you!
Print
Tuna Salad Recipe
- Total Time: 10 minutes
- Yield: 2–3 servings 1x
- Diet: Non-Vegetarian
Description
This Tuna Salad recipe is a classic favorite that’s quick and easy to make. Perfect for a light lunch or a simple meal prep option, this dish is packed with flavor and protein.
Ingredients
Tuna Salad:
- 2 (5 oz) cans tuna, drained (packed in water or oil)
- ¼ cup mayonnaise
- 1 tablespoon Dijon or yellow mustard
- 1 tablespoon lemon juice
- 2 tablespoons finely chopped celery
- 2 tablespoons finely chopped red onion
- 1 tablespoon chopped dill pickles or relish
- Salt and black pepper to taste
Optional:
- Chopped hard-boiled egg
- Fresh dill or parsley
Instructions
- In a medium bowl, combine the tuna, mayonnaise, mustard, and lemon juice. Mix until smooth and well blended.
- Stir in the celery, red onion, and pickles or relish.
- Season with salt and pepper to taste.
- Add any optional mix-ins, then chill for 15–30 minutes before serving for best flavor.
- Serve on bread, in lettuce wraps, with crackers, or stuffed into a tomato or avocado.
Notes
- Use Greek yogurt or mashed avocado in place of some mayo for a lighter version.
- This salad keeps well in the fridge for up to 3 days.
- Great for meal prep, sandwiches, or quick lunches.
- Prep Time: 10 minutes
- Cook Time: 0 minutes
- Category: Lunch
- Method: No-Cook
- Cuisine: American
Nutrition
- Serving Size: 1 cup
- Calories: 230
- Sugar: 1g
- Sodium: 430mg
- Fat: 16g
- Saturated Fat: 3g
- Unsaturated Fat: 12g
- Trans Fat: 0g
- Carbohydrates: 2g
- Fiber: 0g
- Protein: 20g
- Cholesterol: 40mg


