
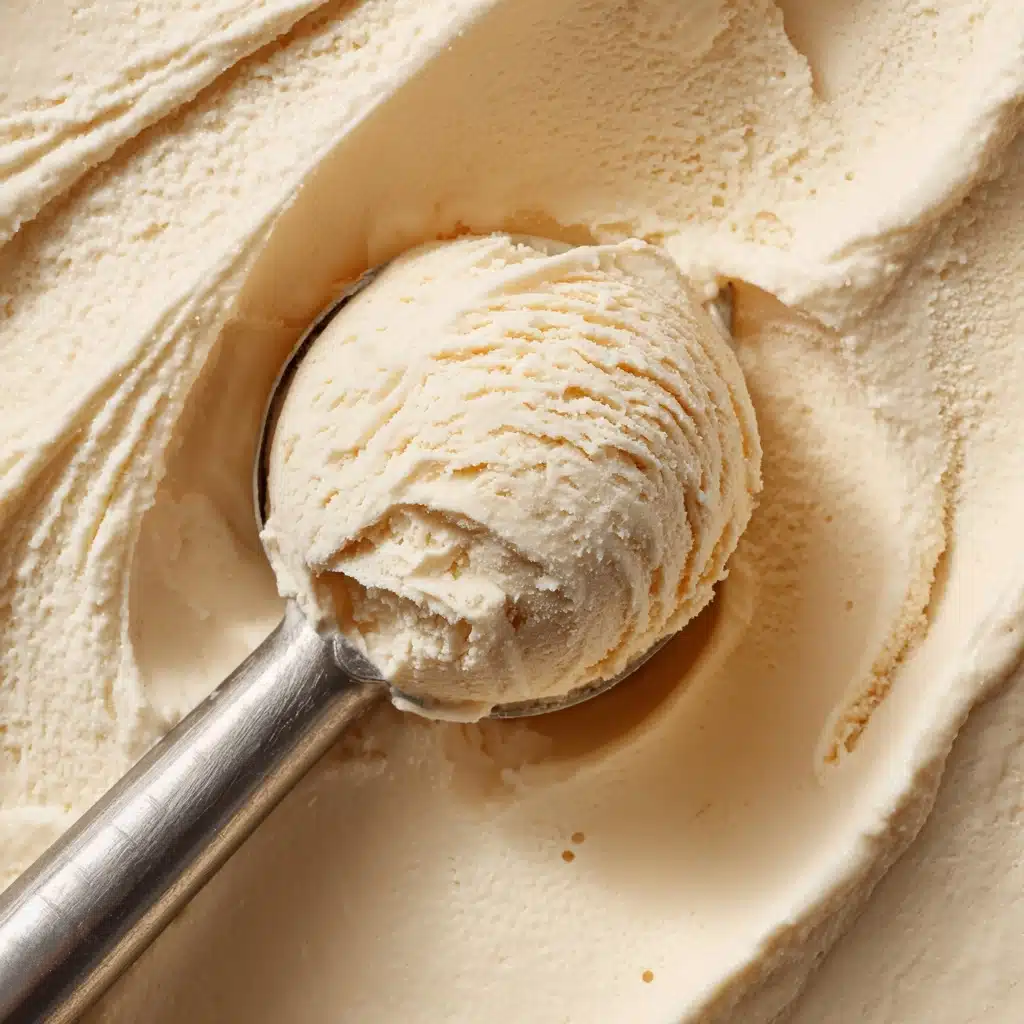
There’s something utterly magical about classic Vanilla Bean Ice Cream—its silky-smooth texture, speckled with fragrant vanilla seeds, and pure, sweet creaminess makes it a universal crowd-pleaser. This simple yet elegant dessert is a testament to how just a handful of high-quality ingredients can create something truly exceptional. Homemade Vanilla Bean Ice Cream elevates even the simplest after-dinner treat, transforming it into something worth savoring, whether you’re piling it into bowls after a summer barbecue or sneaking a spoonful straight from the freezer. Let’s dive in and give this timeless favorite the love it deserves!
Ingredients You’ll Need
Making Vanilla Bean Ice Cream at home is all about embracing the essentials—each ingredient brings its own unique touch, whether it’s richness, sweetness, or that unmistakable vanilla perfume. Keep things straightforward, and you’ll be rewarded with a batch of ice cream that tastes infinitely better than store-bought!
- Heavy cream: Provides the luxurious creaminess and body that makes every scoop rich and smooth.
- Whole milk: Balances the creaminess with just enough lightness for a perfect scoopable texture.
- Granulated sugar: Sweetens the mix and helps prevent iciness—taste as you go if you prefer less sweetness!
- Vanilla bean (split, seeds scraped): The star of the show, lending those signature vanilla flecks and deep floral flavor—don’t skip on quality here!
- Pure vanilla extract: Rounds out and intensifies the vanilla aroma, ensuring every bite is extra fragrant.
- Pinch of salt: Just a sprinkle brightens all the flavors and brings out the ice cream’s delicate sweetness.
How to Make Vanilla Bean Ice Cream
Step 1: Infuse the Dairy
Begin by pouring the heavy cream, whole milk, and sugar into a medium saucepan. Add both the split vanilla bean and all those precious seeds you scraped from inside—this is where all the aromatic magic happens! Warm the mixture gently over medium heat, stirring every so often, until the sugar is fully dissolved and the mixture is steaming, but make sure it never comes to a boil.
Step 2: Boost the Vanilla Flavor
Once the creamy base is hot and steamy, take the saucepan off the heat. Stir in the pure vanilla extract and a pinch of salt, which helps balance and enhance the sweet, fragrant flavors. Now comes the hard part: let everything steep for 30 glorious minutes so the vanilla bean can infuse every drop of the mixture. Patience pays off here!
Step 3: Strain and Chill
After the flavors have mingled, remove the vanilla bean pod. Pour the mixture into an airtight container and pop it in the fridge for at least four hours (or, if you’re planning ahead, overnight). This step is crucial—the colder your base, the creamier the churn.
Step 4: Churn to Perfection
Once the vanilla bean ice cream base is thoroughly chilled, pour it into your ice cream maker. Let the machine do its magic, churning for about 20 to 25 minutes. You’ll know it’s ready when the mixture is thick, creamy, and looks irresistibly scoopable. If you want to add mix-ins like chocolate chips or crushed cookies, toss them in during the last couple of minutes of churning!
Step 5: Freeze and Serve
Scoop the churned ice cream into a freezer-safe container, smoothing the top before sealing. Let it rest in the freezer for at least two hours to firm up. Now gather your favorite bowls—your homemade Vanilla Bean Ice Cream is ready for its debut!
How to Serve Vanilla Bean Ice Cream

Garnishes
The gentle sweetness of Vanilla Bean Ice Cream is a beautiful blank canvas for a world of toppings. Go classic with a drizzle of chocolate or caramel sauce, toss on some toasted nuts, or sprinkle on fresh berries for a bit of color and tartness. Even a few delicate chocolate shavings or a dusting of cinnamon can bring whole new dimensions to every bite!
Side Dishes
This ice cream gives you endless pairing possibilities. Serve it alongside a warm fruit crisp, tuck a scoop next to a fudgy brownie, or add a dollop on top of grilled peaches. It’s also a luxurious topper for pies—from apple to pecan—or a cooling companion to a mug of hot espresso for an instant affogato.
Creative Ways to Present
For a touch of whimsy, spoon your Vanilla Bean Ice Cream between chewy cookies for homemade ice cream sandwiches, or freeze scoops in popsicle molds with swirls of fruit puree. For dinner parties, serve it in chilled glass dishes, topped with spun sugar or edible flowers, letting those vanilla bean flecks shine through. The most important part? Have fun and make it your own!
Make Ahead and Storage
Storing Leftovers
Keep any remaining Vanilla Bean Ice Cream in an airtight, freezer-safe container. Placing a piece of parchment directly on the surface helps fend off icy crystals and keeps the texture ultra creamy. Stored this way, it’ll taste fresh and delicious for up to two weeks, though it’s so tempting that it rarely lasts that long!
Freezing
Homemade ice cream benefits from a steady, cold freezer—make sure to store it at the back of the freezer where the temperature stays most consistent. Letting it firm for at least two hours before serving gives you neatly rounded scoops every time, and those beautiful vanilla flecks will be on full display.
Reheating
While you won’t actually reheat Vanilla Bean Ice Cream, if it becomes overly hard, let the container sit at room temperature for five to ten minutes before scooping. This quick rest softens the texture, making it perfectly creamy and ready for serving—no melting mess and no struggle with a stubborn scoop!
FAQs
Can I make Vanilla Bean Ice Cream without an ice cream maker?
Absolutely! After chilling the base, pour it into a shallow dish and freeze, stirring vigorously every 30 minutes until it’s creamy. While the texture won’t be quite as light as churned, you’ll still get those classic flavors and beautiful vanilla flecks.
What can I substitute for a whole vanilla bean?
If you can’t find a whole vanilla bean, two teaspoons of high-quality vanilla bean paste is a great substitute. This will give you those gorgeous black specks and a rich, fragrant flavor almost identical to the original.
How do I prevent ice crystals from forming in my ice cream?
Start with a thoroughly chilled base and always use an airtight container. For extra protection, press a sheet of parchment or plastic wrap directly against the surface before sealing. Enjoying your Vanilla Bean Ice Cream within two weeks also ensures optimal freshness!
Can I add mix-ins like cookies or nuts?
Definitely! Toss in your favorite add-ins, like crushed cookies, nuts, or mini chocolate chips, during the last couple minutes of churning so they’re evenly distributed without sinking to the bottom.
Is Vanilla Bean Ice Cream gluten-free?
Yes, this recipe for Vanilla Bean Ice Cream is naturally gluten-free as written. Just keep an eye on any mix-ins or toppings you choose to make sure they’re gluten-free as well.
Final Thoughts
There’s simply nothing like a scoop of homemade Vanilla Bean Ice Cream to transport you back to those sweet, simple joys—rich, creamy, and flecked with real vanilla, each bite is a little celebration. Whether you serve it on its own, with your favorite desserts, or dressed up with creative toppings, this classic is always a hit. So grab your ice cream maker and treat yourself to the kind of homemade happiness you’ll want to share (or maybe keep all to yourself)!
Print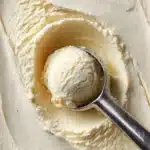
Vanilla Bean Ice Cream Recipe
- Total Time: 15 minutes (plus chilling and freezing time)
- Yield: 8 servings 1x
- Diet: Vegetarian
Description
Indulge in the rich and creamy goodness of homemade Vanilla Bean Ice Cream. This classic dessert is made with real vanilla bean for an intense flavor that will delight your taste buds. Perfect for hot summer days or any time you’re craving a cool and sweet treat.
Ingredients
Ingredients:
- 2 cups heavy cream
- 1 cup whole milk
- 3/4 cup granulated sugar
- 1 vanilla bean, split and seeds scraped
- 1 teaspoon pure vanilla extract
- Pinch of salt
Instructions
- In a medium saucepan, combine the heavy cream, whole milk, and granulated sugar.
- Remove from heat and stir in the vanilla extract and pinch of salt.
- Chill in the refrigerator for at least 4 hours or overnight until very cold.
- Once chilled, pour the mixture into an ice cream maker and churn according to the manufacturer’s instructions, about 20-25 minutes, until thick and creamy.
- Transfer the ice cream to a freezer-safe container and freeze for at least 2 hours to firm up before serving.
Add the split vanilla bean and scraped seeds to the mixture. Place over medium heat and cook, stirring occasionally, until the sugar is dissolved and the mixture is steaming but not boiling.
Let the mixture steep for 30 minutes to infuse the vanilla flavor. Remove the vanilla bean pod and pour the mixture into an airtight container.
Notes
- For extra flavor, substitute the vanilla bean with 2 teaspoons of high-quality pure vanilla bean paste.
- Add mix-ins like chocolate chips or crushed cookies during the last few minutes of churning if desired.
- Prep Time: 10 minutes
- Cook Time: 5 minutes
- Category: Dessert
- Method: Churning
- Cuisine: American
Nutrition
- Serving Size: 1/2 cup
- Calories: 250
- Sugar: 20g
- Sodium: 25mg
- Fat: 18g
- Saturated Fat: 11g
- Unsaturated Fat: 7g
- Trans Fat: 0g
- Carbohydrates: 21g
- Fiber: 0g
- Protein: 3g
- Cholesterol: 80mg


