
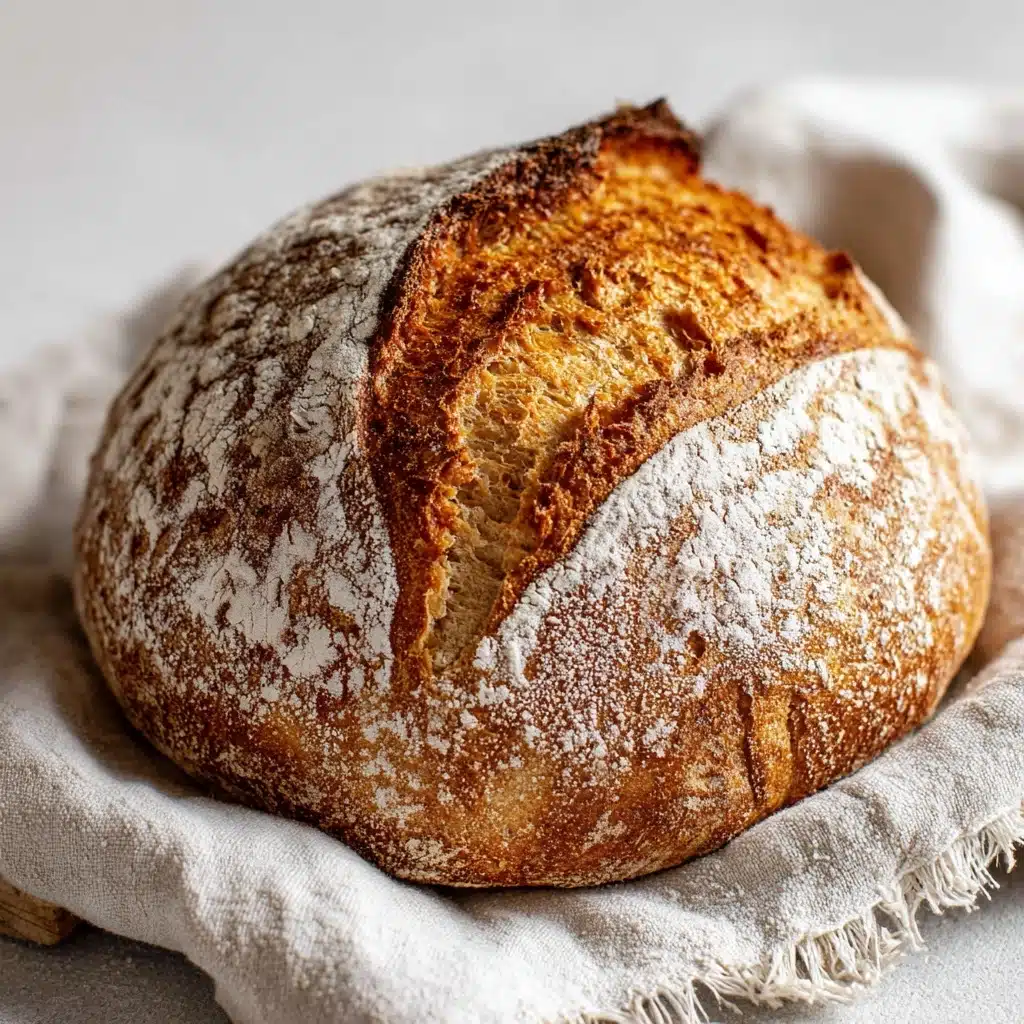
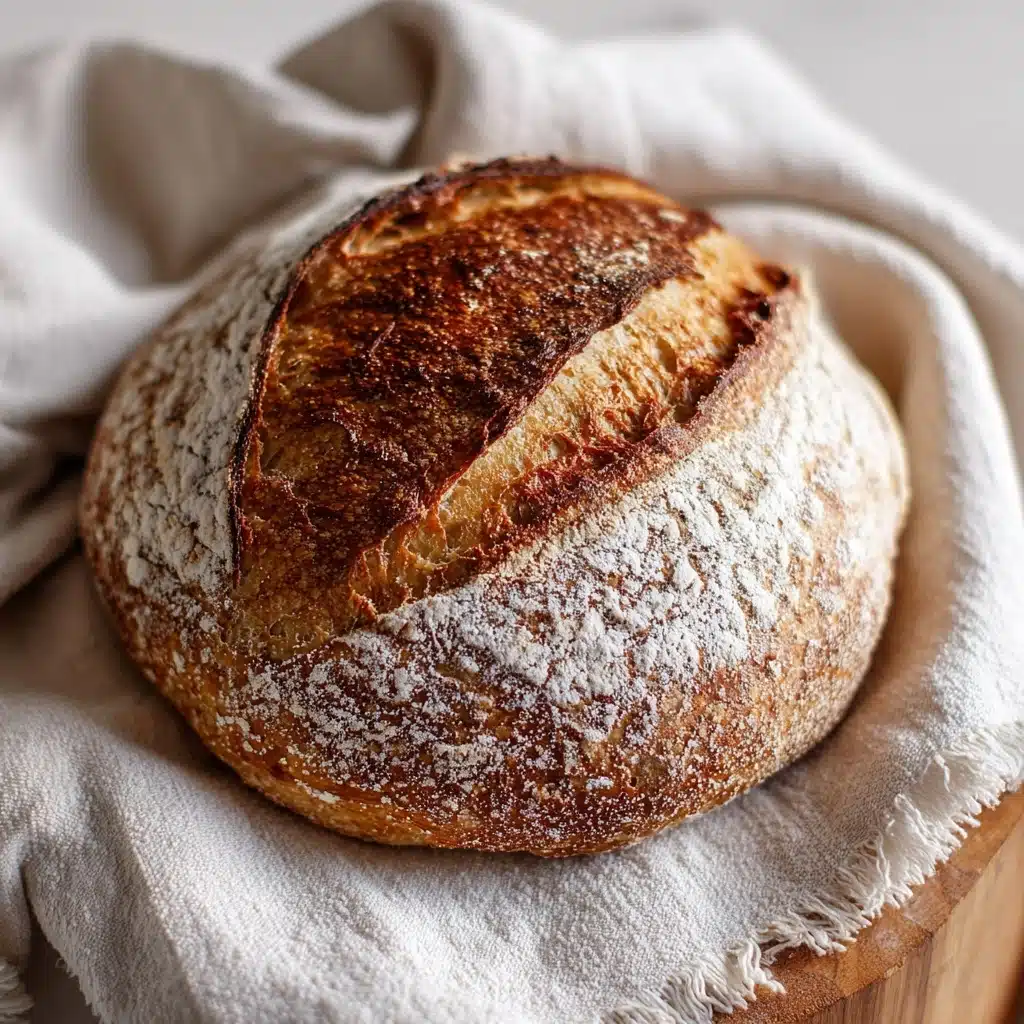
There’s nothing quite as magical or satisfying as baking your own Wild Yeast Bread at home. This rustic loaf rewards you for your patience with a crackly crust, chewy crumb, and complex flavor that’s impossible to rush or replicate with commercial yeast. Letting naturally occurring wild yeast work its magic is both a science and an adventure — and the result is a fragrant, artisan-style bread that promises to wow from the very first slice.
Ingredients You’ll Need
Even better, this recipe calls for only a handful of simple, pantry-friendly ingredients — but each one plays a starring role. Every item on this list adds to the flavor, structure, and personality of your Wild Yeast Bread, making every bite uniquely delicious.
- Bread flour: The high protein content is the secret weapon for achieving that perfect chewy crumb and gorgeous rise.
- Water: Use room temperature water to encourage gentle fermentation and hydration, giving your dough life and flexibility.
- Active wild yeast starter (100% hydration): This is the heart and soul of Wild Yeast Bread, bringing all the tangy complexity and rise without a hint of commercial yeast.
- Sea salt: Just the right amount enhances flavor and regulates the fermentation for a well-balanced loaf every time.
How to Make Wild Yeast Bread
Step 1: Mix and Autolyse the Dough
Start by stirring together the bread flour and water in a large mixing bowl until you have a shaggy, rough dough — don’t worry about smoothness just yet. Cover and let this mixture rest for about 30 minutes; this “autolysis” gives the flour time to fully absorb the water, making your dough easier to work with and laying the foundation for amazing texture later.
Step 2: Incorporate the Wild Yeast and Salt
Now it’s time to mix in your active wild yeast starter and sprinkle in the sea salt. This is where all the character of your Wild Yeast Bread develops. Either knead the dough by hand or use the stretch-and-fold method right in the bowl, working until the dough feels smooth, stretchy, and slightly springy beneath your fingers.
Step 3: Bulk Fermentation and Stretch-and-Fold
Cover the bowl and let the dough rise at room temperature for 4 to 6 hours. For the first two hours, perform three or four sets of stretch-and-folds every 30 minutes. This hands-on step strengthens gluten and builds the internal structure that will create those beautiful bread bubbles and pockets inside your finished loaf.
Step 4: Shape and Cold Proof the Dough
Once your dough has nearly doubled, turn it out onto a lightly floured surface. Shape the dough into a tight round or oval, giving it a gentle but firm hand. Place it into a well-floured banneton or a bowl lined with a floured towel and cover. Let the dough proof in the refrigerator overnight (or up to 18 hours) — this slow, cold rise deepens the flavor and helps your Wild Yeast Bread develop that iconic artisan crust and tang.
Step 5: Bake Your Wild Yeast Bread
Preheat your oven to a blistering 475°F (245°C) with a Dutch oven inside — this is key for creating steam and a crisp crust. When you’re ready, gently turn the dough onto parchment paper, score the top for expansion, and transfer it to the hot Dutch oven. Bake covered for 20 minutes, then finish uncovered for another 20–25 minutes until the crust turns deeply golden and irresistibly crunchy. Allow your bread to cool fully on a wire rack before slicing to preserve its perfect crumb.
How to Serve Wild Yeast Bread
Garnishes
Sprinkle your bread slices with flaky sea salt, fresh herbs, or a light brush of extra virgin olive oil for a subtle flavor boost. A swipe of rich butter or a dollop of sour jam also brings out the naturally tangy notes of Wild Yeast Bread.
Side Dishes
This versatile loaf pairs beautifully with almost anything! Try it alongside a vibrant tomato soup, hearty stew, or a spread of sharp cheeses and olives for a rustic feast. For breakfast, a simple pairing with ripe avocado or gently poached eggs turns Wild Yeast Bread into the star of the table.
Creative Ways to Present
For an impressive presentation, slice and fan out the loaf on a wooden board, or serve warm wedges alongside individual bowls of dipping oil and balsamic vinegar. You can even cube the bread and toast it to create the ultimate homemade croutons for salads or soups.
Make Ahead and Storage
Storing Leftovers
Keep any leftover Wild Yeast Bread at its best by wrapping the cooled loaf in a clean kitchen towel or storing it in a bread box. This helps maintain its crust and chewy interior for two to three days at room temperature—no need to refrigerate!
Freezing
For longer storage, slice the cooled bread and place the slices in a freezer-safe bag, removing as much air as possible. This technique lets you grab a slice or two whenever the craving strikes, holding up brilliantly in the freezer for up to two months.
Reheating
To revive that just-baked flavor and crust, pop thawed slices in a hot oven (around 350°F or 175°C) for five to seven minutes, or simply toast them to your liking. Your Wild Yeast Bread will taste nearly as fresh as the day you baked it!
FAQs
How do I know if my wild yeast starter is active enough for baking?
Your starter is ready when it looks bubbly, doubles in volume within four to six hours of feeding, and passes the “float test” – a small spoonful should float in water. An active starter is the foundation for wonderfully risen Wild Yeast Bread.
Can I substitute part of the white flour with whole grain?
Absolutely! Swapping up to 25% of the bread flour for whole wheat or rye will yield a denser, more flavorful loaf. Just be mindful that you might need to add a touch more water, as whole grains absorb more than white flour.
What’s the purpose of the stretch-and-fold technique?
Stretch-and-folding strengthens the gluten network in Wild Yeast Bread dough without aggressive kneading, ensuring an airy structure and that beautiful open crumb you’re after in an artisan loaf.
Why is it important to bake in a Dutch oven?
The Dutch oven traps steam, which allows your Wild Yeast Bread to rise fully and develop that luscious, crackling crust. If you don’t have one, bake in a heavy pot with a tight lid or use a tray of water for steam in your oven.
How do I get that dramatic “ear” when scoring my bread?
Score confidently with a sharp blade at a slight angle, right before baking. The bold cut gives Wild Yeast Bread room to expand rapidly in the oven, creating a signature “ear” and opening the door to stunning crust artistry.
Final Thoughts
Baking Wild Yeast Bread truly connects you with the timeless art of bread making. Each loaf is a celebration of patience and simplicity — and there’s nothing like the moment you slice through that golden, crackly crust. Give this recipe a try and invite some slow-fermented, homemade magic right into your kitchen!
Print
Wild Yeast Bread Recipe
- Total Time: 1 to 2 days including fermentation
- Yield: 1 loaf (8–10 slices) 1x
- Diet: Vegan
Description
Learn how to make a delicious Wild Yeast Bread at home with this step-by-step recipe. This artisan loaf is naturally leavened, creating a beautifully textured and flavorful bread.
Ingredients
Bread:
- 3 1/2 cups bread flour
- 1 1/4 cups water (room temperature)
- 1/2 cup active wild yeast starter (100% hydration)
- 1 1/2 teaspoons sea salt
Instructions
- Mix Dough: Combine flour and water in a bowl, rest for 30 minutes. Add yeast starter and salt, knead until smooth.
- Rise: Let dough rise for 4-6 hours, perform stretch-and-folds every 30 minutes.
- Shape and Proof: Shape dough, place in a banneton, proof in the refrigerator overnight.
- Bake: Preheat oven with Dutch oven, bake bread until golden brown.
Notes
- Ensure the wild yeast starter is active before using.
- For more flavor, ferment longer or use whole grain flours.
- Adjust hydration based on flour type.
- Prep Time: 45 minutes (active), plus fermentation and proofing
- Cook Time: 45 minutes
- Category: Bread
- Method: Baking
- Cuisine: Artisan
Nutrition
- Serving Size: 1 slice
- Calories: 150
- Sugar: 0g
- Sodium: 230mg
- Fat: 0.5g
- Saturated Fat: 0g
- Unsaturated Fat: 0.5g
- Trans Fat: 0g
- Carbohydrates: 30g
- Fiber: 1g
- Protein: 4g
- Cholesterol: 0mg


