
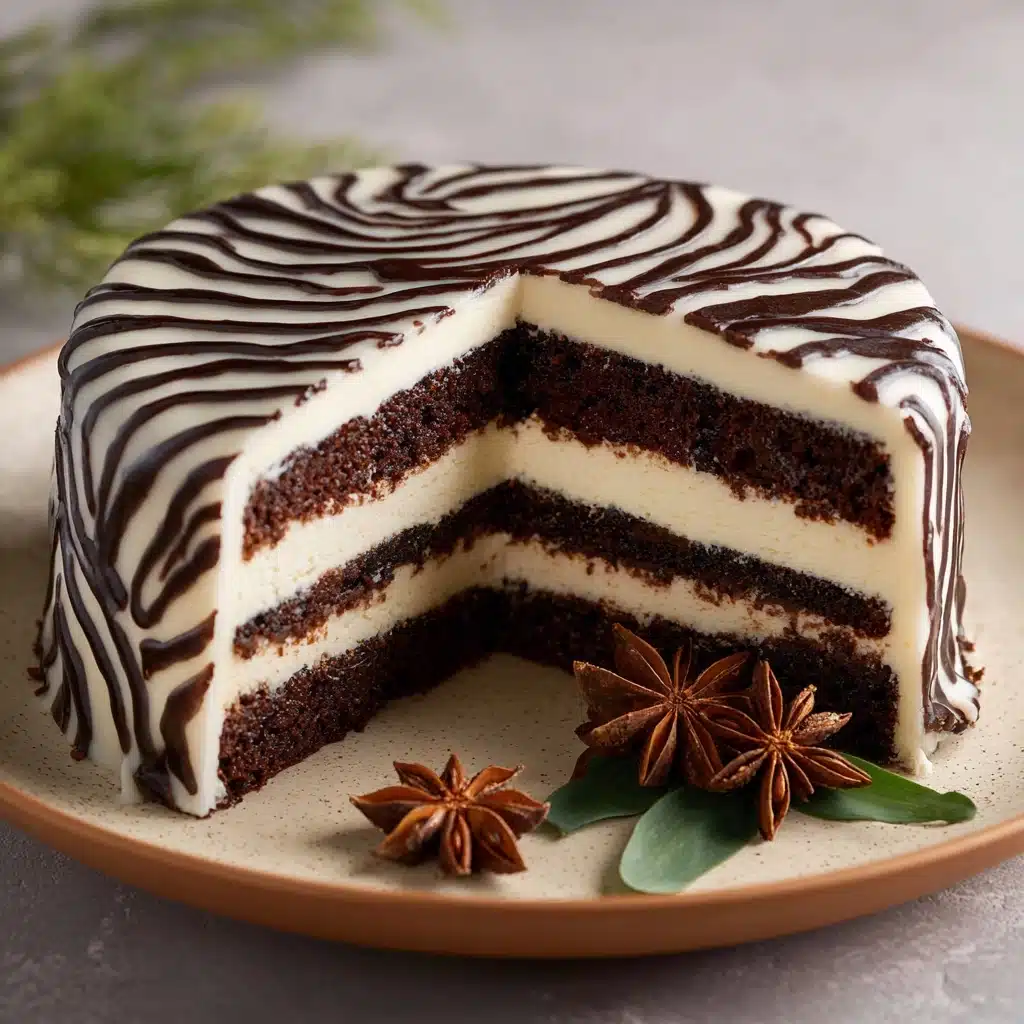
If you’ve ever wanted to turn a regular baking session into a playful, show-stopping event, this Zebra Cake is about to become your latest kitchen obsession. It strikes that magical balance of eye-catching beauty and pure, nostalgic cake flavor, making it perfect for birthdays, celebrations, or simply jazzing up your weekend. With its hypnotic stripes of vanilla and chocolate sponge swirling together in each slice, Zebra Cake isn’t just a treat for the tastebuds—it’s a moment of joy with every bite. Get ready to fall in love with this classic European dessert that’s as fun to make as it is to eat!
Ingredients You’ll Need
One of the best things about Zebra Cake is that it uses simple, reliable pantry staples you probably already have. Each ingredient plays a special role, helping to create the tender crumb, signature stripes, and delightful flavors that define this cake. Here’s what you’ll need—and why!
- All-purpose flour: The backbone of the cake, providing structure without heaviness for a soft, fine crumb.
- Baking powder: Key for achieving a high rise and airy texture in every stripe.
- Salt: Just the right amount sharpens and balances the sweet flavors, making each bite sing.
- Granulated sugar: Adds sweetness and helps tenderize the cake so it stays wonderfully moist.
- Eggs: The glue that holds the batter together, adding richness and ensuring a silky texture.
- Whole milk: Keeps the cake moist and helps blend the batters seamlessly—use buttermilk for an extra touch of tang!
- Vegetable oil: Gives the cake a light texture while making sure it stays soft for days.
- Vanilla extract: Lends warmth and aromatic depth to the vanilla stripes.
- Unsweetened cocoa powder: The secret to those bold chocolate swirls and the signature zebra look.
How to Make Zebra Cake
Step 1: Prep the Pan and Preheat the Oven
Start by preheating your oven to 350°F (175°C). Grease and flour a 9-inch round cake pan thoroughly—this helps the Zebra Cake release perfectly and keeps all those beautiful stripes intact. If you want extra insurance, line the bottom with parchment paper for flawless removal.
Step 2: Mix the Dry Ingredients
In a large bowl, whisk together the flour, baking powder, and salt. This step ensures that your leavening and salt are evenly distributed, giving the Zebra Cake its tender crumb throughout. Be meticulous; even mixing here sets you up for success later on.
Step 3: Combine Wet Ingredients
In a separate bowl, use a hand mixer or whisk to beat the sugar and eggs together until pale and fluffy. This step traps air and is essential for that light cake texture. Next, pour in the milk, oil, and vanilla extract; mix until everything is silky smooth and beautifully blended.
Step 4: Bring Wet and Dry Together
Gradually add the dry ingredients into the wet mixture, stirring gently until no dry streaks remain. Avoid overmixing here; stop as soon as it’s smooth. The batter should be pourable but thick enough to hold its shape for those signature zebra layers.
Step 5: Divide and Color the Batter
Split the batter evenly between two bowls. Into one bowl, sift in the cocoa powder and stir until it’s completely blended for a rich chocolate color. Leave the other bowl plain to keep that lovely vanilla hue—these two bowls are the start of your cake’s dramatic stripes!
Step 6: Create the Zebra Pattern
Here’s where the magic happens. Spoon 2 tablespoons of vanilla batter into the center of your cake pan. Immediately spoon 2 tablespoons of chocolate batter right on top. Keep alternating spoonfuls, always placing each addition directly in the center of the last. As the batters spread, you’ll watch mesmerizing rings form—a true zebra effect!
Step 7: Bake and Cool
Gently tap the pan on your counter to smooth out the top and release any air pockets. Slide it into the oven and bake for 40–45 minutes, or until a toothpick comes out clean from the center. Let the cake cool in the pan for 10 minutes before turning it out onto a wire rack to cool completely. The stripes will be stunning!
How to Serve Zebra Cake
Garnishes
While Zebra Cake is a stunner all on its own, adding a sprinkle of powdered sugar, a drizzle of chocolate ganache, or a scattering of fresh berries can make it even more inviting. For parties, a quick dusting always makes those stripes pop and adds a touch of elegance.
Side Dishes
Pair your Zebra Cake with a scoop of vanilla or chocolate ice cream for an indulgent dessert, or serve alongside fresh fruit for a lighter touch. Sometimes, a dollop of lightly sweetened whipped cream is all you need to highlight the cake’s contrasting flavors.
Creative Ways to Present
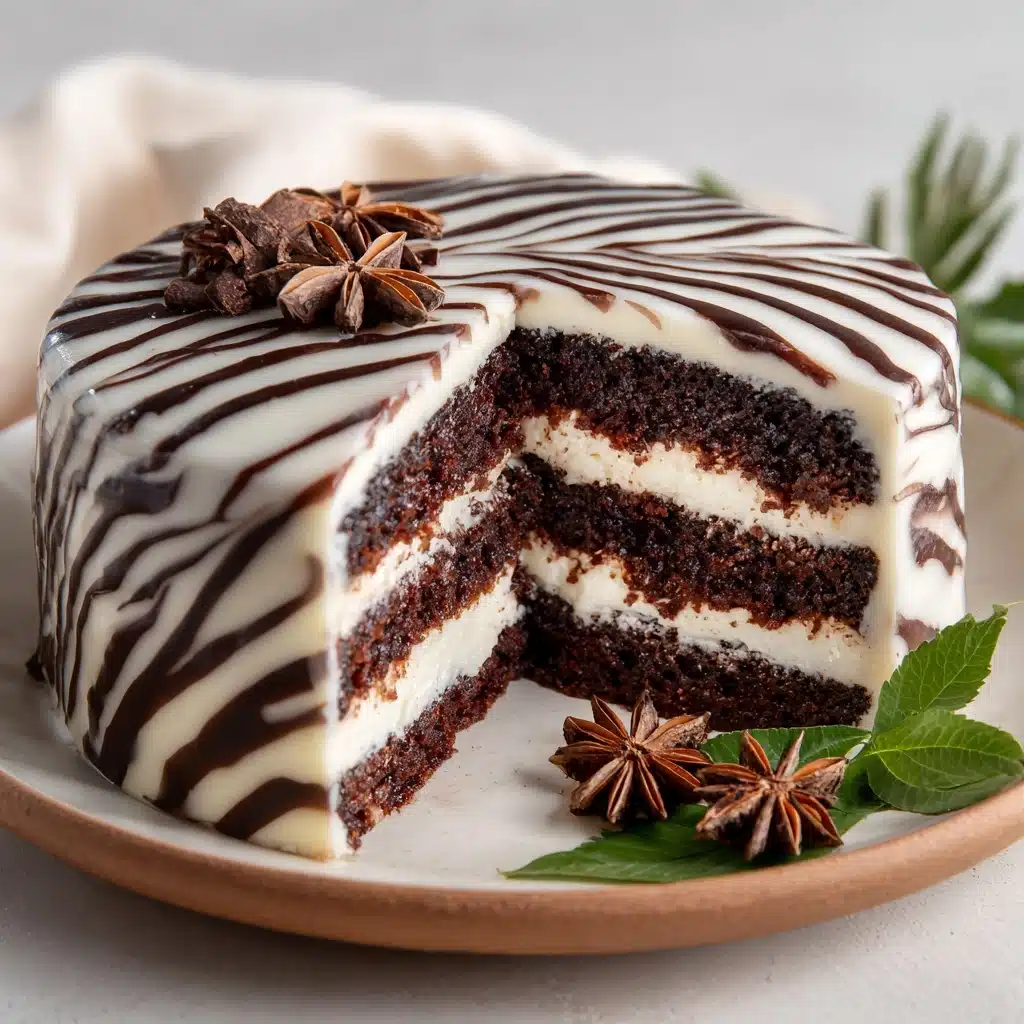
Cutting the cake to reveal the striped interior is always a crowd-pleaser—each slice is a work of art! You can also bake the batter in individual cupcake tins for mini zebra cakes, or layer with fruit compote between slices for a unique twist that keeps everyone guessing—and smiling.
Make Ahead and Storage
Storing Leftovers
To keep your Zebra Cake fresh, wrap leftover slices tightly in plastic wrap or store them in an airtight container at room temperature for up to 3 days. In warm climates, it’s best to refrigerate to preserve moistness and keep the flavors vibrant.
Freezing
Zebra Cake freezes beautifully! Once completely cooled, wrap the cake or individual slices in a layer of plastic, then foil. Pop them into a freezer bag or airtight container and freeze for up to 2 months. Thaw overnight in the fridge or at room temperature when ready to enjoy.
Reheating
If you like your cake a touch warm, simply microwave a slice for 10–15 seconds. This revives the texture and makes it softly aromatic, just like it’s fresh from the oven—perfect for cozying up with a cup of coffee or tea.
FAQs
Can I use gluten-free flour for Zebra Cake?
Absolutely! A cup-for-cup gluten-free flour blend works well in this recipe. Just be mindful that the texture may be slightly different, but the signature stripes and delicious flavor will remain intact.
What other pans can I use besides a round cake pan?
This recipe adapts to a bundt pan or even loaf pans! Note that baking times may vary—keep an eye on doneness and use the toothpick test to check.
How do I get sharper, more defined stripes?
For extra-crisp stripes, make sure your batters are not too runny—thicker batter holds its shape better. Using large, level spoonfuls and pouring each new layer directly into the center of the previous one will help those zebra lines look fantastic.
Can I add flavorings or mix-ins to the batter?
Certainly! Try adding a touch of orange or almond extract, or folding in mini chocolate chips to the chocolate batter for an extra pop of flavor and texture. Just avoid heavy mix-ins that might disrupt the pattern.
Is Zebra Cake suitable for special diets?
As written, Zebra Cake is vegetarian. For a dairy-free version, use your favorite non-dairy milk, and for an egg-free version, substitute with a reliable egg replacer. Always double-check other ingredient labels to be sure!
Final Thoughts
I can’t wait for you to slice into your homemade Zebra Cake and see those gorgeous stripes for yourself. This recipe delivers not just a beautiful centerpiece, but a genuinely delicious dessert that friends and family will request again and again. Give it a try, share a slice, and watch smiles grow—your new favorite cake adventure awaits!
Print
Zebra Cake Recipe
- Total Time: 1 hour 5 minutes
- Yield: 10 slices 1x
- Diet: Vegetarian
Description
This Zebra Cake is a delightful treat that features a striking striped pattern of vanilla and chocolate batters. With a moist and tender crumb, this visually appealing cake is perfect for any occasion.
Ingredients
Dry Ingredients:
- 2 cups all-purpose flour
- 1 tablespoon baking powder
- ½ teaspoon salt
Wet Ingredients:
- 1 cup granulated sugar
- 4 large eggs
- 1 cup whole milk
- ¾ cup vegetable oil
- 1 teaspoon vanilla extract
- 2 tablespoons unsweetened cocoa powder
Instructions
- Preheat the oven: to 350°F (175°C). Grease and flour a 9-inch round cake pan.
- Prepare the batter: Whisk together flour, baking powder, and salt. Beat sugar and eggs until fluffy, then add milk, oil, and vanilla. Combine wet and dry ingredients.
- Create the zebra pattern: Divide batter into two bowls. Mix cocoa powder into one bowl. Spoon alternating spoonfuls of each batter into the pan to create stripes.
- Bake: for 40–45 minutes until a toothpick comes out clean. Cool in the pan before transferring to a wire rack.
Notes
- For a richer flavor, use buttermilk instead of regular milk.
- You can frost the cake with chocolate ganache or dust with powdered sugar for a simple finish.
- This cake can also be baked in a bundt pan, adjusting the time as needed.
- Prep Time: 20 minutes
- Cook Time: 45 minutes
- Category: Dessert
- Method: Baking
- Cuisine: European
Nutrition
- Serving Size: 1 slice
- Calories: 280
- Sugar: 17g
- Sodium: 180mg
- Fat: 13g
- Saturated Fat: 2g
- Unsaturated Fat: 10g
- Trans Fat: 0g
- Carbohydrates: 35g
- Fiber: 1g
- Protein: 5g
- Cholesterol: 55mg


